18
PIP Menu
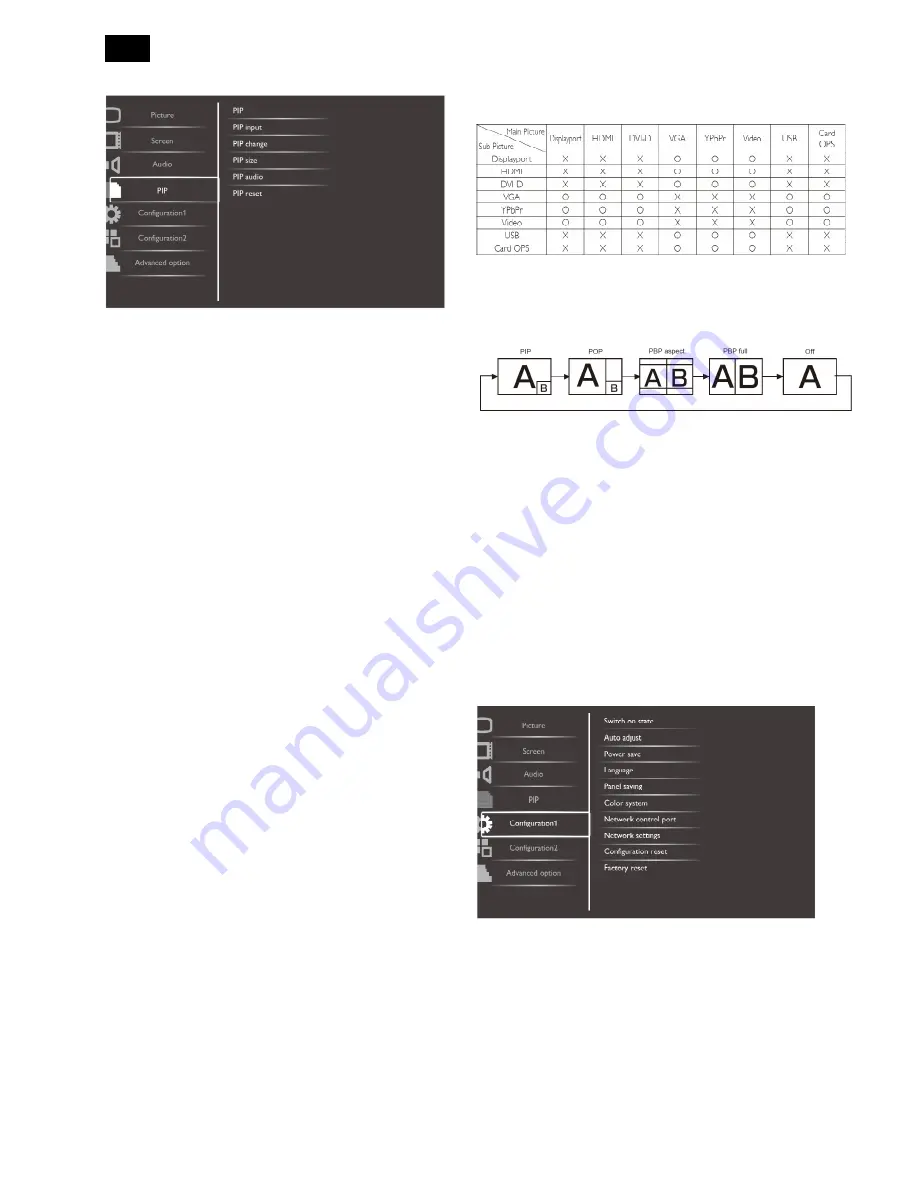
PIP
Select the PIP (Picture-in-Picture) mode.
Choose from: {Off} / {PIP} / {POP} / {PBP aspect} /
{PBP full}.
PIP input
Select the input signal for the sub-picture.
PIP change
Enlarges the smaller picture to become the main
picture, and vice versa.
PIP size
Select the size of the sub picture in the PIP
(Picture-in-Picture) mode.
Choose from: {Small} / {Medium} / {Large}.
PIP audio
Select the audio source in the PIP (Picture-in-Picture)
mode.
• {Main} - Select audio from the main picture
• {Sub} - Select audio from the sub picture.
PIP reset
Reset all settings in the PIP menu to factory preset
values.
NOTES:
• The PIP function is available only for the following
condition: {Configuration1} - {Panel saving} - {Pixel
shift} setting to [Off] and {Advanced option} - {Tiling}
- {Enable} setting to [No].
• The PIP function is available only for certain signal
source combinations as shown in the table below.
• The availability of the PIP function will also
depend on the resolution of the input signal being
used.
(O: PIP function available, X: PIP function unavailable)
By pressing the [
PIP ON/OFF
] button on the remote control, you
can change the mode in the order shown below:
The resolutions in the PIP and POP modes are
configured as follows:
PIP SIZE {Small}: 320 x 240 pixels
{Medium}: 480 x 320 pixels
{Large}: 640 x 480 pixels
POP SIZE: 474 x 355 pixels
NOTE: The images displayed in the sub picture always
fit the PIP sizes shown above irrespective of the
aspect ratio of the input image.
Configuration1 Menu
Switch on state
Select the display status used for the next time you
connect the power cord.
{Power off} - The display will remain off when the
power cord is connected to a wall outlet.
{Forced on} - The display will turn on when the
power cord is connected to a wall outlet.
{Last status} - The display will return to the previous
Содержание Signage Solutions E-Line Display BDL5551EL/00
Страница 2: ...2 Revision List Version Release Date Revision History A00 Feb 07 2013 Initial release Draft Version ...
Страница 33: ...33 Meridian 1 5 Block Diagram 5 1 Scaler Board ...
Страница 34: ...34 Power Board ...
Страница 65: ...65 7 2 POWER BOARD 715G5525P01000003S Remark Parts position can be searched by using FIND function in PDF ...
Страница 66: ...66 Remark Parts position can be searched by using FIND function in PDF ...
Страница 68: ...68 7 5 SUB BOARD 715G5623T01000005K Remark parts position can be searched by using FIND function in PDF ...
Страница 75: ...75 3 Remove all the screws as follow ...
Страница 76: ...76 76 4 Remove the main frame from the panel ...
Страница 81: ...81 3 Set the parameters as below figure ...
Страница 83: ...83 6 Click Commands batch to load the file isp_psi_ext txt ...
Страница 87: ...87 ...
Страница 89: ...89 ...
Страница 92: ...92 92 5 Click Auto to upgrade 6 Update processing ...
Страница 96: ...96 96 2 Tick the Analog DVI and click Loadfile to set the parameters 3 Select the EDID folder ...
Страница 115: ...115 ...
Страница 121: ...121 Service Kit Description Part No Picture ISP tool 715GT183 A DDC TOOL 715GT034 B ...
Страница 122: ...122 122 17 General Product Specification Please refer to the Product Specification the next page ...


