9
RFX9600 Starter’s Guide
Connecting the Extender to the Network
The Extender is normally ready for use and does not need to be configured. The settings need only
be adjusted in case you wish to operate the Extender with a fixed IP-address, or if there is more
than one Extender in the Pronto Network.
Note
Before you start using or configuring the Extender, check if any firmware updates are available
in the Downloads section on
www.pronto.philips.com
.
Refer to the chapter ‘Firmware Update’ on page 12 for further details.
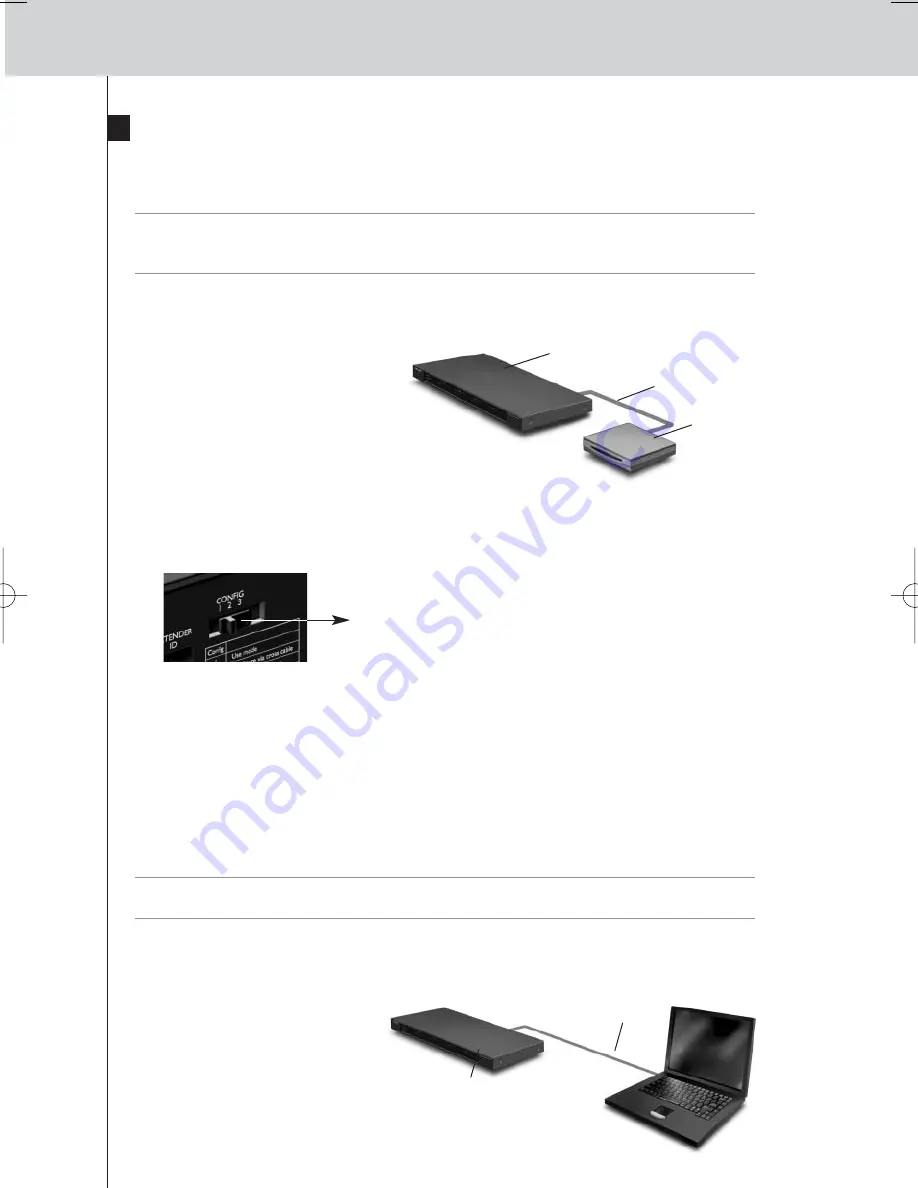
Using the Extender
1
Connect
the Extender to the
router with a straight Ethernet
cable.
2
Set the
Extender ID switch
to 1 or to an ID that is not yet used by another Extender in
the Pronto Network.
3
Set the
Configuration switch
to
1 for use
:
4
Plug in the Extender’s
power adapter
.
The Extender will start up. After startup, the Power and Ethernet LEDs are green. The Busy LED
blinks green when it’s processing a code or a macro.
Configuring the Extender
You can connect the Extender directly to the PC for configuration.
If the Extender is already installed and connected to external equipment, it is also possible to
configure it through a router. For further instructions, refer to the topic
‘Configuration through a
router’
on
page 10
.
Tip
To ensure optimal performance, use a dedicated network for all Pronto communication. This
makes the Pronto Network independent of other networks and changes in network settings.
Configuration with a direct connection to the PC
1
Connect
the Extender to the
PC with the configuration
cable (this is the crossed
Ethernet cable enclosed).
Extender
Straight
Ethernet cable
Router
Configuration switch: 1
Extender
Crossed
Ethernet cable
RFX9600_SG_ESFv3.qxd 07-09-2006 15:38 Pagina 12
Содержание Pronto RFX9600
Страница 1: ...RFX9600 Starter s Guide Manual de inicio Guide de démarrage FR ES EN ...
Страница 2: ......
Страница 48: ......


