background image

Settings

21

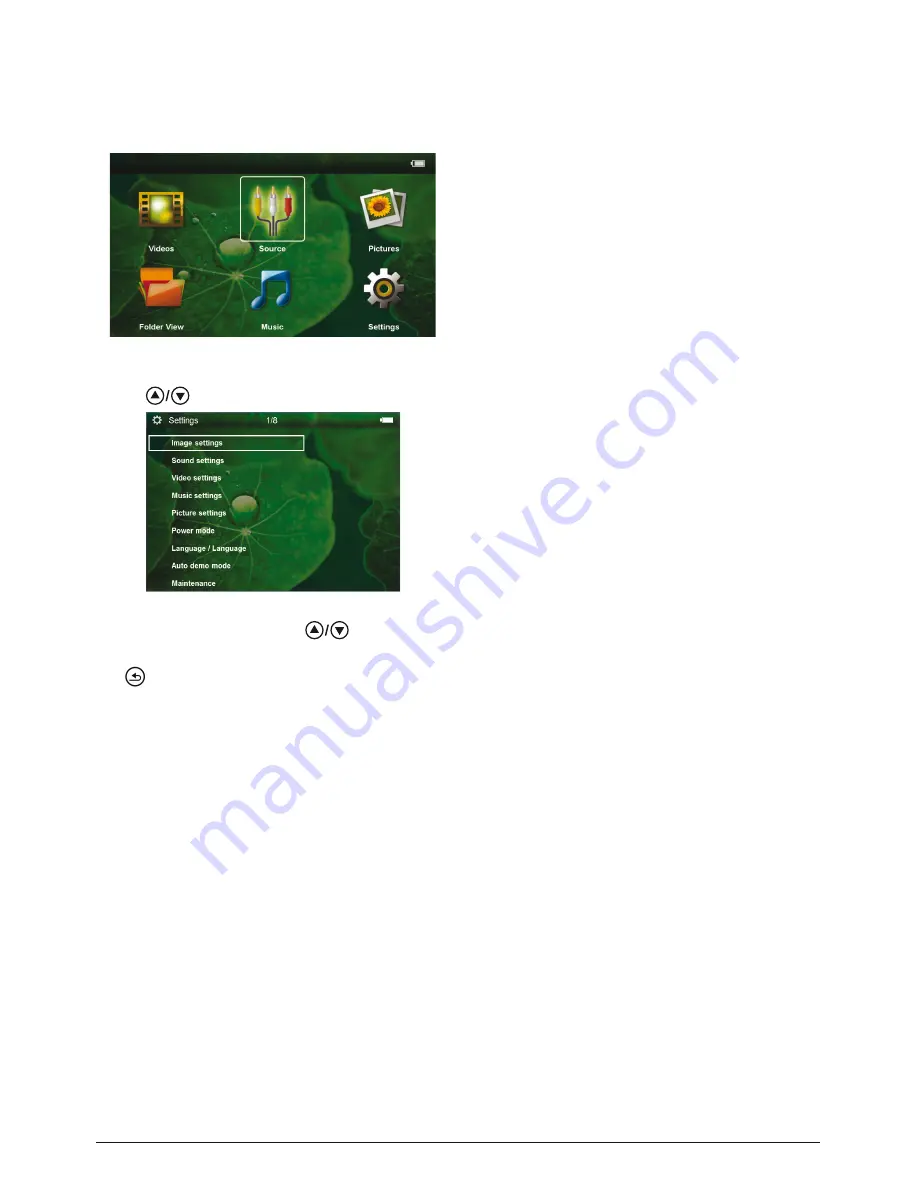
7 Settings

1

Switch the device on using the on/off switch on the
side.

2

After the initial screen the main menu appears.

3

Use the navigation keys to select

Settings

.

4

Confirm with

à

.

5

Use

to select from the following settings.

6

Confirm with

à

.

7

Modify the settings using

à

,

,

8

Confirm with

à

.

The

key takes you one step back in the menu.

Image settings

Wall paper

—Select background images

Fit Screen

—Convert videos and images to 16:9 resolu-

tion

Projection mode

Front

—Normal projection; the device is located in

front of the projection surface/screen.

Rear

—Rear projection; the device is located behind

the projection surface; the image is horizontal mir-
rored.

Ceiling

—The device is hanging from the ceiling in an

upside-down position; the image is rotated by 180
degrees.

Rear ceiling

—The device is hanging from the ceiling

in an upside-down position behind the projection
surface; the image is rotated by 180 degrees and hor-
izontal mirrored.

Wall color correction

—Colour correction of the pro-

jected image to adjust to coloured projection surfaces

Smart Settings

—Select predefined settings for bright-

ness / contrast / colour saturation. If you modify these
settings, the setting is switched to

Manual

.

Brightness

—Adjust brightness

Contrast

—Adjust contrast

Saturation

—Adjust colour saturation

Sound Settings:

Volume

—Adjust the volume

Bass

—Set the playback of the low frequencies

Treble

—Set the playback of the high frequencies

Key tones

—Turn key tones on and off

Video Settings

View

—Display all videos in a list or a corresponding

folder structure on the drive.

Repeat

—Set the repeat type for video files: Repeat

deactivated (

Off

), repeat all videos in a directory

(

Directory

), repeat only the current video (

Movie

),

repeat all videos (

All

).

Resume play

—If this function is activated, playback will

continue at the position it was last stopped. If deacti-
vated, playback will always start at the beginning of the
video.

Music Settings

View

—Show all songs in a list or a corresponding folder

structure on the drive.

Screen

—Activate or deactivate the projection during

playback.

Repeat

—Set the repeat type for music files: Repeat

deactivated (

Off

), repeat all songs in a directory

(

Directory

), repeat only the current song (

Song

),

repeat all songs (

All

).

Shuffle

—Activate this function for random playback.

Otherwise, playback will take place in sequence.

Picture Settings

View

—Display the images as a

thumbnail

or as a

list

during selection in the main menu.

Time per slide

—Image viewing time during slide show

Repeat

—Set the type of repeat for slide show photos:

Repeat off (

Off

), repeat all photos in the directory

(

Directory

), repeat all stored photos (

All

).

Slide transition

—Set image transitions

Slideshow order

—Play slide show in order or ran-

domly

Power Save

Sleep mode

—With this function, the projector auto-

matically shuts down after a specified period of time or
at the end of a movie.

Brightness mode

—Adjust the brightness level in order

to save the power consumption and increase battery
play time.

Содержание PicoPix PPX3414

Страница 1: ...US PPX3414 User Manual Register your product and get support at www philips com welcome BC ...

Страница 2: ...trol 10 Using the Remote Control 11 4 Connect to the playback device 12 Connecting to Devices with HDMI output 12 Connecting to a Computer VGA 12 Connecting using Audio Video CVBS Adaptor Cable 13 Connecting using Component Video YPbPr YUV Cable 13 Connecting the headphones 14 5 Memory card USB storage medium 15 Inserting a Memory Card 15 Connecting USB Storage Medium 15 6 Media Playback 16 Video ...

Страница 3: ... safety instructions in order to ensure proper operation of your device The manufacturer accepts no liability if these instructions are not followed Symbols Used Note Troubleshooting This symbol designates tips that will help you to use your device more effectively and easily CAUTION Damage to the Device or Loss of Data This symbol gives warning of damage to the device and possible loss of data Th...

Страница 4: ... of fire open flames should be kept away from the device Under the following conditions a layer of moisture can appear inside the device which can lead to malfunctions if the device is moved from a cold to a warm area after a cold room is heated when this device is placed in a damp room Proceed as follows to avoid any moisture build up 1 Seal this device in a plastic bag before moving it to anothe...

Страница 5: ...DANGER Risk of explosion with incorrect type of batteries Only replace the batteries with the same or comparable batteries There is a risk of explosion if the incor rect battery type is used DANGER Danger of Damage to the Eye by High Power LED This device is equipped with an high power LED Light Emitting Diode which emits very bright light Do not stare directly into the pro jector lens to avoid ey...

Страница 6: ...ontrol signal receiver Ï Audio output headphone connection or con nection for external speakers Connection for a playback device with an HDMI YPbPr VGA output via an adapter cable Bottom of the Device Tripod socket Note Note that the distance to the projection sur face must be a minimum of 1 64 feet and a maximum of 16 4 feet If the Pocket Projector is located outside of this range it will not be ...

Страница 7: ...nu modify settings Modify settings during music playback select previous next title À Á During music playback adjust volume level during video playback review cue Playback keys During video playback review T Start stop playback During video playback cue Brightness keys N O Decrease increase the brightness Volume keys N Decrease the volume Deactivate sound O Increase the volume Standby Activate the...

Страница 8: ...MI or VGA Pictures Selecting files for the slideshow Folder View Selecting files for Playback Copy or Delete Files Mark the files with Á and confirm using à Music Selecting music files for playback Settings Configure settings for playback and for the device Symbols in the Main Menu The chosen storage appears highlighted in white USB storage medium Memory card Internal memory Charge level of the in...

Страница 9: ...for at least 3 hours This will prolong the life of the battery Initial Installation 1 Switch the device on using the on off switch on the side 2 Turn the device towards a suitable projection sur face or wall Note that the distance to the projection surface must be a minimum of 1 64 feet and a maxi mum of 16 4 feet Make sure the projector is in a secure position 3 Use the focus wheel on the top to ...

Страница 10: ...artment back into the remote control until the locking mechanism engages DANGER Risk of explosion with incorrect type of batteries Only use the CR 2025 type battery There is a risk of explosion if the incor rect battery type is used Note Normally the batteries will last for around one year If the remote control stops working please replace the batteries If the device is not used for a long time ta...

Страница 11: ...etween the remote control and remote sensor CAUTION r The improper use of batteries can lead to overheating explosion risk of fire and injury Leaking batteries can possibly damage the remote control r Never expose the remote control to direct sunlight r Avoid deforming dismantling or charging the batteries r Avoid exposure to open fire and water r Replace empty batteries immediately r Remove the b...

Страница 12: ...aptop or som e PDAs The projector supports the following resoluti ons VGA SVGA XGA For best results set the comp uter s resolution to SVGA 800x600 1 Connect the VGA Audio cable to the projector s mini HDMI socket 2 Connect the VGA plug to the computer s VGA socket and the audio plug to the computer s audio output 3 Adjust the computer s resolution to the correct set ting and switch the VGA signal ...

Страница 13: ...btain the highest possible image quality This cable is available as an acces sory The device jacks have the colours green Y blue U Pb red V Pr for the video signal and red audio right and white audio left for the audio signal 1 Connect the video component cable accessory to the projector s mini HDMI socket 2 Connect the video device s appropriate colored sockets to the component video cable of the...

Страница 14: ...e projector s head phone slot The device speakers deactivate automat ically when the headphones are connected 3 After connecting the headphones increase the vol ume to a comfortable level Note Switching to the multimedia device sig nal output See the multimedia device instruction manual to find out how to switch the signal output to this jack DANGER Danger of Hearing Damage Do not use the device o...

Страница 15: ...naps into position 3 Press lightly on the memory card to remove it 4 The memory card is ejected Connecting USB Storage Medium 1 Connect the USB storage medium directly to the USB socket on the left side of the device DANGER Prematurely remove a Memory Card Never pull out the memory card while the device is accessing it This could cause data to be damaged or lost In order to make sure that the devi...

Страница 16: ...ly File Format There are various video file formats as mov avi m4v Many of these formats function as a container that contains the various encoded audio and video files MPEG 4 H 264 MP3 and AAC are all examples of encoded audio video files In order to play these files the projector must read them and decode the audio video signals Please note that some files cannot be played as a result of differe...

Страница 17: ...eble bass and volume Power Save This function reduces the light output in order to increase the operating time for the built in battery 3 Confirm with à 4 Modify the setting using à and 5 Confirm with à Photo Playback 1 Switch the device on using the on off switch on the side 2 After the initial screen the main menu appears 3 Use the navigation keys to select Pictures 4 Confirm with à 5 With an in...

Страница 18: ...pears 3 Use the navigation keys to select Folder View 4 Confirm with à 5 With an inserted memory card or USB stor age device Select the internal memory the USB storage medium or the memory card using the keys 6 Confirm with à 7 Use to select the file that you want to copy 8 Mark the file using Á Pressing the key again dese lects the chose file s 9 Use to select other files 10 Press à Note Switch o...

Страница 19: ...irm with à Note Files already exist If the files you are copying already exist in the target folder you must choose whether or not you want to overwrite them using and à If you choose not to overwrite these files copies will be created The copies can be recognised by a number added to the file names Note Error If errors occur during the copying process make sure that enough free space is avail abl...

Страница 20: ...th an inserted memory card or USB stora ge device Select the internal memory the USB st 6 Confirm with à orage medium or the memory card using the keys 7 Use to select the Microsoft Office file or A 8 Press à to start view 9 Press to end view and return to the overview 10 When you press again you will return to the dobe PDF file that you wish to view main menu Note Zoom in Zoom out You can enlarge...

Страница 21: ...ble Set the playback of the high frequencies Key tones Turn key tones on and off Video Settings View Display all videos in a list or a corresponding folder structure on the drive Repeat Set the repeat type for video files Repeat deactivated Off repeat all videos in a directory Directory repeat only the current video Movie repeat all videos All Resume play If this function is activated playback wil...

Страница 22: ...date Update Firmware Note Keep the device connected to a power outlet for the duration of the firmware update Information Display free space in the internal mem ory and information on the device Capacity Free space Firmware Version Device name Model Mcu Version Auto demo mode Play automatically demonstration videos when product is powered on ...

Страница 23: ...s not used for several weeks dis charge the battery a little by using the device before storing it r If the device only works using the USB connection or with the power supply the battery is defective r Keep the device and the battery away from sources of heat Battery deep discharge When the battery is in deep discharge or the device is not used for a longer period proceed as followed 1 Connect th...

Страница 24: ...urns off automatically DANGER Switching off the device Switch the device on or off using the power switch before removing the power supply from the socket DANGER Instructions for Cleaning Use a soft lint free cloth Never use liquid or easily flammable cleansers sprays abrasives polishes alcohol etc Do not allow any moisture to reach the interior of the device Do not spray the device with any clean...

Страница 25: ...itched on r Check if the video output of the external device is switched on Only the initial screen appears and not the image from the connected computer r Please check that the VGA output of the computer is switched on r Check if the resolution of the computer is set to 800x600 Device switches to stand by mode r When the device is running for a long period of time the surface becomes hot and a wa...

Страница 26: ...Supported Resolutions VGA SVGA WVGA XGA WXGA Brightness Bright Mode up to 140 lumen PPX3414 Contrast ratio 1000 1 Projected image size 12 120 inch Screen distance 1 6ft 0 5m up to 16 4ft 5m Horizontal Scan Rate 31 69 kHz Vertical Scan Rate 56 85 Hz Power supply Model No MPA 630 Manufacturer Wanlida Group Co Ltd Built in rechargeable battery Battery type LiPol Capacity 1800mAh 7 4V Charging time 3 ...

Страница 27: ...oned references in this man ual are trademarks of the respective companies The lack of the trademarks É and Ë does not justify the assumption that these dedicated terminologies are free trademarks Other product names used herein are for identification purposes only and may be trademarks of their respective owners Sagemcom Documents SAS disclaims any and all rights in those marks Neither Sagemcom D...

Страница 28: ... Philips N V and are used by Sagemcom Documents SAS under license from Koninklijke Philips N V È 201 Sagemcom Documents SAS All rights reserved Sagemcom Documents SAS Documents Business Unit Headquarters CS 50001 92848 Rueil Cedex FRANCE Tel 33 0 1 57 61 10 00 Fax 33 0 1 57 61 10 01 www sagemcom com Nanterre ...

Отзывы: