background image

35

EN

Make sure that the microphone is close to 
the sound source to be recorded.


Do the following to start or stop recording.

Tap to start recording.

Tap to stop recording.


»

After the message is recorded, a pop-
up screen is displayed. 

Tap   to review the recording. Tap 

Use 

this recording

  $


»

You can play the recording in a media 
player application, such as 

Philips 

Songbird

.

Calendar

On the device, you can sync the calendar with:

! the calendar of your Microsoft 

Exchange account.

Alarm clock

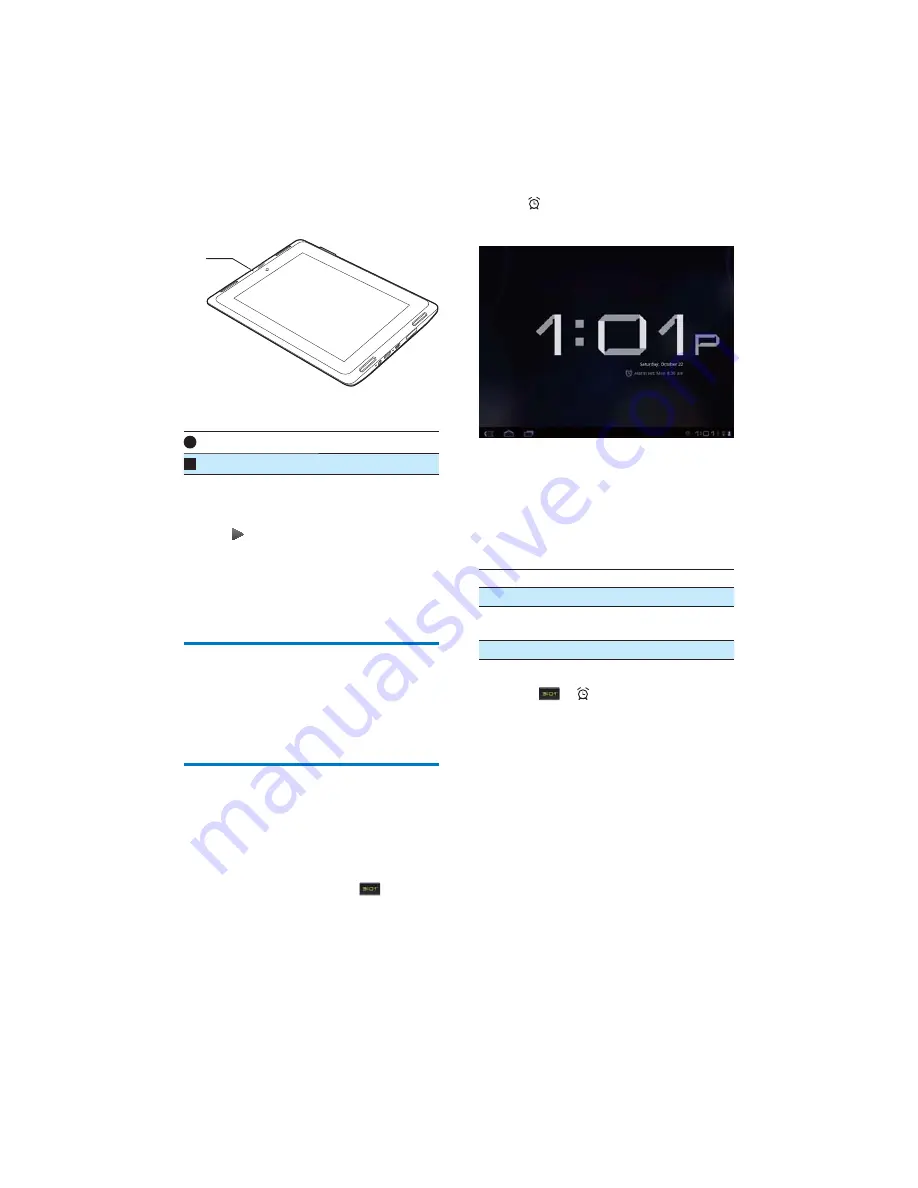
On the device, you can set several alarms.

Set an alarm

Make sure that you have set the clock time 
(see 'Date 42). 

From the Home screen, tap 


»

The next alarm is displayed. 

MIC

Tap 

.


»

The set alarms are displayed. 


To set an alarm clock,
! To add an alarm, tap 

Add alarm

.

!  To change an alarm, tap the preset 

alarm time. 

Tap 

Settings

 #   $ 

as prompted. 

Time

Set the alarm time.

Repeat

 Select how the alarm repeats.

Ringtone

Select the ringtone for the alarm: 
silence, buzzer, or ringtone.

Label

Add description for the alarm.

Switch an alarm on or off 

! In 

 > 

, tap the tick box next to 

the set alarm time. 


»

If the function is enabled, the tick 
box is selected.

Use the alarm 

At the set alarm time, the alarm sounds. A pop-
up screen is displayed. 

! To interrupt the alarm, tap 

Snooze


»

The alarm sounds 10 minutes later. 

! To stop the alarm, tap 

Dismiss


»

The alarm repeats at the next set 
alarm time. 

Содержание Pi7000

Страница 1: ...Pi7000 93 www philips com welcome www philips com welcome User manual Register your product and get support at ...

Страница 2: ... 5 Connections 17 Connect to Wi Fi 17 Connect to the Internet 18 Join your home network 18 Connect to an HDTV 18 Connect to your PC 19 Use a Micro SD card 19 Connect to Bluetooth 19 Connect with Bluetooth devices 19 Bluetooth 20 Listen to music through stereo Bluetooth headphones 21 6 Applications 22 Install applications 22 HiMarket 22 Other sources 22 Manage applications 22 7 Music videos and pic...

Страница 3: ...9 Sound 39 Screen 39 Location security 39 Use wireless networks 39 Visible passwords 40 Device administrators 40 Credential storage 40 Applications 40 Manage applications 40 Running services 41 Battery use 41 Unknown sources 41 Need help Please visit www philips com welcome where you can access a full set of supporting materials such as the user manual the latest software updates and answers to fr...

Страница 4: ...cessories Hearing Safety Listen at a moderate volume Using headphones at a high volume can impair your hearing This product can produce sounds in decibel ranges that may cause hearing loss for a normal person even for exposure less than a minute The higher decibel ranges are offered for those that may have already experienced some hearing loss Sound can be deceiving Over time your hearing comfort ...

Страница 5: ...ams downloaded to your computer is intended only for use with public domain or properly licensed content You may only use such content for your private non commercial use and shall respect eventual copyright instructions provided by the copyright owner of the work Such instruction may state that no further copies shall be made Video streams may include copy protection technology that prohibits fur...

Страница 6: ...s including but not limited to the implied warranties of merchantability and In no event shall the foundation or contributors be liable for any direct indirect incidental special exemplary or consequential damages including but not limited to procurement of substitute goods or services loss of use data caused and on any theory of liability whether in contract strict liability or tort including neg...

Страница 7: ...nager helps you get Pi7000 Philips GoGear audio player Quick start guide Files loaded on the device K Pi7000 User manual Overview Controls a Power lock button Press and hold switch on or off the device Press lock unlock the screen To unlock the screen drag the lock outside the circle b MIC Microphone c Camera lens d Speaker e Touch screen f RESET Press the hole by using the tip of a ball pen when ...

Страница 8: ...s in alphabetical order Add an application widget shortcut or wallpaper to the Home screen b Google Search Use the quick search box to search on Pi7000 or the Web c Navigation buttons Tap to return to the Home screen Go back one level or exit Display recent applications that you have used c a b d for some applications View the options menu d Tap to check the details and select setup options see Us...

Страница 9: ...er of charge cycles Battery life and number of charge cycles vary by use and settings When the battery is fully charged is displayed To conserve battery power and increase the play time do the following on the device Switch off the functions when they are unnecessary such as Wi Fi Bluetooth and the sync option for Background data see Accounts 41 Set the screen off timer to a low value go to Screen...

Страница 10: ...ine services through the applications QQ Social networking service Tudou Online video service QIYI Online video service weibo Social networking service Sina News portal Sina Music Online music service Use applications When you run applications tap a menu at the top bar of the screen You can switch between different menus and select your options status bar a b Current clock time c Setup status Batt...

Страница 11: ...o select the screen brightness Switch on or off the networks Settings Go to the Settings menu K Use the screen Rotate the screen To select the landscape or portrait view 1 Make sure that you have switched on Auto rotate screen in Screen Alternatively select your setup options at the base of the screen see Select setup options on page 12 2 Rotate the screen Lock unlock the screen By locking the scr...

Страница 12: ...A list of options is displayed on the pop up screen Pages of the Home screen are displayed Current page is highlighted 3 Tap your option The shortcut widget wallpaper or other item is added to the selected page Add application icons 1 Tap to open the list of application icons 2 Tap and hold an icon until the pages are displayed 3 Drag the icon to a page The icon is added to the selected page Rearr...

Страница 13: ...onscreen keyboard tap Select input languages Tap You can select multiple languages for your text entry Select keyboards To switch between languages during your text entry select the corresponding keyboard 1 Switch on the input method selector a Go to Language input Input method selector b Select Automatic or Always show 2 Tap Enter text 1 On the onscreen keyboard tap keys to enter text 2 To select...

Страница 14: ...creen is displayed Tip The extra choices on one key are available on the keyboards of some languages Select keyboard settings On the onscreen keyboard tap and select Android keyboard settings Auto capitalization K sentence is capitalized Sound on key press Key sounds for each press on the onscreen keyboard Show correction suggestions Word suggestions are displayed during text entry Edit text You c...

Страница 15: ...e selected text 1 Put the cursor in a position 2 Tap and hold the position until the pop screen is displayed In the pop up screen the option Paste is displayed 3 Tap Paste The text is pasted in the selected position ...

Страница 16: ...router Access Point You can connect Pi7000 to the network that is built around the router 1 At the base of the screen start your Wi Fi setup a Tap an icon of setup status b Tap to display a list of setup options c Tap 2 Tap Wi Fi to switch on the Wi Fi function You see a list of Wi Fi networks in range and previously connected networks if the networks are remembered The device starts connecting to...

Страница 17: ...the IP address of Pi7000 Connect to the Internet Connect Pi7000 to a Wi Fi network that connects to the Internet Note Make sure that the router connects to the Internet directly and no dial up is required on the computer Join your home network Connect Pi7000 to your home Wi Fi network With SimplyShare you can stream music videos and pictures from Pi7000 to Philips DLNA compliant devices that are a...

Страница 18: ...the internal memory or SD card In Windows Explorer drag and drop PC to Pi7000 Pi7000 through media management software such as Windows Media Player 11 Use a Micro SD card Insert a Micro SD card up to 32 GB into Pi7000 You can expand the memory size of Pi7000 Connect to Bluetooth Through Bluetooth you can do the following wirelessly on Pi7000 another connected Bluetooth device Bluetooth headphones ...

Страница 19: ... is displayed when the pairing is complete Get connected by another Bluetooth devices 1 Make sure that Pi7000 is discoverable by another Bluetooth device a From the Home screen tap Wireless networks Bluetooth settings b If necessary tap to switch on Bluetooth If the function is enabled the tick box is selected c Tap Discoverable Pi7000 is discoverable for 120 seconds 2 On the Bluetooth device sear...

Страница 20: ...eo Bluetooth headphones Follow the steps under Connect another Bluetooth device see Connect another Bluetooth devices on page 20 After successful connection is displayed Next time you switch on Bluetooth on the devices the Bluetooth connection is established automatically Listen to music through the stereo Bluetooth headphones Play music on Pi7000 You listen to the music through the connected Blue...

Страница 21: ... the Home screen go to Applications Tap to switch on Unknown sources Download transfer the applications To download the applications from online sources follow the onscreen instructions To transfer the application to the internal memory or SD card of the device use the USB cable to connect the device to your PC Start installation The downloaded applications start installation automatically K trans...

Страница 22: ...et a In the list of items swipe up down The slider is displayed b Press and hold the slider In the pop up text box current alphabet is displayed c To select an alphabet drag the slider up down until you reach the alphabet At the top of the list you see alphabet Tip Superscroll is available in a long list of items under or Find music by keyword On the library screen tap to enter the keyword in the ...

Страница 23: ...o switch between screens Tap to return to the list of items Tap to return to the library screen Set the play screen as lock screen During music play the screen is locked automatically after a certain time duration With the play screen set as lock screen press the power lock button and you can select play options on the lock screen To switch off the lock screen In Philips Songbird tap Settings and ...

Страница 24: ... onscreen keyboard is displayed 3 Edit the name of the playlist The playlist is renamed Remove a song from the playlist 1 In a playlist select or play a song 2 Tap and hold the song until the pop up screen is displayed Tap Remove from playlist The selected song is removed from the playlist Delete a playlist 1 Select a playlist 2 Tap and hold the playlist until the pop up screen is displayed Tap De...

Страница 25: ...nd videos images only or videos only d Tap to go to the camera a b c d To browse through the pictures or videos Swipe left right on the screen Play videos 1 2 Tap a video to start play The play screen is displayed On the play screen To pause resume play tap To search within the video drag the progress bar Play pictures Tap a picture to start play The play screen is displayed a Tap to return to the...

Страница 26: ...he frame 3 Tap OK You save the cropped version Play media to an HDTV 1 Make sure that you have connected Pi7000 to an HDTV by using an HDMI cable 2 On the HDTV switch to the input channel of Pi7000 by pressing the source button repeatedly on the remote control of the TV 3 On Pi7000 play photos or videos You can watch the photo or videos on theTV Share media on your home network 1 Make sure that yo...

Страница 27: ...that you store under the following folders on Pi7000 Music Pictures and Video videos that you take or record on Pi7000 4 Select the device that plays media Drag Pi7000 to the device The device is selected as player 5 Add media to the shared list Tap Alternatively tap the twice to add X device ...

Страница 28: ... the quick search box To search the web make sure that you have connected the device to the Internet 2 Start the search a On the onscreen keyboard enter your keyword for search b Tap to start search Select search options 1 Tap Search settings 2 Tap to select an option Searchable items Select the items that you can search for on the device Google Search Select options for the Google Search in the W...

Страница 29: ...ail account Enter the information about your account Select pop3 or IMAP account 3 Follow the onscreen instructions to complete the setup Consult your email service provider for the setup information such as the outgoing server incoming server Select account settings 1 On the screen of mail list tap Account settings A pop up screen is displayed If necessary tap repeatedly to return to the screen o...

Страница 30: ...rent colors are used to mark the messages from different accounts To check messages from a single account 1 Repeat Step 1 in To check one combined mailbox 2 Tap the selected account Messages from the account are displayed To check starred messages Tap the star next to the message The message is added to the Starred folder To check unread messages On the screen of mail list the unread messages are ...

Страница 31: ...messages you want to manage Tap the check boxes next to the messages Selected messages are highlighted 2 Tap the icons to do the following a Move the messages to the selected folder b Add the messages to the Starred folder c Delete the messages ...

Страница 32: ...to start search b Tap the icons to search backwards forward or refresh the Web page c Close the Web page d Open a new Web page To switch between Web pages At the top bar tap the tab of the selected Web page a b c d Add a bookmark Add a bookmark You can quickly access a visited Web page a Add a bookmark to current Web page b Go to the bookmarked Web pages a b ...

Страница 33: ...e slider to switch between the camera and video recorder b c a 3 To take photos Point the lens at you or objects Tap and hold until the green frame is displayed Release The photo is taken 4 To record videos Tap to start or stop video recording To view photos videos in the Gallery Tap the thumbnail You can view the photos videos that you have taken or recorded Select settings White balance Tap to s...

Страница 34: ...t the clock time see Date 42 2 From the Home screen tap The next alarm is displayed MIC 3 Tap The set alarms are displayed 4 To set an alarm clock To add an alarm tap Add alarm To change an alarm tap the preset alarm time 5 Tap Settings as prompted Time Set the alarm time Repeat Select how the alarm repeats Ringtone Select the ringtone for the alarm silence buzzer or ringtone Label Add description...

Страница 35: ...t the password and name for the credentials as prompted To apply the secure credentials 1 Make sure that you have set the password to the credential storage In select Location security Set password 2 In select Location security Use secure credentials On the device you allow the applications to use the secure credentials Set up your Microsoft Exchange account 1 From the Home screen go to 2 Set up y...

Страница 36: ...ddVPN on the device 1 Ask your network administrator for the 2 From the Home screen go to Wireless networks VPN settings AddVPN 3 4 Install the secure credentials as needed To connect to theVPN 1 Make sure that you have connected Pi7000 to the Internet 2 From the Home screen go to Wireless networks VPN settings A list ofVPNs is displayed 3 Tap theVPN to start connection ...

Страница 37: ...ngs on the device One touch Wi Fi Protected Setup WPS Pi7000 supports Wi Fi Protected Setup WPS You can quickly and securely connect Pi7000 to a wireless router that also supports the WPS 1 In Wi Fi settings tap a network that supports the WPS A pop up screen is displayed 2 On Pi7000 start connection through WPS push button a On the pop up screen select WPS push button in the drop down list of Net...

Страница 38: ...elect sound settings for your device Volume Drag the slider to select the volume level for media ringtone Audible selection Sounds play when you tap on the screen Screen lock sounds Sounds play when you lock unlock the screen Screen In Screen select your display settings Brightness Drag the slider to change the display brightness Auto rotate screen Switch on off the screen rotation between the lan...

Страница 39: ...ll such an application disable the rights of device administrator In Device administrators tap an application The rights of device administrator are disabled You cannot sync data for the application Credential storage In wireless connections you need the secure credentials when you access a web server that requires login credentials or you connect to corporate networks In Location security Credent...

Страница 40: ...ction is unnecessary Auto sync is disabled when you switch off Background data To sync the data manually select the refresh option in the application Privacy In Privacy Factory data reset you can erase all the data that you have stored on the internal memory of the player Storage In Storage learn the space information about the internal memory and SD card on your Pi7000 Language input Select langu...

Страница 41: ... device Use the accessibility function 1 Select Accessibility If the function is enabled the tick box is selected 2 Select an accessibility application that you have installed 3 Select your options for voice output see Voice output on page 41 Date time Automatic setting Over the Internet you can sync the date and time on Pi7000 from Philips online services To switch on the automatic clock setting ...

Страница 42: ...ave connected the device to the Internet 2 Select System updates Upgrade The device starts to check for the Downloading and installation of the Note update is complete Status and information about the device In Status Battery status Display power charging status Battery level Display remaining power by percentage Wi Fi MAC address Display the X network adapter of Pi7000 If MAC router add the MAC a...

Страница 43: ...000 to a PC by using the USB cable 2 On the PC under My Computer or Computer Pi7000 double click the installer exe to start installation 3 Follow the onscreen instructions to complete installation 1 Make sure that your PC is connected to the Internet 2 Connect Pi7000 to the PC 3 On your PC launch Philips Device Manager 4 Click Update Philips Device Manager checks for from the Internet if available...

Страница 44: ...1 mid xmf mxmf RTTTL RTX rtttl rtx OTA ota and iMelody imy Audio capturing AMR NB Bitrate 4 75 to 12 2 kbps Sampling rate 8 kHz File supported 3GPP 3gp Bitrate 128 kbps Sampling rate 44 1 kHz File format MP3 Built in microphone mono Video playback Supported formats WMV wmv avi MPEG 4 avi H 264 3gpp mp4 H 263 Sorenson H 263 3GPP container FLV supported for the Internet streaming Video capturing H 2...

Страница 45: ...acity is less Full memory capacity may not be available as some memory is reserved for the device Storage capacity is based on 4 minutes per song and 128 kbps MP3 encoding PC system requirements Windows XP SP3 or above Vista 7 32 bit 64 bit Pentium III 800 MHz processor or higher 512 MB RAM 500 MB hard disk space Internet connection Windows Internet Explorer 6 0 or later USB port ...

Страница 46: ...Specifications are subject to change without notice 2011 Koninklijke Philips Electronics N V All rights reserved Pi7000_UM_93_V1 0_WK1146 5 ...

Отзывы: