PDS-60ca Product
Guide
8
Connect Luminaires to PDS-60ca
Make sure line power is OFF before connecting luminaires to the device. On most
PDS-60ca models, the luminaire ports are at the end of a short cable attached to the
board adjacent to device’s data ports. (See the illustrations on the previous page.)
1. Guide the connector and cable through an opening in the device’s luminaire
connection chamber.
2. Connect a iColor/eW Flex strand or luminaire leader cable to one of the two
available ports in the device’s power connection chamber.
Connect the PDS-60ca to Line Power
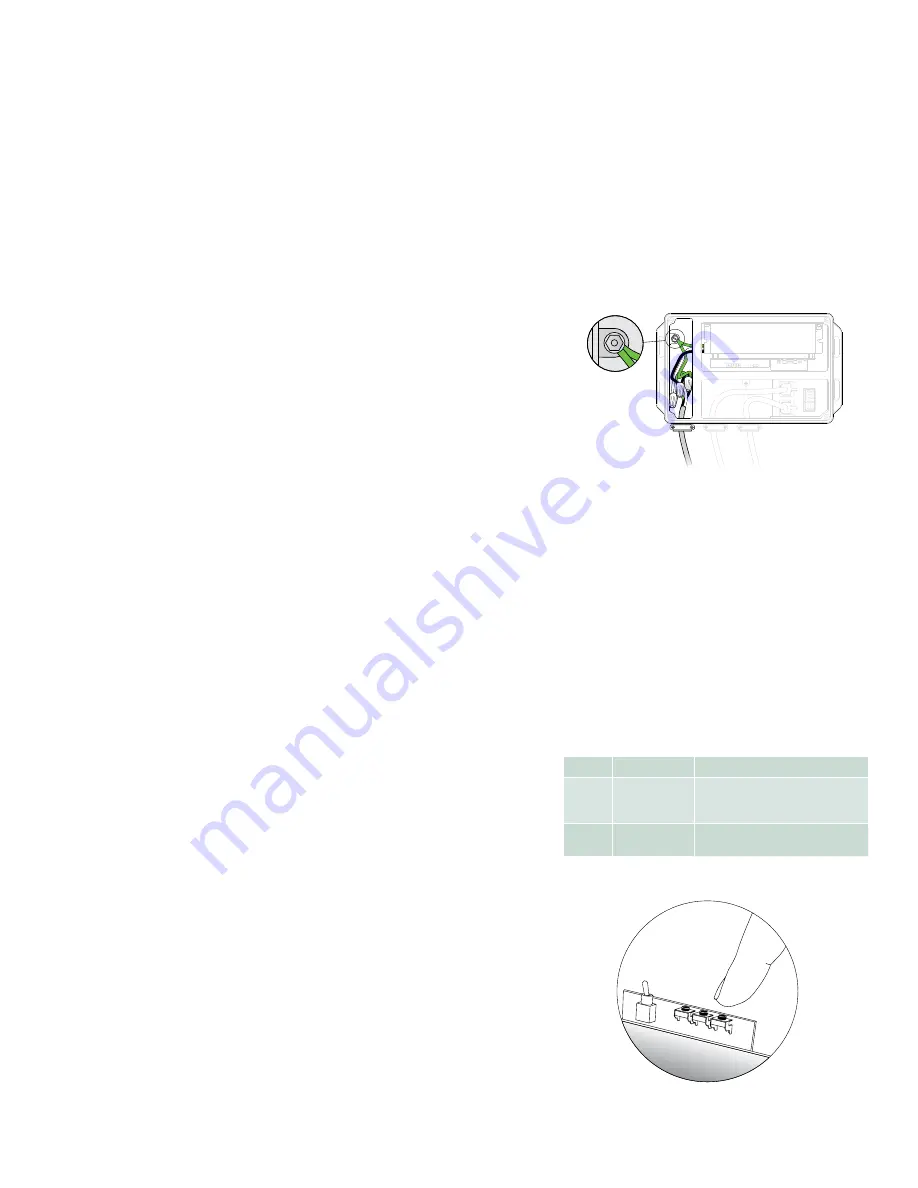
The device arrives with line, neutral, and ground wires in the form of flying leads
ready for connection in the power connection chamber. You connect line power to
the leads by using wire connectors.
1. Install a cable strain relief connector in one of the device’s 3/4 in openings in
the power connection chamber. If necessary, use conduit as required by local
electrical codes.
2. Run the mains line power cable through the opening. Pull at least 152 mm (6 in)
of wire into the chamber.
3. Strip at least 10 mm (0.38 in) of insulation from the wires. Join the mains line
power cable with the flying leads using three wire connectors.
Display Light Effects (Pre-Programmed Only)
If you have the pre-programmed version of the PDS-60ca, you are able to display
effects on your luminaires without a controller. Pre-programmed controllers cannot
receive signals from external controllers. But they can send light show data to other
downstream devices via the DMX OUT port, thereby effectively playing the role of
a controller. (Refer to the Make Data Input Connections section for instructions on
how to link other power/data supplies via DMX OUT ports.)
To achieve the effects you want, you can use the controls inside the device, which
consists of a toggle switch and three buttons. Once you have set the mode, speed, and
options for effects using the control button, PDS-60ca stores settings and records
them, even after you have cycled the power on the device.
To display effects:
1. With the PDS-60ca cover removed and the power off, use the toggle switch
inside the housing to select the type of luminaires that are attached to the device.
(See the luminaire type switch settings table on the right.)
2. Power the device on. (For chasing comet shows, hold down the MODE button
during power up to run a blink scan of attached nodes to determine the run
length.)
3. Use the Mode button to select an effect. Press and release the Mode button to
cycle through each effect described in the Lighting Effects Settings table on the
next page.
4. If desired, use the Options button to modify the effect you chose with the mode button.
5. Use the Speed button to change the speed of the effect. Hold down the Speed
button to change the color for the Fixed Color effect.
Effect setting changes are immediate.
Position
Setting
Luminaire
s
1
Linear RGB
Effects
iColor Flex MX gen2, eW Flex Micro,
eW Flex Compact, iColor Flex LMX
gen2
2
Monochromatic
Effects
Best used with eW Flex
Luminaire Type Toggle Switch Settings
DMX/ETHERNET
IN
DM
X
OU
T
1
2
3
O
S
M
PDS-60ca connected to mains line power
DMX/ETHERNET
IN
DM
X
OU
T
1
2
3
O
S
M
Option
s
Speed
Mod
e
S
O
M
Effects buttons and toggle switch
1 2 3
E
Before connecting to line power, set the
luminaire type using the toggle switch. If the
luminaire type is changed after power is engaged,
the power supply must powered off and turned
back on to recognize the toggle switch change.


