background image

28

English

Tuning to radio stations

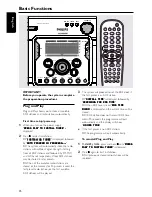
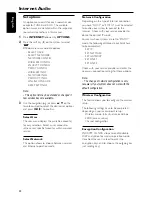
1

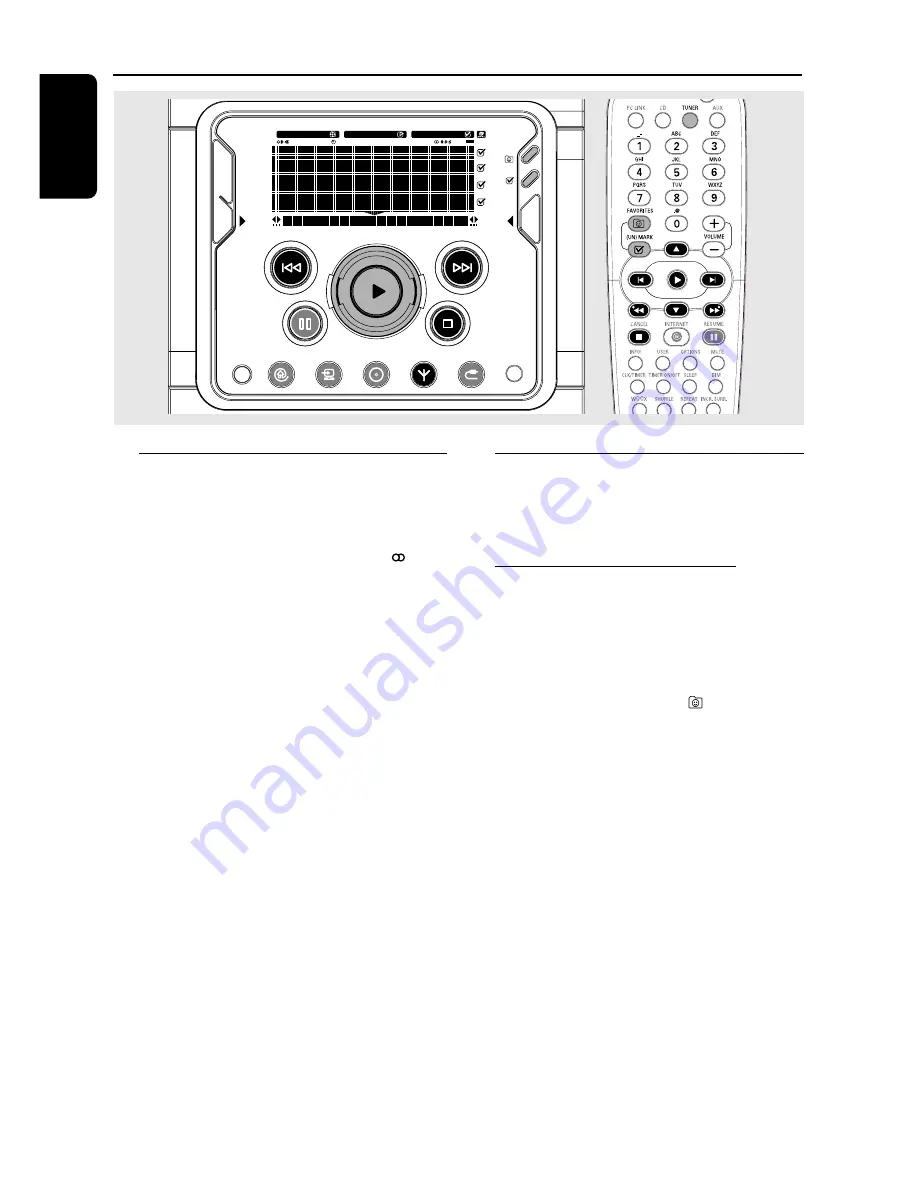
Press 

TUNER 

to select TUNER mode.

"

TUNER

TUNER

TUNER

TUNER

TUNER

" is displayed.  The current radio

frequency will appear on the display.

If an FM station is received in stereo, 

 is

displayed.

2

Press 

TUNER

 again to select the desired

waveband : FM, MW or LW.

3

Press and hold  

S

 or 

T

 (or 

à

 / 

á

 on

the remote control) until the frequency
indication starts to change, then release.

The display will show "

SEARCHING...

SEARCHING...

SEARCHING...

SEARCHING...

SEARCHING...

" until

a radio station with sufficient signal strength is
found.

4

Repeat step 

3

 if necessary until you find the

desired radio station.

To tune to a weak station, press  

S

 or 

T

(

à

 / 

á

) briefly and repeatedly until optimal

reception found.

Storing favourite radio stations

You can store up to 40 favourite radio stations in
the memory. Favourites is always on in Tuner
mode.

Automatic Preset Programming

Plug and Play setting (refer to “Basic Functions -
Plug and Play”).

OR

1

Press 

TUNER 

to select TUNER mode.

2

Press and hold 

FAVORITES 

 until 

“AUTO

AUTO

AUTO

AUTO

AUTO

PROGRAM FAVORITE STATIONS

PROGRAM FAVORITE STATIONS

PROGRAM FAVORITE STATIONS

PROGRAM FAVORITE STATIONS

PROGRAM FAVORITE STATIONS?

?

?

?

?

” is

displayed, followed by “

YES

YES

YES

YES

YES

” and “

NO

NO

NO

NO

NO

” options.

3

Press the soft key (

@

) on the system to select

YES

YES

YES

YES

YES

”.

 “

AUTO PROGRAM IN PROGRESS...

AUTO PROGRAM IN PROGRESS...

AUTO PROGRAM IN PROGRESS...

AUTO PROGRAM IN PROGRESS...

AUTO PROGRAM IN PROGRESS...

” is

displayed.

The system will automatically store the radio

stations with sufficient signal strength, starting
from all RDS stations and followed by FM, MW
and LW bands respectively.  Weak RDS stations
may be stored in later presets.

When all the available radio stations are

stored or the memory for 40 presets is used, the
last preset radio station (or the first available
RDS station) will be played.

To stop storing the automatic preset

Press 

Ç

.

SLEEP

INCR. SURR.

ALL

REPEAT

SHUFFLE

DIM 123

AM FM

MW

LW

REC

NEWS

1 2 3

NAVIGATE

PLAY

FAVORITES

CD

INTERNET

OPTIONS

AUX

TUNER

PC LINK

VIEW

FAVORITES

CANCEL

RESUME

OK

ENTER

BACK

iR

Radio Reception

Содержание MC-I250/21M

Страница 1: ...1 MC i250 MC i250 Wireless Broadband InternetAudio System For more information on Streamium go to http My Philips com ...

Страница 2: ... our online upgrades the documentation included may not be up to date Please refer to My Philips com for the most recent information MISES À NIVEAU De nouveaux services et de nouvelles fonctions sont ajoutés régulièrement à ce produit par nos mises à niveau en ligne par conséquence il se peut que la documentation fournie ne soit pas mise à jour Reportez vous à My Philips com pour les informations ...

Страница 3: ...ith wireless network adaptor 3 Configure your home network Follow the directions specified in your router s manual and make sure that the PC s Internet connection is installed properly and working If you have problems with the setup of the Internet connection contact your networking equipment manufacturer or Internet Service Provider Prerequisites For Setup IMPORTANT Do not connect the Streamium M...

Страница 4: ...P dynamic IP addressing and NO PROXY When your router is configured as a DHCP server and your ISP does not use a proxy the set should automatically establish a connection to the Internet As soon as you are asked to enter your email address on the screen your set has successfully established a connection to the Internet To activate the online features of MC i250 you still have to complete the regis...

Страница 5: ... 123 AM FM MW LW REC NEWS 1 2 3 NAVIGATE PLAY FAVORITES CD INTERNET OPTIONS CANCEL RESUME OK ENTER BACK AUX TUNER PC LINK OPEN CLOSE VIEW FAVORITES WOOX TREBLE BASS SOUND JOG 0 5 4 1 3 4 5 6 7 8 9 2 STANDBY ON ECO POWER MICRO HIFI SYSTEM iR 3 ...

Страница 6: ... N or coloured black Connect the brown wire to the terminal marked L or coloured red Do not connect either wire to the earth terminal in the plug marked E or e or coloured green or green and yellow Before replacing the plug cover make certain that the cord grip is clamped over the sheath of the lead not simply over the two wires Copyright in the U K Recording and playback of material may require c...

Страница 7: ...5 E n g l i s h Français E s p a ñ o l Deutsch N e d e r l a n d s Italiano Index English 6 Français 39 Español 72 Deutsch 105 Italiano 171 Nederlands 138 ...

Страница 8: ...between Navigation view and Play view Using the soft keys 19 Scrolling 20 Internet Audio Connecting to your PC PC LINK 21 Connecting to online music services 21 Set options 22 23 Select User Select Network Network Configuration Wireless Configuration Encryption Configuration Proxy Configuration Wireless Information Network Information Product Information Online Upgrade Reset Settings About My Phil...

Страница 9: ...our favourites list Returning to normal list exit from favourites list Getting extra information 31 External Sources Connecting an external device 32 Listening to external source 32 Clock Timer View clock 33 Clock setting 33 Timer setting 33 34 Checking the timer Activate deactivate the timer Sleep timer setting 35 Maintenance 35 Specifications 36 Troubleshooting 37 38 Contents ...

Страница 10: ...seful tips to help you get the best wireless performance The best place to put your wireless access point is as close as possible to the centre of the area that you want to cover Position your wireless access point s antenna s vertically Keep antenna s away from large metal objects to avoid interference Avoid placing MC i250 directly under the wireless access point Refer to the signal bar strength...

Страница 11: ...ltage indication beside the voltage selector of your system is identical with the voltage of your local power supply If not please consult your dealer Place the system on a flat hard and stable surface Place the system in a location with adequate ventilation to prevent internal heat build up in your system Allow at least 10 cm 4 inches clearance from the rear and the top of the unit and 5 cm 2 inc...

Страница 12: ...tically under extreme conditions If this happens let the system cool down before reusing it not available for some versions B Antennas connection Connect the supplied AM loop antenna and FM antenna to the respective terminals Adjust the position of the antenna for optimal reception AM Antenna Position the antenna as far as possible from aTV VCR or other radiation source FM Antenna For better FM st...

Страница 13: ...Disc player DVD player or CD Recorder LINE OUT R L Use a cinch cable to connect these terminals to the analogue audio inputs of any analog audio equipment amplifier receiver or tape recorder for example Notes Do not connect equipment to both the LINE OUT and AUX CDR IN terminals at the same time Otherwise noise will be generated and malfunction might occur If you are connecting equipment with a mo...

Страница 14: ...d at any later point in time in the SET OPTIONS menu under SELECT NETWORK 2 You will be asked to choose between Infrastructure or Ad hoc operation mode If you want to use a wireless access point Infrastructure mode recommended select accordingly If you select NO MC i250 will try to establish a direct connection to a wireless network adapter Ad hoc mode 3 You will be asked to enter the network name...

Страница 15: ...to the set In static IP mode the information mentioned above has to be entered using the remote control Does the ISP use a proxy If yes what is the proxy name and proxy port Does the ISP only allow registered devices to use DHCP If yes you might have to tell the ISP the set s MAC address can be found in SET OPTIONS under NETWORK INFO As soon as you are asked to enter your email address on the scre...

Страница 16: ...LW AUX to select the input for an additional appliance Ç CANCEL for CD to stop playback forTuner to stop programming for Clock to exit clock setting or cancel timer for Plug Play to exit plug play mode 2 2 2 2 2 OK to start playback to confirm the selection to initiate and start plug play mode Navigation jog 3 4 for CD INTERNET PC LINK to scroll through a list forTuner to select a favourite radio ...

Страница 17: ...track disc favourites repeatedly INCR SURR to activate or deactivate the surround sound effect SLEEP to activate deactivate or set the sleep timer function DIM to select different brightness for the display screen DIM 1 DIM 2 DIM 3 or DIM OFF MUTE to interrupt or resume sound reproduction fi DIGITS 0 9 numbers consisting more than two figures must be keyed in within 2 seconds for CD INTERNET PC LIN...

Страница 18: ...wed by FM MW and LW bands respectively Weak RDS stations may be stored in later presets When all the available radio stations are stored or the memory for 40 presets is used the last preset radio station or the first available RDS station will be played 3 The system will proceed to set the RDS clock if the first preset is an RDS station INSTALL TIME INSTALL TIME INSTALL TIME INSTALL TIME INSTALL T...

Страница 19: ...ree seconds ECO POWER MODE ECO POWER MODE ECO POWER MODE ECO POWER MODE ECO POWER MODE is displayed then the display screen will go blank The low power LED will be lighted Power saving automatic standby As a power saving feature the system will automatically switch to Standby mode if you do not press any buttons within 30 minutes after a disc has stopped playing Dim mode You can select the desired...

Страница 20: ... 1 Press BASS or TREBLE on the system to select Bass orTreble sound feature 2 Adjust SOUND JOG on the system to select the desired Bass orTreble level BASS LEVEL XX BASS LEVEL XX BASS LEVEL XX BASS LEVEL XX BASS LEVEL XX or TREBLE LEVEL XX TREBLE LEVEL XX TREBLE LEVEL XX TREBLE LEVEL XX TREBLE LEVEL XX is displayed XX XX XX XX XX denotes the level as follows MIN MIN MIN MIN MIN 2 2 2 2 2 0 0 0 0 0...

Страница 21: ...hile music is playing to make your next selection Switching between Navigation view and Play view Press VIEW on the system Using the soft keys Each source service has different sort modes For example the sort modes when playing back an MP3CD are ALBUM PLAYLIST ARTIST and TRACK only some of the modes may be available depending on the disc The or at the bottom right or left hand corner of the screen...

Страница 22: ...r To scroll through a list Adjust the navigation jog clockwise to scroll down or anti clockwise to scroll up There are two scrolling speeds 1slow and 2fast 1 Enables you to skip forward backward to an item on the list 2 Enables you to skip forward backward by several items on the list Basic Functions ...

Страница 23: ...udio content that can be categorised by GENRE REGION LANGUAGE PERSONAL STATION etc 1 Press INTERNET A list of on line services is displayed MY RADIO STREAMIUM RADIO INTERNET If unsuccessful DID NOT CONNECT DID NOT CONNECT DID NOT CONNECT DID NOT CONNECT DID NOT CONNECT PLEASE TRY AGAIN LATER PLEASE TRY AGAIN LATER PLEASE TRY AGAIN LATER PLEASE TRY AGAIN LATER PLEASE TRY AGAIN LATER is displayed 2 ...

Страница 24: ...ween wireless and Ethernet operation mode Network Configuration Depending on the type of Internet connection you have DHCP or STATIC must be selected to enable your system to connect to the Internet Check with your service provider to obtain the correct IP mode For users whose systems are set to STATIC mode the following additional input fields have to be completed SET IP SET NETMASK SET GATEWAY S...

Страница 25: ...ly notify you of any software updates by e mail Reset Settings Selecting this feature will revert the system to the default setting WARNING Restoring the default settings erases all the information stored in the set options You will remain registered at My Philips com Note To terminate internet access when switching the source mode to CD or AUX press OPTIONS and select accordingly About My Philips...

Страница 26: ...rded audio CDs All finalised audio CDR and audio CDRW discs CD s with MP3 and or MP3PRO files files end with mp3 Loading disc 1 Press OPEN CLOSE to open the disc tray 2 Load in a disc with the label side facing up 3 Press OPEN CLOSE again to close the disc tray The system detects the type of disc being loaded CD CD CD CD CD or MP3 CD MP3 CD MP3 CD MP3 CD MP3 CD is displayed The system then starts ...

Страница 27: ...following REPEAT TRACK repeat the current track REPEAT ALL repeat the entire disc 2 To resume normal playback press REPEAT until REPEAT OFF REPEAT OFF REPEAT OFF REPEAT OFF REPEAT OFF is displayed Random play 1 Press SHUFFLE on the remote control SHUFFLE is shown and SHUFFLING SHUFFLING SHUFFLING SHUFFLING SHUFFLING is displayed All the tracks or favourite tracks if favourite mode is active will b...

Страница 28: ...ears next to the selected track Repeat this step to select additional tracks to your favourite list The next selected track will appear at the end of the list If you attempt to programme more than 50 CD 128 MP3 CD tracks NO MORE NO MORE NO MORE NO MORE NO MORE FAVORITES CAN BE ADDED FAVORITES CAN BE ADDED FAVORITES CAN BE ADDED FAVORITES CAN BE ADDED FAVORITES CAN BE ADDED is displayed Activating ...

Страница 29: ...isplay MULTIPLE MATCHES MULTIPLE MATCHES MULTIPLE MATCHES MULTIPLE MATCHES MULTIPLE MATCHES Press OPTIONS and use the navigation jog to select NEXT CD INFO NEXT CD INFO NEXT CD INFO NEXT CD INFO NEXT CD INFO and press OK 2 to confirm to access alternative CD information To return to default CD information numerical order Press OPTIONS and use the navigation jog to select RESET CD INFO RESET CD INF...

Страница 30: ...lay OR 1 Press TUNER to selectTUNER mode 2 Press and hold FAVORITES until AUTO AUTO AUTO AUTO AUTO PROGRAM FAVORITE STATIONS PROGRAM FAVORITE STATIONS PROGRAM FAVORITE STATIONS PROGRAM FAVORITE STATIONS PROGRAM FAVORITE STATIONS is displayed followed by YES YES YES YES YES and NO NO NO NO NO options 3 Press the soft key on the system to select YES YES YES YES YES AUTO PROGRAM IN PROGRESS AUTO PROG...

Страница 31: ...NO MORE FAVORITES CAN BE ADDED ADDED ADDED ADDED ADDED is displayed Selecting a favourite radio station 1 Use the navigation jog or press 3 4 on the remote control to select the desired preset radio station from the favourite list 2 Press OK 2 2 2 2 2 to confirm The preset number radio frequency and waveband are displayed OR Press on the remote control Radio Reception Erasing a favourite radio sta...
Страница 32: ...the scrolling RDS text press OPTIONS Setting the RDS clock Some RDS radio station may be transmitting a real clock time at an interval of every minute It is possible to set the clock by using a time signal which is broadcast together with the RDS signal 1 Press CLK TIMER twice 00 00 00 00 00 00 00 00 00 00 or current time starts flashing 2 Press the soft key on the system SEARCHING FOR RDS TIME SE...

Страница 33: ...tons Creating your favourites list When in CD PC LINK INTERNET mode press UN MARK to add remove tracks or stations to from your favourites lists InTUNER mode press UN MARK to save and delete radio stations and hold down UN MARK to auto programme radio stations Accessing your favourites list To play from the favourites list press FAVORITES select a track or station followed by OK É Returning to nor...

Страница 34: ...ct CDR DVD CDR DVD CDR DVD CDR DVD CDR DVD when connected to a CD recorder or DVD player 2 Play the external device When CDR DVD mode is selected any audio equipment connected to the LINE OUT terminals of this micro system will be muted You will not be able to record or listen to the sound on equipment connected to the LINE OUT terminal External Sources Notes You are advised not to listen to and r...

Страница 35: ... flashing 2 Press the left hand soft key to select 12 or 24 hour clock mode 3 Press S or T or on the remote control to switch between hour or minutes setting The hour or minutes digits flash 4 Use the navigation jog or press 3 4 on the remote control to set the hour and minutes 5 Press CLK TIMER again to store the setting The clock starts working To exit without storing the setting Press Ç Notes T...

Страница 36: ...e ForTuner mode the timer will wake up by playing the last tuned radio station For INTERNET or PC LINK mode the timer will wake up by playing the last streamed music If the connection fails it will switch toTuner mode 3 Press S or T or on the remote control to switch between hour or minutes setting The hour or minutes digits flash 4 Use the navigation jog or press 3 4 on the remote control to set ...

Страница 37: ...r To clean a CD wipe it in a straight line from the centre toward the edge using a soft lint free cloth A cleaning agent may damage the disc Write only on the printed side of a disc and only with a soft felt tipped pen Clean the system with a soft slightly dampened lint free cloth Do not use any cleaning agents as they may have a corrosive effect Maintenance Do not expose the system batteries or d...

Страница 38: ...0 MP3 CD 128 Frequency response 20 20000 Hz Signal to noise ratio 76 dBA Channel separation 79 dB 1 kHz Total harmonic distortion 0 02 1 kHz TUNER FM wave range 87 5 108 MHz MW wave range 531 1602 kHz LW wave range 153 279 kHz Number of presets 40 Antenna FM 75 Ω wire AM Loop antenna SPEAKERS Front left right System 2 way speaker system with top firing wOOx membrane Impedance 6 Ω wOOx 1 x 5 top fi...

Страница 39: ...enance UNRECOGNIZED DISC FORMAT UNRECOGNIZED DISC FORMAT UNRECOGNIZED DISC FORMAT UNRECOGNIZED DISC FORMAT UNRECOGNIZED DISC FORMAT Check for any scratches or smudges on the disc is displayed Replace or clean the disc see Maintenance CONNECTIONTO INTERNET The set does not connect to the Press INTERNET again internet Make sure you have configured your home network correctly try connecting to the in...

Страница 40: ...he speaker connections and location reversed The remote control does not function Select the source CD orTUNER for example properly before pressing the function button É í ë Reduce the distance between the remote control and the system Insert the batteries with their polarities signs aligned as indicated Replace the batteries Point the remote control directly toward the IR sensor on the front of t...

Отзывы: