PCS 104 682
3-5
INSTRUCTIONS FOR USE
Slo
w
1
Press
SLO
W
on
the
remote
control
to
watch
a
VCD at a slow
er speed.
There are 3 types of
slo
w modes to select.
‹
The sound will be muted.
‹
On
TV
screen,
“
SLO
W 1/2
”,
“
SLO
W 1/4
” o
r
“
SLO
W 1/8
” will be display
ed.
2
To resume playback at normal speed,
press
SLO
W
repeatedly until
“
SLO
W X/X
”
disappear
s from
the
TV
screen
or
press
2
Å
.
A-B
repeat
This
feature
is
also
applicab
le
to
audio
CD
(except
for
MP3-CD).
To
Pla
y
a
cer
tain
scene
or
passage of the disc repeatedly
.
1
Press
A-B
on the remote control dur
ing
pla
yback to mar
k the star
t point of the chosen
scene
or
passage
.
‹
“
A
=
” will appear on the displa
y.
‹
“
B
” will star
t flashing.
2
Press
A-B
again to mar
k the end of the chosen
scene
or
passage
.
‹
“
A
=
B
” will appear on the display
.
‹
The
selected
scene
or
passage
will
star
t
pla
ying
repeatedl
y.
3
Press
A-B
once more to retur
n to nor
mal
pla
yback.
‹
“
A
=
B
” will disappear from the displa
y.
Notes: –
You can also cancel
A-B repeat b
y pressing
S
or
T
.
–
A-B repeat marking can cr
oss from one tr
ac
k to
another
. But
for
VCD
2.0,
you
can
only
able
to
set
the
A-B repeat marking within the same tr
ac
k.
Frame
1
Press
FRAME
on
the
remote
control
repeatedly to get the still picture and fr
ame-by-
frame pla
yback.
‹
The
pla
yer
will
go
into
pause
mode
2
To
resume
nor
mal
pla
yback,
press
2
Å
.
CD
/ VCD
/ MP3-CD
Resume
l
In
stop
mode
, press
RESUME
on
the
remote
control
to
star
t pla
yback
again
from
where
yo
u
ha
ve stopped.
Note: –
Resume
will
not
be
available
if
you
have
changed
the
disc
, opened
the
disc
tray
or
disconnected the system the po
wer supply
.
View
This
feature
allo
ws
you
to
scan
through
a VCD
fo
r
a quick review
. PBC mode m
ust be switched off.
1
Press
VIEW
on the remote control.
‹
On
TV screen,
9 pictures will be display
ed.
T
o
view the previous/next page
, press
S
or
T
.
‹
The
fir
st
20
seconds
of
each
tr
ack
will
be
pla
yed.
2
To
exit
review
mode
, press
digits
0
– 9
,
+10
to
pla
yback
the
desired
tr
ack
or
2
Å
to
pla
y
the
cur
rent selected tr
ack.
Return
l
Press
RETURN
on the remote control to
retur
n
to
the
previous
VCD
disc
MENU
level.
It
is functional only f
or
Video CD when PBC is
switched
on.
K
ey
(
I
È i
)
This feature allo
ws y
ou to change the key tone
of y
our vocal r
ange
.
1
Press
KEY
on the remote control.
‹
The last selected key tone lev
el will be
displa
yed.
l
Press
KEY
again to change the tone lev
el to
“0
”.
2
Press
VOLUME
3
or
4
to adjust the key tone.
‹
The key tone lev
el can be increase or
decrease between lev
el
+
8 and
-
8.
MIC
Volume
and
Echo
This f
eature allows y
ou to add echo while singing
or talking through a microphone
.
To adjust micr
ophone v
olume le
vel
1
Press
MIC/ECHO
on
the
remote
control
repeatedly until
“
MIC 6
” is display
ed.
2
Press
VOLUME
3
or
4
to increase or
decrease the MIC volume
.
‹
The volume lev
el will be display
ed.
To
adjust
echo
le
ve
l
1
Press
MIC/ECHO
on
the
remote
control
repeatedly until
“
ECHO 6
” is display
ed.
2
Press
VOLUME
3
or
4
to increase or
decrease the echo level.
‹
The
echo
lev
el
will
be
displa
yed.
Vocal
This
feature
allo
ws
you
to
fade
out
the
or
iginal
vocal
from
a
Kar
aoke
VCD
. Y
ou
can
also
use
it
to
select the diff
erent audio modes.
l
Press
VOCAL
on the remote control or
STEREO/V
OCAL
on
the
system
repeatedl
y
to
select
the
follo
wing
modes:
“
MONO LEFT
”
™
“
MONO RIGHT
”
™
“
VP LEFT
”
™
“
VP RIGHT
”
™
“
STEREO
” ...
STEREO
–
same
effect
as
the
or
iginal
recorded
disc
.
VOC
AL LEFT/RIGHT
–
fade out the or
iginal
vocal
for
special
recorded
Kar
aok
e
disc
only
(with the ECHO mode switched on).
MONO
LEFT/RIGHT
–
select
the
language
on
a
bilingual
VCD
.
CD
/ VCD
/ MP3-CD
Содержание MC-55
Страница 4: ......
Страница 6: ......
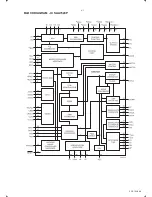
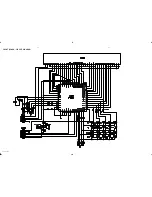
Страница 13: ...PCS 104 686 4 1 BLOCK DIAGRAM IC SAA7324P ...
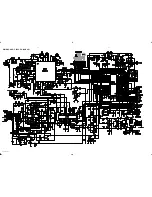
Страница 14: ...BLOCK DIAGRAM 4 2 PCS 104 687 ...
Страница 15: ...WIRING DIAGRAM 5 1 5 1 PCS 104 688 ...
Страница 16: ...FRONT BOARD CIRCUIT DIAGRAM 6 1 6 1 PCS 104 689 ...
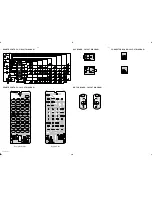
Страница 17: ...FRONT BOARD LAYOUT DIAGRAM 6 2 6 2 PCS 104 690 ...
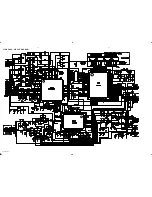
Страница 18: ...MAIN BOARD CIRCUIT DIAGRAM 7 1 7 1 PCS 104 691 ...
Страница 19: ...MAIN BOARD LAYOUT DIAGRAM 7 2 7 2 PCS 104 692 Component Side Copper Side ...
Страница 20: ...POWER SUPPLY BOARD CIRCUIT DIAGRAM 8 1 8 1 PCS 104 693 ...
Страница 21: ...POWER SUPPLY BOARD CIRCUIT DIAGRAM 8 2 8 2 PCS 104 694 ...
Страница 22: ...VCD BOARD CIRCUIT DIAGRAM 9 1 9 1 PCS 104 695 ...
Страница 23: ...VCD BOARD LAYOUT DIAGRAM 9 2 9 2 PCS 104 696 Top View Bottom View ...


