background image

40

3139 115 23481

English

IMPORTANT!
For proper surround sound, make
sure the speakers and AV subwoofer
are connected (see page 10).

VOL 

+-

SURR

SOUND

BASS

TREBLE

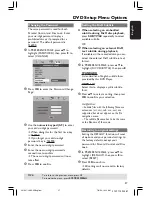
Selecting surround sound

Press 

SURR 

on the remote to select :

MULTI-CHANNEL or STEREO.

The availability of the various surround

sound modes depends on the number of
speakers used and the sound available on
the disc.

The centre and surround speakers

operate only in Multi-channel surround
mode.

The available output modes for Multi-

channel include: Dolby Digital, DTS
(Digital Theatre Systems) Surround and
Dolby Pro Logic II.

Stereo broadcasts or recordings will

produce some surround channel effects
when played in a surround mode.
However, mono (single channel sound)
sources will not produce any sound from
the surround speakers.

Helpful Hints:
– SURR button is not functional for SACD
playback.  You have to access to the disc
menu in order to select between multi-
channel and stereo tracks, see page 29.
– You are not able to select the surround
sound mode if the system setup menu is
turned on.

Sound Controls

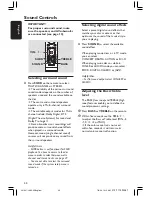
Selecting digital sound effects

Select a preset digital sound effects that
matches your disc’s content or that
optimises the sound of the musical style
you are playing.

Press 

SOUND 

to select the available

sound effect.

When playing movie discs or in TV mode,
you can select :
CONCERT, DRAMA, ACTION or SCI-FI.

When playing music discs or while in
TUNER or AUX/DI mode, you can select :
ROCK, DIGITAL, CLASSIC or JAZZ.

Helpful Hint:
– For flat sound output, select CONCERT or
CLASSIC.

Adjusting the Bass/Treble
level

The BASS (low tone) and TREBLE (high
tone) features enable you to define the
sound-processor settings.

1

Press 

BASS

 or 

TREBLE 

on the remote.

2

Within five seconds, use the 

VOL 

+-

to adjust the Bass or Treble level (MIN, -2,
-1, 0, +1, +2 or MAX).

If the volume control is not used

within five seconds, it will resume its
normal volume control function.

001-047-LX85-22-Engfinal

7/8/04, 10:15 AM

40

Содержание LX8500W

Страница 1: ...1 3139 115 23481 DVD Video SACD Home Theatre System LX8500W User manual 001 047 LX85 22 Engfinal 7 8 04 10 01 AM 1 ...

Страница 2: ...should be a BS1362 5 Amp A S T A or BSI approved type 3 Refit the fuse cover If the fitted plug is not suitable for your socket outlets it should be cut off and an appropriate plug fitted in its place If the mains plug contains a fuse this should have a value of 5 Amp If a plug without a fuse is used the fuse at the distribution board should not be greater than 5 Amp Note The severed plug must be ...

Страница 3: ...ems Inc U S Pat Noís 5 451 942 5 956 674 5 974 380 5 978 762 6 226 616 6 487 535 and other U S and world wide patents issued and pending DTS and DTS Digital Surround are registered trademarks of DigitalTheater Systems Inc Copyright 1996 2003 Digital Inc All Rights Reserved This DVD player is in conformity with the EMC directive and low voltage directive For Customer Use Read carefully the informat...

Страница 4: ...Electronics B U Peripherals Accessories declara que el cumple con los requisitos esenciales y cualesquiera otras disposiciones aplicables o exigibles de la Directiva 1999 5 CE Deutsch Hiermit erklärt Philips Consumer Electronics B U Peripherals Accessories die Übereinstimmung des Gerätes mit den grundlegenden Anforderungen und den anderen relevanten Festlegungen der Richtlinie 1999 5 EG Nederlands...

Страница 5: ...os y se podrán llevar a cabo fácilmente Visite la página www p4c philips com para buscar información sobre actualizaciones de software Da das Disk Format je nach Hersteller verschieden ist ist für Ihr DVD System möglicherweise die Erweiterung der Spielbarkeit oder eine Aktualisierung erforderlich Da die DVD Technologie sich ständig weiterentwickelt werden sich diese Erweiterungen durchsetzen und e...

Страница 6: ...erting batteries into the remote control 19 Using the remote control to operate the system 19 Step 2 Setting the TV 19 Switching toYUV video output setting 19 Selecting the colour system that corresponds to your TV 20 Setting the TV Display 20 Step 3 Setting language preferences 21 On Screen Display OSD language 21 Audio Subtitle and Disc menu languages 21 Step 4 Setting the speakers channels 22 D...

Страница 7: ...c Menu 35 Restricting playback by Parental Control 35 36 PBC 36 MP3 JPEG Navigator turning on off 36 Changing the Password 37 Setting the DivX Subtitle 37 Restoring to original settings 37 Tuner Operations Tuning to radio stations 38 Presetting radio stations 38 Using the Plug and Play 38 Automatic presetting 39 Manual presetting 39 Selecting a preset radio station 39 Deleting a preset radio stati...

Страница 8: ...m environment until the moisture evaporates Do not block the vents Do not operate the DVD system AV Subwoofer in an enclosed cabinet and allow about 10 cm 4 inches of free space all around the player for adequate ventilation 10 cm 4 inches 10 cm 4 inches 10 cm 4 inches DVD Home Cinema System PHILIPS Care of disc To clean a CD wipe it in a straight line from the centre toward the edge using a soft ...

Страница 9: ... Left Front speaker Right AV Subwoofer Rear speaker Right Rear speaker Left DVD System Centre speaker For best possible surround sound all the speakers except AV subwoofer should be placed at the same distance from the listening position 1 Place the front left and right speakers at equal distances from the TV and at an angle of approximately 45 degrees from the listening position 2 Place the centr...

Страница 10: ...ront speakers Centre Speaker AV Subwoofer TO AV SUBWOOFER TO AV SUBWOOFER Front Speakers Step 4 Connecting wire less rear speakers The rear speaker stands grey and blue colour stickers are equipped with a wire less receiver that receives audio signals from the DVD system The wire less rear speakers provide a surround sound entertainment experience without the scattered wires Use the supplied rear ...

Страница 11: ... OUT jacks on theTV not required if you are using Scart connection Step 5 ConnectingTV AUDIO OUT S VIDEO IN VIDEO IN SCART IN OR OR Using Scart jack Use the supplied scart video cable black to connect the DVD system s SCART jack to the corresponding Scart input jacks on theTV OR Using S Video jack Use an S video cable not supplied to connect the DVD system s S VIDEO jack to the S Video input jack ...

Страница 12: ...toYUV see page 19 3 Activate the progressive scan function see page 34 Step 6 Connecting a Progressive ScanTV 1 Connect the supplied MW loop antenna to the MW jack Place the MW loop antenna on a shelf or attach it to a stand or wall 2 Connect the supplied FM antenna to the FM jack Extend the FM antenna and fix its ends to the wall For better FM stereo reception connect an external FM antenna not s...

Страница 13: ... TO AV SUBWOOFER AUDIO OUT S VIDEO IN VIDEO IN SCART IN AC MAINS DVD system AV Subwoofer AV Inter connect cable TV Rear L left speaker Organise the cables neatly optional This DVD system comes with a cable cover it allows you to organise all the connecting cables neatly through the opening and you can use the velcro strip that attached to the inter connect cable to tie up rest of the cables togeth...

Страница 14: ...AUDIO OUT S VIDEO IN VIDEO IN SCART IN 2 4 1 AC MAINS 3 VCR or Cable Satellite Box Using theVCR for recording DVD playback Some DVDs are copy protected You cannot record or dub protected discs using aVCR 3 Connect the DVD system s S VIDEO jack to the S VIDEO IN jack on theVCR 4 Connect the DVD system s LINE OUT R L jacks to the AUDIO IN jacks on theVCR This will allow you to make analogue stereo t...

Страница 15: ...u cannot record the disc through aVCR or digital recording device You cannot hear or record the SACD or MP3 CD playback if you use the digital connection For your playback through DIGITAL IN connection set the digital output of that player to PCM format Always refer to the owner s manual of the other equipment for complete connection and use details Connecting digital audio equipment for example C...

Страница 16: ...ing 4 SYSTEM MENU Enters or exits system setup menu 5 Cursor Selects movement direction in the menu TUNER press left or right to select a preset radio station TUNER up or down to select auto tuning 6 OK Confirms a selection 7 S T DISC searches backward forward or selects a track TV selects previous next channel Philips TV only TUNER tunes the radio frequency up down 8 Ç Exits an operation DISC sto...

Страница 17: ...SS TREBLE Selects BASS low tone or TREBLE high tone sound mode and use theVOLUME control to change the tone level AUDIO Selects an audio language DVD or an audio channel CD ZOOM Enlarges a picture on theTV screen TVVOL AdjustsTV volume PhilipsTV only É DISC starts playback Å DISC pauses playback DISC MENU Enters or exits disc contents menu ForVCD version 2 0 only In stop mode turns on off playback...

Страница 18: ...lips TV only TUNER tunes the radio frequency up down 5 Ç STOP Exits an operation DISC stops playback TUNER erases a preset radio station 1 2 4 3 7 6 5 9 8 0 Top and front panel 6 SOUND Selects a sound effect Selects another transmission channel for the rear wire less speakers 7 SOURCE Selects the relevant active source mode DISC TUNER FM MW TV or AUX DI 8 VOLUME Adjusts the volume level 9 System d...

Страница 19: ...y connections See page 11 ConnectingTV 1 Press SOURCE control until DISC appears on the display panel 2 Turn on theTV and set to the correct video in channel You should see the blue DVD background screen on the TV Usually this channel is between the lowest and highest channels and may be called FRONT A V IN VIDEO See your TV manual for more details Or you may go to channel 1 on your TV then press ...

Страница 20: ...Select a setting and press OK Follow the instructions shown on the TV to confirm the selection if any If a blank distortedTV screen appears wait for 15 seconds for auto recovery Setting theTV Display Set the aspect ratio of the DVD Player according to the TV you have connected The format you select must be available on the disc If it is not the setting for TV display will not affect the picture du...

Страница 21: ... OSD LANGUAGE then press 2 4 Press 34 to select a language and press OK to confirm Audio Subtitle and Disc menu languages 1 Press Ç twice to stop playback if any then press SYSTEM MENU 2 Press 2 repeatedly to select PREFERENCE PAGE 3 Press 34 to highlight one of the options below at a time then press 2 AUDIO disc s soundtrack SUBTITLE disc s subtitles DISC MENU disc s menu DIVX SUBTITLE 4 Press 34...

Страница 22: ... SETUP PAGE 3 Press 34 to highlight SPEAKER SETUP then press 2 4 Enter its submenu by pressing 2 5 Press 34 to highlight one of the options below at a time then press 2 SPEAKERSVOLUME Volume level setting for individual speakers 6dB 6dB SPEAKERS DELAY Delay times setting in relation to the listening position distance for center and surround speakers ms ms ms 6 Press 1 2 to adjust the setting that ...

Страница 23: ... code X denotes the number of this device is shown at the back panel of this device If the DVD is marked with a different region code it cannot be played on this device Helpful Hints It may not be possible to play CD R RW or DVD R RW in all cases due to the type of disc or condition of the recording If you are having trouble playing a certain disc remove the disc and try a different one Improperly...

Страница 24: ...ay mode While playing a disc press REPEAT continuously to choose a Play Mode DVD RPT ONE repeat chapter RPT TT repeat title SHUFFLE random play RPT SHF repeat shuffling RPT OFF repeat off VCD SVCD CD RPT ONE repeat track RPT ALL repeat disc SHUFFLE random play RPT SHF repeat shuffling RPT OFF repeat off MP3 SACD DivX RPT ONE repeat track RPT FLD repeat folder SHUFFLE random play RPT OFF repeat off...

Страница 25: ...status for example title or chapter number elapsed playing time audio subtitle language A number of operations can be done without interrupting disc playback 1 During playback press DISPLAY A list of available disc information appears on the TV screen 2 Press 34 to view the information and press OK to access 3 Use the numeric keypad 0 9 to input the number time or press 34 to make the selection th...

Страница 26: ...mal playback press B or 2 Changing sound track language This operation works only on DVDs with multiple soundtrack language you can change the language you want while playing DVD Press AUDIO repeatedly to select the available audio languages ForVCD changing the audio channel Press AUDIO repeatedly to select the available audio channels provided by the disc STEREO LEFT MONO RIGHT MONO or MIX MONO C...

Страница 27: ...the menu on the display This function can also be accessed via the PREFERENCE PAGE menu see page 36 ForVCDs with Playback Control PBC feature version 2 0 only When play is stopped press DISC MENU to toggle between PBC ON and PBC OFF If you select PBC ON the disc menu if available will appear on the TV Use S T or numeric keypad 0 9 to select a play option and press OK to confirm If you select PBC O...

Страница 28: ... one folder being played repeatedly SHUFFLE all files in the current folder being played at random order Press Åto pause or B or 2 to resume playback Playing MP3 music and JPEG picture simultaneously 1 Load a MP3 disc that contains music and picture The disc menu appears on the TV screen 2 Select an MP3 track and press B or 2 to start playback 3 During MP3 music playback select a picture folder fr...

Страница 29: ...n the TV screen Press B or 2 to start the slide show playback Preview Function This function shows the content of the current folder or the whole disc 1 During playback press Ç 12 thumbnail pictures will appear on theTV screen 2 Press S T to display the other pictures on the previous next page 3 Use 1 2 3 4 keys to highlight one of the picture and press OK to start playback 4 Press DISC MENU to re...

Страница 30: ...Programming disc tracks not for Picture CD MP3 SACD You can play the contents of the disc in the order you want by programming the tracks to be played Up to 20 tracks can be stored 1 Press PROGRAM on the remote OR In GENERAL SETUP PAGE press 34 to highlight PROGRAM then press 2 to select INPUT MENU 2 Press OK to confirm 2 6 7 8 9 10 To programme your favourite tracks chapter 3 Use the numeric keyp...

Страница 31: ... disable the screen saver function 2 Press 34 to select a setting and press OK to confirm DivX VOD registration code Philips provide you the DivX VOD Video On Demand registration code that allows you to rent and purchase videos using the DivX VOD service For more information visit us at www divx com vod 1 In GENERAL SETUP PAGE press 34 to highlight DIVX R VOD CODE then press 2 The registration cod...

Страница 32: ...your audio output which makes the speaker setup system reproduce high quality surround sound For details see page 22 CD Upsampling This feature allows you to convert your music CD to a higher sampling rate using sophisticated digital signal processing for better sound quality This function can also be accessed via the CD UP SAMP button on the remote If you have activated the upsampling the system ...

Страница 33: ...OFF Select this when you want to enjoy the surround sound with its full dynamic range 2 Press 34 to select a setting and press OK to confirm Video Setup Menu 1 In disc mode press SYSTEM MENU 2 Press 1 2 to select Video Setup icon 3 Press OK to confirm TVType This menu contains the options for selecting the colour system that matches the connected TV For details see page 20 TV Display This menu con...

Страница 34: ...hown on the TV to confirm the selection if any If a blank distortedTV screen appears wait for 15 seconds for auto recovery Picture Setting This DVD system provides three predefined sets of picture colour settings and one personal setting which you can define yourself 1 In VIDEO SETUP PAGE press 34 to highlight PICTURE SETTING then press 2 STANDARD Select this for standard picture setting BRIGHT Se...

Страница 35: ...ck The factory default setting is RGB 2 Press 34 to select a setting and press OK to confirm Helpful Hint You do not need to adjust the video output setting if you are usingVIDEO yellow or S VIDEO video connection Preference Setup Menu 1 Press Ç twice to stop playback if any then press SYSTEM MENU 2 Press 1 2 to select the Preference Setup icon 3 Press OK to confirm DIVX SUBTITLE Audio Subtitle Di...

Страница 36: ...l should be viewed only by adults due to graphic sexual material violence or language Helpful Hints VCD SVCD CD have no level indication so parental control has no effect on these type of discs This also applies to most illegal DVDs Some DVDs are not encoded with a rating though the movie rating may be printed on the Disc cover The rating level feature does not prohibit play of such Discs PBC You ...

Страница 37: ... subtitle during playback If available on the recorded disc you can select the external DivX subtitle in text format 2 In PREFERENCE PAGE press 3 4 to highlight DIVX SUBTITLE then press 2 STANDARD A standard list of English subtitle fonts provided by this DVD Player CYRILLIC Select this to display a cyrillic subtitle fonts 3 Press 34 to select a setting then press OK to confirm your selection Help...

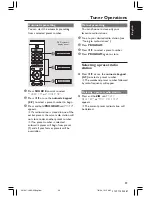
Страница 38: ... If the FM radio station is transmitting RDS Radio Data System data the RDS name will be displayed and stored Presetting radio stations You can store up to 20 FM and 10 MW preset radio stations in the memory Helpful Hints The system will exit presetting mode if no button is pressed within 20 seconds If no valid frequency is detected during Plug and Play CHECK ANTENNA appears Using the Plug and Pla...

Страница 39: ...ill begin from preset 1 and all your former presets will be overridden Manual presetting You can choose to store only your favourite radio stations 1 Tune to your desired radio station see Tuning to radio stations 2 Press PROGRAM 3 Press 1 2 to select a preset number 4 Press PROGRAM again to store Selecting a preset radio station Press 1 2 or use the numeric keypad 0 9 to select a preset number Th...

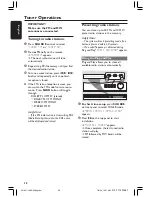
Страница 40: ...to the disc menu in order to select between multi channel and stereo tracks see page 29 You are not able to select the surround sound mode if the system setup menu is turned on Sound Controls Selecting digital sound effects Select a preset digital sound effects that matches your disc s content or that optimises the sound of the musical style you are playing Press SOUND to select the available soun...

Страница 41: ...the volume press MUTE again or increase the volume level Dimming system s display screen In any active mode press DIM on the remote to select the desired brightness DIM 1 70 brightness DIM 2 50 brightness DIM 3 25 brightness DIM OFF normal brightness Using the remote to operate your Philips television 4 1 2 2 3 1 Press SOURCE control until TV appears on the display panel 2 Press 1 2 or use the num...

Страница 42: ...and start playback if necessary 3 For ultimate recording press SOUND to select CLASSIC or CONCERT and press SURR to select STEREO 4 Start recording on the external recording device Helpful Hint Refer to the owner s manual of the connected equipment for details Setting the Sleep timer The sleep timer enables the system to switch to Eco Power standby mode automatically at a preset time 1 Press and h...

Страница 43: ...2 kHz 48 kHz 4 Hz 44 kHz 96 kHz PCM IEC 60958 Dolby Digital IEC 60958 IEC 61937 DTS IEC 60958 IEC 61937 SACD D A converter PCM SACD cut off frequency 50 kHz Specifications MAIN UNIT Power Supply Rating 34V DC Power Consumption 20 W Dimensions w x h x d 360 mm x 40 mm x 305 mm Weight 2 5 kg FRONT SPEAKERS System 2 way closed box system Impedance 6 Ω Speaker drivers 2 x 3 woofer 1 x LS ribbon tweete...

Страница 44: ...D screen Press SOURCE to select Disc mode If this happens when you are changing the setting of the TV TYPE wait for 15 seconds for auto recovery If this happens when you are turning on the progressive scan feature wait for 15 seconds for auto recovery Check the video connection Sometimes a small amount of picture distortion may appear This is not a malfunction Clean the disc The aspect ratio is fi...

Страница 45: ...rect surround sound setting Make sure the source you are playing is recorded or broadcast in surround sound DTS Dolby Digital etc If the signal is too weak adjust the antenna or connect an external antenna for better reception Increase the distance between the system and yourTV or VCR Tune in to the correct frequency Place the antenna farther away from any equipment that may be causing the noise S...

Страница 46: ...Logic II It is an improved matrix decoding technology that provides better spatiality and directionality on Dolby Surround programme material provides a convincing three dimensional soundfield on convertional stereo music recordings and is ideally suited to bring the surround experience to automotive sound While conventional surround programming is fully campatible with Dolby Surround Pro Logic II...

Страница 47: ...e with more than one region or ALL regions S Video Produces a clear picture by sending separate signals for the luminance and the colour You can use S Video only if your TV has an S Video In jack Super Audio CD SACD This audio format is based upon the current CD standards but includes a greater amount of information that provides higher quality sound There are three types of discs single layer dou...

Страница 48: ...48 3139 115 23481 001 047 LX85 22 Engfinal 7 8 04 10 15 AM 48 ...

Страница 49: ...tina 7665 Latvian 7686 Letzeburgesch 7666 Limburgan Limburger 7673 Lingala 7678 Lithuanian 7684 Luxembourgish 7666 Macedonian 7775 Malagasy 7771 Magyar 7285 Malayalam 7776 Maltese 7784 Manx 7186 Maori 7773 Marathi 7782 Marshallese 7772 Moldavian 7779 Mongolian 7778 Nauru 7865 Navaho Navajo 7886 Ndebele North 7868 Ndebele South 7882 Ndonga 7871 Nederlands 7876 Nepali 7869 Norsk 7879 Northern Sami 8...

Страница 50: ...50 3139 115 23481 CLASS 1 LASER PRODUCT SgpJP 0428 05 1 Meet Philips at the Internet http www philips com http www p4c philips com LX8500W 3139 115 23481 001 047 LX85 22 Engfinal 7 8 04 10 15 AM 50 ...

Отзывы: