background image

38

English

3139 115 22741

Tuner Operations

Timer Operations

Manual presetting

You can choose to store only your
favourite radio stations.

1

Tune to your desired radio station (refer
to “Tuning to radio stations”).

2

Press 

PROG

 twice.

The preset number starts flashing. If

you want to store the radio station in
another preset number, press 

1 2

 or use

the 

numeric keypad (0-9)

.

3

Press 

PROG

 again to store.

4

Repeat steps 

1

3

 to store other radio

stations.

Selecting a preset radio
station

Press 

1 2

 or use the 

numeric keypad

(0-9)

 to select a preset number.

The preset number, radio frequency,

and waveband will appear.

Deleting a preset radio station

Press and hold

 9

 on the top panel until

PRESET DELETED

” appears.

The current preset radio station will

be deleted and the next available preset
radio station will take its place.

All other preset radio stations with

higher numbers will decrease by one.

Setting the timer

The system can switch on to DISC or
TUNER mode automatically at a preset
time, serving as an alarm to wake you up.

IMPORTANT!
– When in Eco Power standby
mode, it is not possible to show the
clock time or set the clock/timer
function.
– Before setting the timer, ensure
that the clock is set correctly.
– The volume of the timer will
increase gradually to the last tuned
volume level.  If the last tuned
volume level is too low, the set will
then increase to a predetermined
minimum audible level.
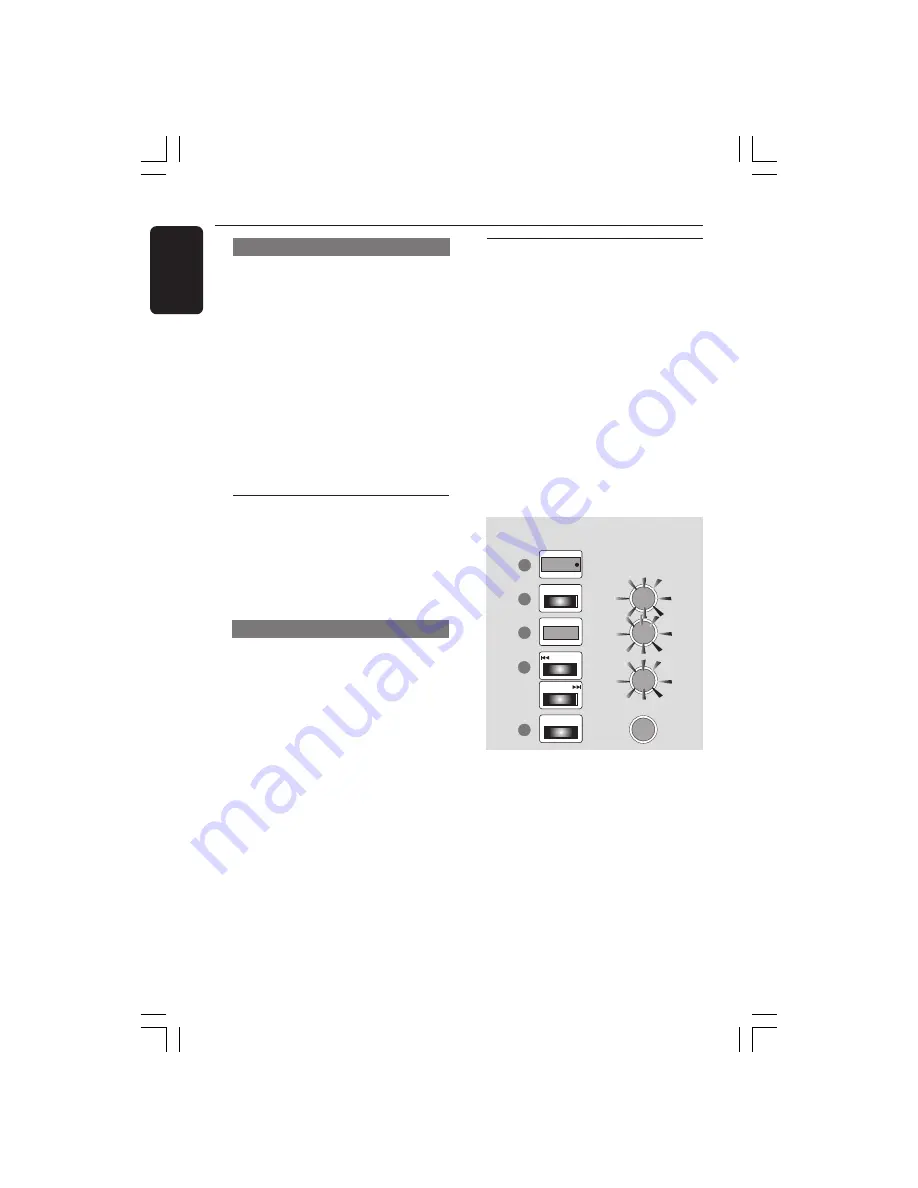
CLOCK/TIMER

2

3

4

5

SEARCH/PREV

SEARCH/PREV

CLOCK/TIMER

1

STANDBY•ON

ECO POWER

SOURCE

12

:

00AM

TUNER

10

:

38AM

DISC

12

:

00AM

DISC

10

:

38AM

DISC

1

Press 

STANDBY ON

 to switch on the

DVD system.

2

Press and hold 

CLOCK/TIMER

 until

the clock time starts flashing on the
display panel.

3

Press 

SOURCE

 repeatedly (or

DISC

 or 

TUNER

 on the remote) to

select the wake up source (DISC or
TUNER).

buttons on
top/front panel

DVD system’s
display panel

001-045-LX71-22-Eng

8/07/2003, 11:27 AM

38

Содержание LX7100SA

Страница 1: ...1 3139 115 22741 DVD VIDEO SACD DIGITAL SURROUND SYSTEM LX7100SA LX7100SA 001 045 LX71 22 Eng 8 07 2003 11 25 AM 1 ...

Страница 2: ...onnect either wire to the earth terminal in the plug marked E or e or coloured green or green and yellow Before replacing the plug cover make certain that the cord grip is clamped over the sheath of the lead not simply over the two wires Copyright in the U K Recording and playback of material may require consent See Copyright Act 1956 and The Performer s Protection Acts 1958 to 1972 Norge Typeskil...

Страница 3: ... Huom Toiminnanvalitsin on kytketty toisiopuolelle eikä se kytke laitetta irti sähköverkosta Sisäänrakennettu verkko osa on kytkettynä sähköverkkoon aina silloin kun pistoke on pistorasiassa Manufactured under license from Dolby Laboratories Dolby Pro Logic and the double D symbol are trademarks of Dolby Laboratories Confidential Unpublished Works 1992 1997 Dolby Laboratories Inc All rights reserv...

Страница 4: ...4 3139 115 22741 001 045 LX71 22 Eng 8 07 2003 11 25 AM 4 ...

Страница 5: ...39 115 22741 E n g l i s h Français E s p a ñ o l N e d e r l a n d s Italiano Deutsch Index English 6 Français 46 Español 86 Deutsch 126 Nederlands 166 Italiano 206 001 045 LX71 22 Eng 8 07 2003 11 25 AM 5 ...

Страница 6: ...TV 19 Step 4 Setting the speakers channels 20 Step 5 Setting language preference 21 Disc Operations Playable discs 22 Playing discs 22 Using the Disc Menu 23 Basic playback controls 23 Resuming playback from the last stopped point DVD VCD SVCD 23 Selecting various repeat functions 24 Repeat play mode 24 Repeating a section 24 Programme favourite tracks audio CDs only 24 Clearing the programme 24 U...

Страница 7: ...e Sleep timer 39 Sound andVolume Controls Sound Control 40 Selecting surround sound 40 Turning on off clear voice effect 40 Selecting digital sound effects 40 Volume Control 40 Other Functions Switching on off 41 Switching to active mode 41 Switching to Eco Power standby mode 41 Switching to standby mode view clock 41 Dimming system s display screen 41 Recording to an external device 41 Using the ...

Страница 8: ...disc Leave the player in the warm environment until the moisture evaporates Do not block the vents Do not operate the DVD system in an enclosed cabinet and allow about 10 cm 4 inches of free space all around the player for adequate ventilation 10 cm 4 inches 10 cm 4 inches 10 cm 4 inches DVD Home Cinema System PHILIPS Care of disc To clean a CD wipe it in a straight line from the centre towards th...

Страница 9: ... speakers and subwoofer 1 1 3 3 2 4 Centre speaker and DVD system Front speaker Right Surround Speaker Left Surround Speaker Right Front speaker Left For best possible surround sound all the speakers except subwoofer should be placed at the same distance from the listening position 1 Place the left and right front speakers at equal distances from the TV and at an angle of approximately 45 degrees ...

Страница 10: ... Left L FL black white Centre C black green Surround Right SR black grey Surround Left SL black blue 2 Connect the active subwoofer s AUDIO INPUT jack to the WOOFER LINE OUT jack using the supplied subwoofer cable front speaker right front speaker left Surround speaker right Surround speaker left Centre speaker Active Subwoofer Connections Helpful Hints Ensure that the speaker cables are correctly...

Страница 11: ... connect the DVD system s SCART OUT jack to the corresponding Scart input jacks on theTV OR Using CompositeVideo jack CVBS 2 Use the composite video cable yellow not supplied to connect the DVD system s CVBS jack to the video input jack or labelled as A V In Video In Composite or Baseband on theTV OR Using S Video jack 2 Use the S video cable not supplied to connect the DVD system s S VIDEO OUT ja...

Страница 12: ...lied MW FM MW ANTENNA FM 75 Ω L C R SL SR MW FM MW ANTENNA FM 75 Ω SCART OUT S VIDEO CVBS VIDEO OUT AUDIO AUX IN TV IN LINE OUT DIGITAL OUT CENTER OUT DIGITAL IN WOOFER LINE OUT SURROUND FRONT CENTER SPEAKER SYSTEMS 8Ω CDR FM antenna MW antenna fix the claw into the slot Step 5 Connecting FM MW antennas 1 2 Helpful Hints Adjust the position of the antennas for optimal reception Position the antenn...

Страница 13: ...plug in the AC power cord to the power outlet Never make or change any connections with the power switched on On the DVD system AUTO INSTALL PRESS PLAY may appear on the display panel Press 2 on the top panel to store all available radio stations or press 9 to exit see page 37 Tuner Operations On the active subwoofer The LED indicator at the front panel will light up in green when the subwoofer is...

Страница 14: ...Connect the DVD system s AUX IN R L jacks to theAUDIO OUT jacks on theVCR or cable satellite box Before starting operation press AUX DI on the remote to select AUX in order to activate the input source Using theVCR for recording DVDs Some DVDs are copy protected You cannot record or dub protected discs using aVCR 3 Connect the DVD system s CVBS jack to theVIDEO IN jack on theVCR 4 Connect the DVD ...

Страница 15: ...Connect the DVD system s DIGITAL OUT jack to the DIGITAL IN jack on a digital recording device DTS Digital Theatre System compatible with a Dolby Digital decoder for example Before starting operation set the DIGITAL OUTPUT according to the audio connection See page 30 Setting the digital output Connections optional Helpful Hints Some DVDs are copy protected You cannot record the disc through aVCR ...

Страница 16: ...UNER starts automatic manual preset programming CLOCK selects 12 or 24 hour clock display 7 CLOCK TIMER Shows clock display for a few seconds or enters clock setting mode Enters timer setting mode 8 OPEN CLOSE Opens Closes the disc tray 9 SOURCE Selects the relevant active mode TV AV DISC TUNER or AUX DI TUNER toggles between FM and MW band AUX DI toggles between AUX and DI Digital Input mode 0 Sy...

Страница 17: ...usts subwoofer s volume level REAR Adjusts rear surround speakers volume level CENTER Adjusts centre speaker s volume level TVVOL Adjusts TV volume Philips TV only SLEEP Sets the sleep timer function DIM Selects different dim mode VOICE only available in Multi channel mode Turns on off clear voice sound effect MUTE Mutes or restores the volume RESUME Continues disc playback after an interruption O...

Страница 18: ... disposed of properly Step 2 Setting the clock The clock can be set in either 12 hour or 24 hour mode 12 00 AM or 00 00 for example CLOCK TIMER PROG 1 2 3 4 12 00 AM 00 00 SEARCH PREV SEARCH PREV 13 38 13 38 CLOCK TIMER 1 In standby mode press CLOCK TIMER once 12 00 AM or 00 00 will flash 2 Press PROG to change between 12 hour and 24 hour clock mode 3 Press S T to set the minutes and hours To incr...

Страница 19: ...d DISC on the remote until PAL or NTSC appears on the display panel To change the setting repeat step 2 Selecting the colour system that corresponds to yourTV This DVD system is compatible with both NTSC and PAL In order for a DVD to play on this DVD system the colour system of the DVD the TV and the DVD system should match 1 In disc mode press SYSTEM MENU 2 Use 1 2 3 4 on the remote to navigate i...

Страница 20: ... The test tone will be automatically generated To help you judge the sound level of each speaker the left front speaker is always on during the setting 1en 1en st 1 5 Use 3 4 to adjust the settings for each speaker that suit your surround sound needs which may include A Adjusting the volume levels for one or both speakers until the sound evens B Turning on or off the sound output C Delay time sett...

Страница 21: ...ead The exception is DVD system s menu language it will remain once selected 1 In disc mode press SYSTEM MENU 2 Use 1 2 3 4 on the remote to navigate in the menu 3 Select icon and press 4 Move to and press 2 Move to one of the following and press 2 Audio Subtitle Menu English English English 1en 1en st 1 Audio disc s soundtrack Subtitle disc s subtitles Menu on screen menu 4 Press 3 4 to select a ...

Страница 22: ...aving trouble playing a certain disc remove the disc and try a different one Improperly formatted discs will not play on this DVD system IMPORTANT If the inhibit icon X appears on theTV screen when a button is pressed it means the function is not available on the current disc or at the current time Playing discs 1 Press SOURCE button until DISC appears on the display panel or press DISC on the rem...

Страница 23: ...rn to the menu screen if PBC is on Basic playback controls Pausing playback Press 2 To resume normal playback press 2 again Selecting another track chapter Press S T or use the numeric keypad 0 9 to key in a track chapter number If repeat mode is active pressing S T will replay the same track chapter Searching backward forward Press and hold S T then press 2 to resume normal playback While searchi...

Страница 24: ...section will now repeat continuously 3 Press REPEAT A B again to resume normal playback Disc Operations Programme favourite tracks audio CDs only You can play the contents of the disc in the order you want by programming the order of the tracks to be played Up to 20 tracks can be stored 1 3 6 2 5 2 PROG STOP CLEAR SEARCH PREV PLAY PAUSE CLOCK TIMER SEARCH NEXT 1 Stop playback then press PROG to en...

Страница 25: ...ber will appear on the Program line To programme only certain Chapter Index of the selected Title Track go to step 6 not applicable for Audio CDs 6 Move to Chapter Index in the menu then press 1 2 to select the required Chapter Index number and press OK to confirm The Title Chapter or Track Index number will appear on the Program line 7 Repeat steps 4 6 to select others Title Track or Chapter Inde...

Страница 26: ...t a desired album Press S T or use the numeric keypad 0 9 to select another track in the current folder Press 2 to pause resume playback 3 To stop playback press 9 In stop mode you can Use the numeric keypad 0 9 to select another album Helpful Hints Due to the recording nature of Digital Audio MP3 DAM only digital audio music will play It is normal to experience an occasional skip while listening ...

Страница 27: ...st scan speed The volume will be muted To resume normal playback press ÉÅ Smart Color Press 34 to select one of the predefined sets of colour settings 1 Personal 2 Rich 3 Natural 4 Soft and 5 Animation Title Press 34 to select a Title number if available for playback to begin Time Search The playback will pause and a time edit box appears on the display Use the numeric keypad 0 9 to enter the time...

Страница 28: ...OTE Some of the features in the Setup Menu are described in Getting Started Setting theTV shape The format you select must be available on the disc If it is not the setting for TV Shape will not affect the picture during playback Follow the steps of Using the Setup Menu and select TV Shape TV Shape Black Level shift Video shift 1en 1en st 1 Personal color Color settings TV System 4 3 letterbox 4 3...

Страница 29: ...ing which you can define yourself Follow the steps of Using the setup menu and select Color Settings TV Shape Black Level shift Video shift 1en 1en st 1 Personal color Color settings TV System 1 Personal 2 Rich 3 Natural 4 Soft 5 Animation Press 34 to select one of the colour settings Personal Rich Natural Soft or Animation Fine tuning the personal colour setting If you choose Personal from Color ...

Страница 30: ... equipment that has a multichannel decoder Setting the PCM output Set your PCM Pulse Code Modulation output only after you have set the system s Digital Output to PCM only See Setting the digital output Follow the steps of Using the Setup Menu and select PCM Output Digital output Analog output Night mode Karaoke vocal Speakers 48 kHz 96 kHz 1en 1en st 1 PCM output 48 kHz Select this if the optiona...

Страница 31: ...t will not change your analogue output setting in the setup menu Night mode turning on off Follow the steps of Using the Setup Menu and select Night Mode Digital output Analog output Night mode Karaoke vocal Speakers On Off 1en 1en st 1 PCM output Off Select this when you want to enjoy the surround sound with its full dynamic range On Select this to level out the volume High volume outputs will be...

Страница 32: ...trol PBC feature Follow the steps of Using the setup menu and select PBC 1en 1en st 1 Access control Status window PBC On Off Help text Off Select this if you want theVCD to start playback automatically once loaded in the disc tray On Select this if you want the disc menu of theVCD if available to show on theTV screen once loaded in the disc tray Help text turning on off Follow the steps of Using ...

Страница 33: ... time enter any four numbers you prefer You will have to enter the same code exactly twice This will set your code for the first time If you forget your old four digit code press 9 four times when prompted for the four digit code Then enter any four numbers you prefer twice 5 Move to Change code and press 2 1en 1en st 1 Access control Status window PBC Help text Child lock Parental level Change co...

Страница 34: ...ove the level you selected will not play unless you enter your four digit password or choose a higher level rating Select to deactivate Parental level and have all discs play 1en 1en st 1 Access control Status window PBC Help text Child lock Parental level Change country Change code 7 Press SYSTEM MENU again to remove the menu See page 36 if necessary to select the country for which the Parental L...

Страница 35: ...ain to remove the menu Helpful Hint Lock Unlock each side of two sided DVDs and each volume of multi volumeVideo CDs Enabling Play once Play Always You can enable or disable viewing of a specific disc The DVD system can memorise settings for 120 discs When you select Play Always the disc currently in the player moves to the top of the list When the list is full and you add a new disc the last disc...

Страница 36: ...MENU 2 Use 1 2 3 4 on the remote to navigate in the menu 3 Select icon and press 4 Move to and press 2 Move to Access Control and press 2 1en 1en st 1 Access control Status window PBC Help text Enter code 4 Use the numeric keypad 0 9 to enter the four digit code You may have to enter the same code exactly twice If not successful see page 33 Changing the password 5 Move to Change country and press ...

Страница 37: ...S PLAY appears 2 Press 2 on the top panel to start installation INSTALL TUNER appears All previously stored radio stations will be replaced Once completed the last tuned radio station or the first available RDS station will be played 3 If the first preset is a RDS station it will proceed to set the RDS clock INSTALL is displayed followed by TIME and SEARCH RDS TIME When RDS time is read RDS TIME i...

Страница 38: ...eset radio stations with higher numbers will decrease by one Setting the timer The system can switch on to DISC or TUNER mode automatically at a preset time serving as an alarm to wake you up IMPORTANT When in Eco Power standby mode it is not possible to show the clock time or set the clock timer function Before setting the timer ensure that the clock is set correctly The volume of the timer will ...

Страница 39: ...rom the display panel and TIMER OFF appears OR Press CLOCK TIMER to turn on the timer to the last setting The timer information will display for a few seconds then the system resumes its last active source or stays in standby mode Helpful Hint The system will exit timer setting mode if no button is pressed within 90 seconds Timer Operations Setting the Sleep timer The sleep timer enables the syste...

Страница 40: ...e sound feature if you have selected Multi channel as the surround mode Press VOICE on the remote to select CLEAR VOICE ON To turn off the setting pressVOICE again to select CLEAR VOICE OFF Selecting digital sound effects Select a preset digital sound effects that matches your disc s content or that optimises the sound of the musical style you are playing Press SOUND on the remote When playing mov...

Страница 41: ...n external device 1 Connect the external recording device to LINE OUT or DIGITAL OUT See pages 14 15 Connections optional 2 Select the source to record from your DVD system DISC TUNER TV AV or AUX DI and start playback if necessary You can only record from DISC if using DIGITAL OUT to connect the external recording device 3 Start recording on the external recording device Helpful Hints All the sou...

Страница 42: ...annel selection Change the TV channel until you see the DVD screen Press DISC on the remote Sometimes a small amount of picture distortion may appear This is not a malfunction Clean the disc TVs have a colour system standard If the disc s or DVD system s colour system is different than your TV s colour system the picture may be distorted or colourless Set to the correct TV System setting The aspec...

Страница 43: ...he language for the sound or subtitle is prohibited on the DVD If the signal is too weak adjust the antenna or connect an external antenna for better reception Increase the distance between the system and yourTV or VCR Tune in to the correct frequency Place the antenna farther away from any equipment that may be causing the noise Select the source DISC or TUNER for example before pressing the func...

Страница 44: ...its 96 kHz Frequency Response 4 Hz 20 kHz 44 1 kHz 4 Hz 22 kHz 48 kHz 4 Hz 44 kHz 96 kHz Digital Output Input SPDIF Sony Philips digital interface Coaxial PCM IEC 60958 Dolby Digital DTS IEC 60958 IEC 61937 SACD D A converter DSD SACD cut off frequency 30 kHz Specifications MAIN UNIT Power Supply Rating 220 230V 50 Hz Power Consumption 160 W Eco Power Standby 0 5 W Dimensions w x h x d 390 x 73 x ...

Страница 45: ...e sound field Multichannel refers to a structure of sound tracks having three or more channels Parental level A function of the DVD to limit playback of the disc by the age of the users according to the limitation level in each country The limitation varies from disc to disc when it is activated playback will be prohibited if the software s level is higher than the user set level PCM Pulse Code Mo...

Отзывы: