Directions for Use
EN 13
L04L AA
3.
P
ICTURE
M
ENU
C
ONTROLS
15
Picture
Brightness
Color
Picture
Sharpness
T
int
Color T
emp.
50
Brightness
65
Color
50
Picture
50
Sharpness
50
Color T
emp.
Normal
W
arm or
Cool
DNR
On
Of
f
T
int
0
Co
On
Of
f
T
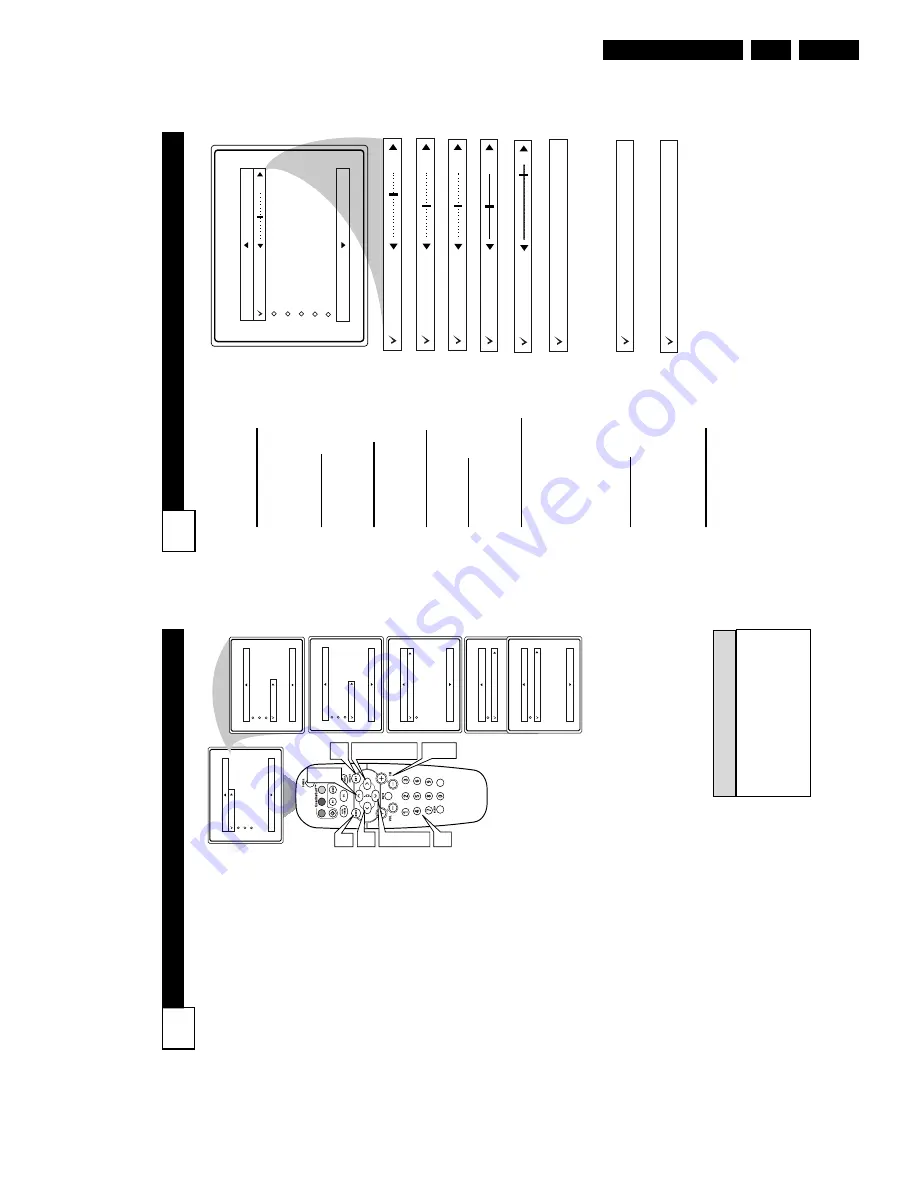
o adjust your TV
pictur
e contr
ols,
select a channel and use the
Pictur
e Menu Contr
ols listed below:
1
Brightness Contr
ol
- Pr
ess the
CURSOR
RIGHT
2
or
LEFT
1
buttons
until the darkest
parts of the picture are as bright
as you prefer
.
2
Color
Contr
ol
-
P
ress the
CURSOR
RIGHT
2
or
LEFT
1
buttons
to add or eliminate
color
.
3
Pictur
e Contr
ol
- Pr
ess the
CURSOR
RIGHT
2
or
LEFT
1
buttons
until lightest parts of
the picture show good detail.
4
Sharpness Contr
ol
- CURSOR
RIGHT
2
or
LEFT
1
buttons
to improve detail in the picture.
5
T
int Contr
ol
- Pr
ess the
CUR-
SOR
RIGHT
2
or
LEFT
1
buttons
to obtain natural skin
tones.
6
Color
T
emp Contr
ol
-
P
ress
the
CURSOR
RIGHT
2
or
LEFT
1
buttons
to select
Normal, Cool, or
W
arm picture
preferences. (Normal
will keep
the whites, white; Cool will
make the whites, bluish; and
W
arm will make the whites, red-
dish.)
7
DNR Contr
ol
-
P
ress the
CURSOR
RIGHT
2
or
LEFT
1
buttons
to turn DNR On or
Of
f. Dynamic Noise Reduction
helps to eliminate “noise” from
the picture.
8
Contrast
+
Contr
ol
- Pr
ess the
CURSOR
RIGHT
2
or
LEFT
1
buttons
to toggle the control
On or OFF
.
The Co con-
trol helps to “sharpen” the pic-
ture quality
.
The black portions
of the picture become richer in
darkness and the whites become
brighter
.
C
HANNEL
E
DIT
14
C
hannel Edit makes it easy for you to
ADD or DELETE channels fr
om the
list of channels stor
ed in the TV’
s memory
.
1
Pr
ess the MENU button
on the
remote control to show the on-
screen menu.
2
Pr
ess the CURSOR UP
3
or
DOWN
4
buttons
to scroll though
the on-screen menu until the word
Install
is highlighted.
3
Pr
ess the CURSOR RIGHT
2
button
to display the
Install
menu
features.
4
Pr
ess the CURSOR UP
3
or
DOWN
4
buttons
to scroll through
the Install features until the words
Channel Edit
are highlighted.
5
Pr
ess the CURSOR RIGHT
2
button
to display the Channel Edit
options.
6
W
ith the Channel
Edit options
displayed,
and
Channel
highlight-
ed; you can use the cursor buttons to
scroll through all available channels
that you wish to add (skipped OFF)
or delete (Skipped ON) from the
TV’
s memory
. Y
ou can also use the
NUMBERED buttons to go directly
to a specific numbered channel that
you want to add or skip. Or
, you can
also use the CH+ or CH- to quickly
scan through the channels that have
not been skipped.
7
Using the CURSOR DOWN
4
button, scroll the menu to highlight
the word SKIPPED.
8
Now use the CURSOR
RIGHT
2
to toggle between On or
Off.
If
ON is selected the channels is
skipped when scrolling channels
with the CH+ or CH- buttons. If
OFF is selected the channels is not
skipped when scrolling channels
with the CH+ or CH- buttons.
9
When finished, pr
ess the ST
A-
TUS/EXIT
button
to remove the
menu from the screen.
VOL
Channel Edit
Channel
Skipped
12
Main
Picture
Sound
Features
Install
Brightness
Color
Picture
Sharpness
T
int
More...
Main
Picture
Sound
Features
Install
Language
T
uner Mode
Auto Program
Channel Edit
Install
Language
T
uner Mode
Auto Program
Channel Edit
Channel
Skipped
Channel Edit
Channel
Skipped
On
Channel Edit
Channel
Skipped
Of
f
9
2
4
7
3
5
8
6
1
2
4
6
8
6
6
An “X” appearing in front of
any channel will indicate that
channel has skip on.
When the
CH + or CH - buttons are used,
those channels will be skipped.
H
ELPFUL
H
INTS
Содержание L04L
Страница 36: ...Service Modes Error Codes and Fault Finding EN 36 L04L AA 5 E_06532_012 eps 130204 ...
Страница 58: ...58 L04L AA 7 Circuit Diagrams and PWB Layouts Layout Mono Carrier Part 1 Bottom Side Part 1 ...
Страница 93: ...Spare Parts List EN 93 L04L AA 10 10 Spare Parts List Not applicable ...
Страница 94: ...Revision List EN 94 L04L AA 11 11 Revision List First release ...


