


26
EN
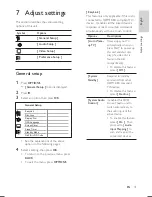
7
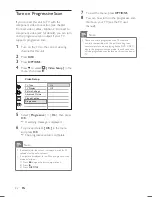
Select
[ OK ]
in the menu, then press
OK
to start scanning of devices.
Once complete, audio input mapping
menu is displayed.
AUX3 Input
AUX2 Input
Digital Input
AUX1 Input
Audio Input Mapping
TV
Other (non-HDMI)
For example, if your TV audio is
•
connected to the AUX IN-AUX 1
sockets on this unit, select
[ AUX1
Input ]
and map with the TV (brand
name) at the right panel.
8
Select the audio input of this unit that is
used to connect to other HDMI device
(e.g. AUX1 Input, AUX2 Input), then press
B
.
9
Select the correct connected device, then
press
OK
.
Repeat steps 8~9 to map other
•
connected devices.
10
To exit the menu, press
OPTIONS
.
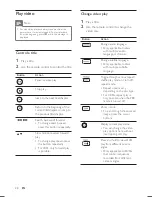
Select a play source
On the main unit
1
Press
SOURCE
repeatedly to select:
DISC >
USB >
RADIO FM >
RADIO
AM/MW
>
OPTICAL INPUT 1-2
>
COAXIAL INPUT > AUX 1-2-3 INPUT
>
MP3 LINK > DISC
...
On the remote control
Press
•
DISC
to switch to DISC mode.
Press
•
USB
to switch to USB mode.
Press
•
RADIO
to switch to FM or AM/MW
band.
Press
•
AUX/DI /MP3 LINK
repeatedly to
select other external devices.
Display
Device connected to
AUX1 INPUT
AUDIO IN-AUX1 sockets.
AUX2 INPUT
AUDIO IN-AUX2 sockets.
AUX3 INPUT
AUDIO IN-AUX3 sockets.
OPTICAL
INPUT 1
OPTICAL DIGITAL IN-1
socket.
OPTICAL
INPUT 2
OPTICAL DIGITAL IN-2
socket.
COAXIAL
INPUT
COAXIAL DIGITAL IN
socket.
MP3 LINK
MP3 LINK socket.
Содержание HTS9810
Страница 54: ...150 ...
Страница 55: ...151 ...
Страница 56: ...152 ...
Страница 58: ...154 ...
Страница 59: ...155 ...
Страница 60: ...156 ...
Страница 61: ...157 ...
Страница 62: ... 2008 Philips Consumer Lifestyle All right reserved 12nc 3139 245 30992 sgpjp 0841 59 3 ...


