background image

EN 35

3139 785 32530

7

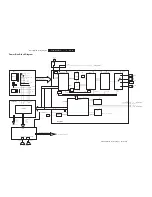
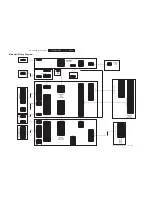
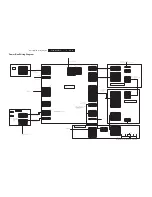
Circuit Diagram and PWB Layout

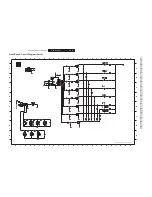
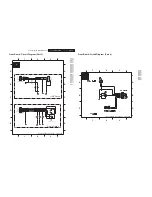
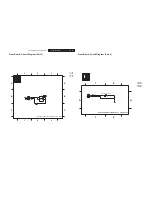
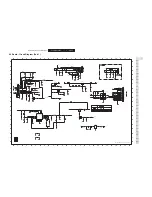
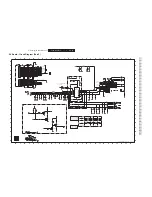
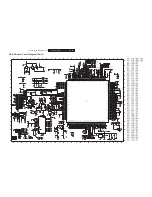
Front Board: Circuit Diagram (Part 7)

C

A

B

C

1701 A2
2701 A2
2702 A3
3701 A2
7701 B2
F701 A2
F702 A2
F703 A2
F704 B2

1

2

3

1

2

3

A

B

F704

F702
F703

F701

2

0

7

2

7

u

4

1

0

7

2

n

0

0

1

7701

TSOP4836

2

GND

1

OUT

3

VS

1
2
3

3701

100R

1701

S3B-EH

3139-243-35885-130-07-a4.pdf     2006-12-22

Front Board: Circuit Diagram (Part 8)

F803

B

C

1801 A1
2801 A2
2802 A3

1

2

3

1

2

3

A

B

C

A

3801 A2
7801 B1
F801 A2
F802 A2
F803 A2
F804 B2

F802

F801

7

u

4

2

0

8

2

F804

GND

2

OUT

1

VS

3

n

0

0

1

1

0

8

2

TSOP4836

7801

2
3

100R

3801

S3B-EH

1801

1

3139-243-35885-130-08-a4.pdf     2006-12-22

Содержание HTS6600

Страница 1: ...en 37 Copyright 2007 Philips Consumer Electronics B V Eindhoven The Netherlands All rights reserved No part of this publication may be reproduced stored in a retrieval system or transmitted in any form or by any means electronic mechanical photocopying or otherwise without the prior permission of Philips Version 1 0 Contents Page Contents Page PWB Layout Front Display 38 PWB Layout Front Key 40 PW...

Страница 2: ...ON OF PC BOARDS Main Unit PCBs on the Bracket IPOD Board USB Board HDMI Board SCART Board Bracket AV Board Main Unit PCBs on the Lower Level IR Board White LED Board Front Key Board Front Display Board Motor Assembly SD9 2 MPEG Board DVD Mechanism Door Close Board Door Open Board ...

Страница 3: ...EN 3 3139 785 32530 Technical Specifications and Connection Facilities 1 AV BOARD TUNER MODULE SPEAKER BOARD AIO BOARD AMPLIFIER MODULE PSU POWER BOX ...

Страница 4: ...at RF 1mV dev 75kHz 3 3dB Limiting point 8μV Crosstalk at RF 1mV dev 67 5kHz 28dB 1 3 AMPLIFIER L R output power 1 x 70W type 75W Centre 1 x 95W type 100W Surround 1 x 70W type 75W Subwoofer 1 x 95W type 100W Frequency response 3dB 150Hz 20kHz Hum Volume Minimum 200nW Residual noise Volume Minimum 40nW Input sensitivity Aux In 1V 3dB at 39kΩ Scart In TV in 500mV 3dB at 39kΩ 1 4 COMPACT DISC VCD DV...

Страница 5: ...s 250Hz 15kHz e g 7122 707 48001 LF Voltmeter e g PM2534 DUT S N and distortion meter e g Sound Technology ST1700B Frame aerial e g 7122 707 89001 Tuner AM MW LW To avoid atmospheric interference all AM measurements have to be carried out in a Faraday s cage Use a bandpass filter or at least a high pass filter with 250Hz to eliminate hum 50Hz 100Hz RF Generator e g PM5326 Ri 50Ω Bandpass 250Hz 15k...

Страница 6: ...al Torx driver holder 4822 395 91019 Torx bit T10 150mm 4822 395 50456 Torx driver set T6 T20 4822 395 50145 Torx driver T10 extended 4822 395 50423 Compact Disc SBC426 426A Test disc 5 5A 4822 397 30096 SBC442 Audio Burn in Test disc 1kHz 4822 397 30155 SBC429 Audio Signals disc 4822 397 30184 Dolby Pro logic Test Disc 4822 395 10216 ...

Страница 7: ...la massa dell apparecchio tramite un braccialetto a resistenza Assicurarsi che i componenti e anche gli utensili con quali si lavora siano anche a questo potenziale GB ESD PROTECTION EQUIPMENT Complete Kit ESD3 small tablemat wristband connection box extention cable and earth cable 4822 310 10671 Wristband tester 4822 344 13999 CLASS 1 LASER PRODUCT GB Warning Invisible laser radiation when open A...

Страница 8: ...duce heat Mix of lead free solder alloy parts with leaded solder alloy parts is possible but PHILIPS recommends strongly to avoid mixed solder alloy types leaded and lead free If one cannot avoid or does not know whether product is lead free clean carefully the solder joint from old solder alloy and re solder with new solder alloy SAC305 Use only original spare parts listed in the Service Manuals ...

Страница 9: ...to short circuit the contacts fig 1 5 Replace the defective loader with a new loader 6 Remove paperclip from the flexfoil and connect it to the new loader 7 Remove solder joint on the ESD protection point ATTENTION The laser diode of this loader is protected against ESD by a solder joint which shortcircuits the laserdiode to ground For proper functionality of the loader this solder joint must be r...

Страница 10: ...irmly secured to the metal chassis Figure 2 1 2 For the 8 pole cable between the PSU and TI amplifier fold the cable as indicated making it as close possible to metal chassis Figure 2 2 3 Fold as indicated underneath the metal chassis for both point 1 and 2 Note that the cables underneath should be laid as close possible to the metal chassis also Figure 2 3 4 For the FFC cable between Audio BD and...

Страница 11: ...nce preventing them from touching the Audio BD itself Figure 2 5 6 For the 9 pole cable linking from the Main Unit to the Power Box tuck it underneath the tuner and above the 4 pole cinch connector and also making it as close as possible to the back metal plate Figure 2 6 7 For reference to point 6 Figure 2 7 8 The cables should be tied as indicated Figure 2 8 ...

Страница 12: ...ables should refrain from touching or even getting near to the PSU Figure 2 9 10 Overview Figure 2 10 11 Paste a tape over the subwoofer cable on the Tuner as indicated Secondly the cable should be outside of the Audio BD along the edge of the metal chassis Figure 2 11 12 With reference to point 11 Figure 2 12 ...

Страница 13: ...Free Requirements 2 13 With reference to point 11 Note that the cable should not be bent to the left across the Audio BD due to the excess cable when the unit is being push back inside the wooden Power Box Figure 2 13 14 With reference to point 11 Figure 2 14 ...

Страница 14: ...e figure to prevent the face of the set from scratches Figure 2 15 Packing Sheet 2 2 4 Manual Procedure to open the door 1 Remove the stand assembly refer to chapter 4 for more details 2 Remove the cabinet Rear refer to chapter 4 for more details 3 Manually slide the Top bottom gear at Axial pipe to manually open the door 4 Remove the disc from the disc compartment Figure 2 16 Top bottom gear at A...

Страница 15: ...nnect the speakers and main unit to subwoofer TO DVD SYSTEM AM MW FM MW ANTENNA SPEAKERS COAXIAL DIGITAL IN AUX 1 AUX 2 RIGHT LEFT FM 75 R L MAINS SCART OUT TV1 HDMI OUT COMPONENT VIDEO OUT TO SUBWOOFER TV AUDIO IN TV 2 TO SUBWOOFER Y Pb Pr B LEFT RIGHT SPEAKERS A A Connect the left speaker to the SPEAKER LEFT socket and the right speaker to the SPEAKER RIGHT socket at the rear of the subwoofer B ...

Страница 16: ...O IN AUX1 or AUX2 sockets on the subwoofer to the AUDIO OUT sockets on the connected device for example DVD recorder VCR Cable Satellite Box MW FM MW ANTENNA TO MAIN UNIT SPEAKERS COAXIAL DIGITAL IN AUX 1 AUX 2 RIGHT LEFT FM 75 R L MAINS AUX 1 AUX 2 R L AUDIO OUT AUDIO OUT Note Press AUX DI on the remote control to select AUX1 or AUX2 as the source you want to listen to Main Unit rear Subwoofer re...

Страница 17: ... and 3 more screws attached to the AV plate 151 to dismantle the AV board 1020 as shown in figure 5 Figure 4 4 4 Mechanical Instructions 4 1 Dismantling of the Main Unit 4 1 1 Dismantling of USB HDMI AV AVIO SCART and IPOD boards 1 Remove rear cover 170 and remove 2 screws to detach the stand 161 162 163 164 165 as shown in Figure 1 Figure 4 1 2 Remove 6 screws to detach Rear Cabinet 158 as shown ...

Страница 18: ...050 it is necessary to remove the AV board first Then remove 3 screws to detach the IPOD board from the bracket 146 as shown in figure 6 Figure 4 6 E F 7 In order to dismantle the SCART board 1040 remove 2 screws attached to the Bracket 146 and 2 screws attached to the SCART plate 152 as shown in figure 7 Figure 4 7 G ...

Страница 19: ...and IPOD boards together with bracket 146 The mounting screws for the bracket 146 are shown in figure 8 Please keep in mind that the EMC Copper tape 153 shown in figure 9 should be at the correct place while assembling the set after repair Figure 4 8 Figure 4 9 H EMC Copper Tape 2 After removing the bracket 146 remove 4 mounting screws to dismantle the SD9 2 MPEG Board 1070 as shown in figure 10 F...

Страница 20: ...nting screws for boards of the Front Panel 1010 are shown in figure 11 Figure 4 11 4 1 4 Dismantling of the DVD mechanism 1 To dismantle the DVD mechanism 1080 the FFC dressing board should be removed first by removing 2 mounting screws 2 Then remove 4 screws and dismantle the DVD mechanism as shown in figure 12 Refer to Service Hints in chapter 2 for replacing the DVD mechanism Figure 4 12 J J J ...

Страница 21: ...oofer Figure 4 15 2 Remove1 screw for Tuner 1020 3 screws for Speaker Board 1060 and 1 screw for AIO board 1050 to detach them from the Rear Plate 230 Remove 1 screw attached to the Rear Plate 230 and 2 screws attached to the bracket 236 for dismantling of the Audio Board 1040 Mounting Screws are shown in figure 16 and figure 17 Subwoofer Figure 4 16 M N O O O O Subwoofer Figure 4 17 3 Remove 4 sc...

Страница 22: ... screws as shown in figure 19 and the bracket 236 remove 3 screws from both sides of the bracket 236 as shown in figure 20 and figure 21 Then detach the Bottom Plate Assembly 1030 161 from the Rear Plate 230 and remove 4 screws detach the PSU 1030 from the Bottom Plate 161 as shown in figure 22 Subwoofer Figure 4 19 Subwoofer Figure 4 20 Subwoofer Figure 4 21 Q Q Q Subwoofer Figure 4 22 R ...

Страница 23: ...SB and AV Boards HDMI Board Insulation Sheet MPEG Board SCART Board I n s u l a t i o n S h e e t IPOD Board USB Board AV Board Figure 4 25 Service Position 3 Front Boards Figure 4 26 Power Box Service Position 4 Amplifier Module and Speaker Board Front Key Board IR Board White LED Board Front Display Board Remove Screw Detach Cutsheet FFC Foil Insulation Sheet Speaker Board Amplifier Module ...

Страница 24: ...antling Instructions Service Positions Figure 4 27 Power Box Service Position 5 Audio Board IO Board and Speaker Board Figure 4 28 Power Box Service Position 6 PSU Insulation Sheet Speaker Board AV Board IO Board Insulation Sheet ...

Страница 25: ...umber of Front uP counting up from 01 to 99 5 1 Display Test Purpose This test is used to check the driving circuits the display and whether there are any short circuits open circuits or any other defects Display test key Player Following display patterns are used to test the display and its connections to μP Pattern 1 Default All display control pins are ON All LEDs are ON to check the open circu...

Страница 26: ...hive into the root directory of the new CD project 4 Burn the data onto a blank CDR or CDRW Note ISO9660 is mandatory UDF discs are not supported The final CDROM must not contain any other data except the file from the zip archive 5 1 4 Procedure to upgrade the firmware 1 Power up the set and open tray 2 Insert the prepared Upgrade CDROM and close the tray 3 The OSD will Display Upgrade file detec...

Страница 27: ... 15 5V 3V3 16 PCM_Cs 17 5V 1V8 18 PCM_LRCK 19 GND 20 SCLK 21 GND 22 PCM_MCLK 23 GND 24 Reserved 25 Reserved 26 Reserved 50P 0 5 FFC H 26P 0 5 FFC H 1 PCM_MCLK 2 GND 3 PCM_BCLK 4 AUX_IN DAC_STB 5 PCM_LRCLK 6 GND 7 PCM_DATA0 8 GPO0 S0 9 GPO1 S1 10 GND 11 SPDIF_OUT 12 CVBS_REF 13 CVBS_DVD 14 G_REF 15 G_Y 16 B_REF 17 B_U 18 R_REF 19 R_V 20 GPIO_4 SEL_0 21 GPIO_5 SEL_1 22 SCL_0 VSCK not used 23 SDA_0 V...

Страница 28: ...AF180 1 25V 3V3 3V3 3V3 I2S_SPDIF_DATA Coxial Input SPDIF0 5V6 5V6 3V3 5VL SPDIFIN1 EEPROM RDS Micro Controller SCL1 SDA1 TPA5050 TPA5050 Delay IC Delay IC I2S_D_Data 3V3 3V3 3V3 FM_DET From Tuner 5VL 3V3 3V3uP I2S Data I2S_MCLK I2S_SCLK I2S_LRCLK FREQ_HOP AMP_RST AMP_ERR AMP NTC SEL0 SEL1 AUDIO BOARD SPDIF1 RST_ADC Buffer 74LVC1G125GW OSC DSO751SV EXTAL Buffer 74LVC1G32GW XT1 RST_AK4113 RST _DSP ...

Страница 29: ... C 5 4 D N G 4 W S _ L 4 2 1 L R T C _ E T U M 5 1 1 _ L C S 1 4 D N G 6 4 0 C 5 D E L S 5 2 2 L R T C _ E T U M 6 1 D N G 2 4 2 C 7 4 D N G 6 D E L S 6 2 D N G 7 1 X R _ U C M 3 4 D N G 0 2 8 4 C N Y S H 7 2 D E S U T O N Y 8 1 X T _ U C M 4 4 1 C 1 2 9 4 E D B S U 8 2 D N G 9 1 Q R I _ U C M 3 _ O I P G 5 4 D N G 2 2 0 5 C N Y S V 1 D N G 9 2 D E S U T O N C 0 2 t e D _ e n i L 2 _ O I P G 6 4 0...

Страница 30: ...600 1207 is inserted 20 FREQ_HOP HTS5950 1206 is inserted 1208 and 1206 is at same location optional insertion 1302 1206 hts5950 5P FFC 1 25 8P FFC 1 25 1 SPDIF_IN1 Remarks HTS8100 6600 5950 1305 is inserted 1 FRONT 1101 2 GND HTS6000 1302 is inserted 2 SUR 12P EH 7P FFC 1 25 3 SPDIF_IN0 3 CEN 1 SR 1 SPDIF_IN1 4 GND 4 GND 2 SR 2 GND 5 SPDIF_OPT 5 3 3V VREF 3 SL 3 SPDIF_IN0 6 GND 6 SPK_CTRL 4 SL 4 ...

Страница 31: ... 9 G 4 2 1 G 5 1 0 1 G 4 1 1 1 G 3 1 2 1 G 2 1 3 1 G 1 1 4 1 G 0 1 5 1 G 9 6 1 G 1 1 F 2 1 F 2 3 1 F 4 5 4 1 F 3 5 7 2 1 2 F 2 2 F 6 2 3 2 F 9 2 4 2 F 8 2 LCD 16 BT 145GN 1108 1 p 0 3 3 0 0 1 2 n 0 0 1 2 3 1 2 100p 2155 F132 6 1 1 2 n 0 0 1 p 7 4 3 0 1 2 2154 100p 5 1 2 3 4 F133 1111 S5B EH 100p 2149 100p 2147 2 R 2 6 3 1 3 F112 7 0 1 3 3 K 3 330R 3133 3110 10R F122 7 0 1 2 n 0 0 1 7 2 1 3 K 0 1 3...

Страница 32: ...3n 2211 5 1 47n 2202 19 20 1 3 8 13 18 2 4 5 6 7 9 10 11 12 14 16 17 IOEXP PCF8574TS F3 7201 7206 BC847B 3200 220R 7 0 2 2 7 u 4 6205 BAS316 7204 BC847B p 0 0 1 0 0 2 2 5 0 2 2 7 u 4 9 0 2 2 7 u 4 6207 BAS316 4 BC847B 7207 6 0 2 1 H H K S 1 2 3 7 u 4 8 0 2 2 1 2 3 4 BAS316 6206 2 3 4 H H K S 4 0 2 1 4 3 0 2 1 H H K S 1 H H K S 2 0 2 1 1 2 3 6203 BAS316 8 1 2 3 9 K 3 9 K 3 6 1 2 3 5 1 2 3 9 K 3 322...

Страница 33: ...302 WH04D 1 1 2 3 T304 3 4 5 6 1 10 11 2 1305 EJ 3507P 102 PHA 600R 5305 5304 600R 600R 5303 4 0 3 2 p 0 1 p 0 1 3 0 3 2 1 2 3 4 5 6 p 0 1 5 0 3 2 E CK0382 001 1303 2 0 3 2 V 5 2 u 0 1 n 0 0 1 1 0 3 2 600R 5301 1 2 3 4 600R S4B PH K 1304 5302 T308 T306 T307 T305 4302 4301 T302 T301 annot_deleted GND 5V T303 3139 243 35885 130 03 a4 pdf 2006 12 22 Front Board Circuit Diagram Part 4 C A B C 1400 B2 ...

Страница 34: ...C 1500 B2 1501 B1 F501 B2 F502 B2 1 2 3 1 2 3 A B F502 1 2 F501 S2B EH 1501 SPVF 1500 3139 243 35885 130 05 a4 pdf 2006 12 22 Front Board Circuit Diagram Part 6 2 A A 1600 A1 6600 A2 F601 A1 F602 A1 F602 1 2 1 F601 6600 L 174A2PWC A TNB5 19 1600 S2B EH 1 2 3139 243 35885 130 06 a4 pdf 2006 12 22 ...

Страница 35: ... 0 7 2 7 u 4 1 0 7 2 n 0 0 1 7701 TSOP4836 2 GND 1 OUT 3 VS 1 2 3 3701 100R 1701 S3B EH 3139 243 35885 130 07 a4 pdf 2006 12 22 Front Board Circuit Diagram Part 8 F803 B C 1801 A1 2801 A2 2802 A3 1 2 3 1 2 3 A B C A 3801 A2 7801 B1 F801 A2 F802 A2 F803 A2 F804 B2 F802 F801 7 u 4 2 0 8 2 F804 GND 2 OUT 1 VS 3 n 0 0 1 1 0 8 2 TSOP4836 7801 2 3 100R 3801 S3B EH 1801 1 3139 243 35885 130 08 a4 pdf 200...

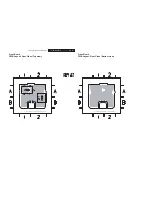
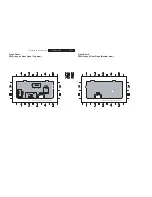
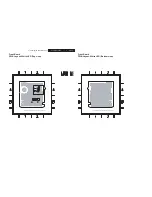
Страница 36: ...30 Door Close 3139 243 36126 top a4 pdf_2007 02 13 Front Board PWB Layout Door Close Top view Door Close 3139 243 36126 bot a4 pdf_2007 02 13 Front Board PWB Layout Door Close Bottom view 7 Circuit Diagram and PWB Layout ...

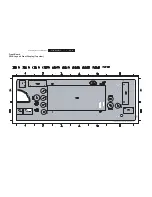
Страница 37: ...2530 Door Open 3139 243 36086 top a4 pdf_2007 02 13 Front Board PWB Layout Door Open Top view Front Board PWB Layout Door Open Bottom view Door Open 3139 243 36086 bot a4 pdf_2007 02 13 7 Circuit Diagram and PWB Layout ...

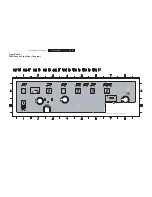
Страница 38: ...EN 38 3139 785 32530 Front Display 3139 243 35876 top a3 pdf_2007 02 13 Front Board PWB Layout Front Display Top view 7 Circuit Diagram and PWB Layout ...

Страница 39: ...EN 39 3139 785 32530 Front Board PWB Layout Front Display Bottom view Front Display 3139 243 35876 bot a3 pdf_2007 02 13 7 Circuit Diagram and PWB Layout ...

Страница 40: ...EN 40 3139 785 32530 Front Board PWB Layout Front Key Top view Front Key 3139 243 35896 top a3 pdf_2007 02 13 7 Circuit Diagram and PWB Layout ...

Страница 41: ...EN 41 3139 785 32530 Front Board PWB Layout Front Key Bottom view Front Key 3139 243 35896 bot a3 pdf_2007 02 13 7 Circuit Diagram and PWB Layout ...

Страница 42: ... 42 3139 785 32530 Front Board PWB Layout IR Top view IR 3139 243 36366 top a4 pdf_2007 02 13 Front Board PWB Layout IR Bottom view IR 3139 243 36366 bot a4 pdf_2007 02 13 7 Circuit Diagram and PWB Layout ...

Страница 43: ...2530 Front Board PWB Layout White LED Top view White LED 3139 243 36316 top a4 pdf_2007 02 13 Front Board PWB Layout White LED Bottom view White LED 3139 243 36316 bot a4 pdf_2007 02 13 7 Circuit Diagram and PWB Layout ...

Страница 44: ...4 3139 785 32530 Front Board PWB Layout USB Top view USB 3139 243 36096 top a4 pdf_2007 02 13 Front Board PWB Layout USB Bottom view USB 3139 243 36096 bot a4 pdf_2007 02 13 7 Circuit Diagram and PWB Layout ...

Страница 45: ...L0 2 SCL1 7 SDA0 3 SDA1 6 VCC 8 GND_D 7110 PCA9515ADP EN 5 GND 4 NC 1 F113 F117 GND_D GND_D 3 2 1 2 7 n 2 F104 p 0 7 4 6 0 1 2 9 K 0 1 4 3 1 3 13 2 3 4 5 6 7 8 LAC1315 0102FC 1100 1 10 11 12 5 3 1 3 7 K 4 F102 BC817 25W 7106 GND_D F115 F121 7 1 1 2 p 0 7 4 F128 V 0 1 u 0 7 4 2 2 1 2 F127 F124 6 1 1 2 p 0 7 4 7 2 1 2 p 0 2 2 7 8 9 6106 MBRA210L S9B EH 1102 1 2 3 4 5 6 120u 5103 F112 8 1 1 2 p 0 7 4...

Страница 46: ... 3 1 2 3 4 1 2 3 F217 8 K 1 4208 4207 1 0 2 3 R 0 5 1 2 3 4 5 6 7 8 9 1204 HLEM16R 1 1 10 11 12 13 14 15 16 6R8 F231 3221 F218 3222 4R7 V F214 2 4200 7203 1 3 4205 BC847BW 4204 R 0 5 1 3 0 2 3 2 0 2 2 p 7 4 2 0 2 3 R 0 5 1 5202 1u8 9 0 2 2 p 0 0 1 1 2 3 4 5 6 F210 LPR6520 P910F 1203 F230 F219 F229 F204 F201 F200 F202 V 1 1 2 2 p 0 0 1 p 7 4 3 0 2 2 5201 1u8 5200 1u8 47p 2219 F228 p 7 4 1 0 2 2 F22...

Страница 47: ... 3 1 3 2 2317 12A n 0 0 1 0 2 3 3 K 0 0 1 p 0 2 2 9 4 3 2 F302 0 5 3 2 p 0 2 2 GND 5306 30R 5VA GND_A 6 1 3 S A B 2 0 3 6 2 0 3 4 GND_A F324 K 0 0 1 4 3 3 3 K 0 0 1 9 2 3 3 8 2 3 2 GND_A 0 u 1 V 0 1 GND_A 1u0 2314 3 2 1 8 4 7304 1 LM833D GND 3 K 3 6 6 3 3 8 4 3 2 5 n 1 0 2 3 2 2 u 2 GND_A 3347 10u 2 3 4 5 6 7 8 9 10 11 12 13 14 15 16 17 18 1303 HLW18R 2C7 1 9 6 3 2 2 u 2 4304 8 K 6 3 1 3 3 8 0 3 2...

Страница 48: ...EN 48 3139 785 32530 7 Circuit Diagram and PWB Layout PWB Layout AV Board Top view AV 3139 243 35847 top a3 pdf_2007 02 13 ...

Страница 49: ...EN 49 3139 785 32530 7 Circuit Diagram and PWB Layout PWB Layout AV Board Bottom view AV 3139 243 35847 bot a3 pdf_2007 02 13 ...

Страница 50: ... S V D 0 9 7 1 A 1 9 0 A O I 2 9 8 1 D D V D 9 7 8 MA 0 8 1 D A S S V D 1 8 2 D A 2 8 3 8 3 D A 4 D A 4 8 5 D A 5 8 6 D A 4 A H G I H 2 7 3 A H G I H 2 A H G I H 3 7 4 7 1 A H G I H 0 2 A O I 5 7 6 7 S C O I 7 7 1 A O I 8 7 E O O I 0 D A 5 6 3 D D V D R W O I 6 6 7 6 6 1 A 7 A H G I H 8 6 9 6 6 A H G I H 7 DVDRFIN 0 7 5 A H G I H 1 7 58 IOA4 59 IOA5 6 DVDRFIP IOA6 60 IOA7 61 62 HIGHA0 63 IOA18 IOA...

Страница 51: ...26 27 28 29 3 12 13 14 15 16 17 18 19 2 20 1201 1 10 11 1 2 3 6 5 8 4 7 HLEM30R 1RLF 2Kx8 Φ EEPROM 7212 M24C16 RDW6TP 2222 22p 22R 3230 T236 BLM18P 5209 2246 100n T235 T251 3275 2 33R 7211 BSH103 3 1 T220 T237 4223 4218 7 6 2 3 R 0 5 1 22R 3279 100n 2252 DV33 0 K 1 4 2 2 3 T242 p 7 4 3 0 2 2 5VC 3 1 5 4 T213 D 74LVC1G125GW 7214 2 7207 T241 BC817 25W DV33 T238 22p 2230 3217 33R DV33 T205 7204 BC817...

Страница 52: ...4314 46 47 48 49 5 50 6 7 8 9 35 36 37 38 39 4 40 41 42 43 44 45 26 27 28 29 3 30 31 32 33 34 16 17 18 19 2 20 21 22 23 24 25 1 10 11 12 13 14 15 62684 501100A 1302 9 4 3 2 n 0 0 1 9 1 3 T 33p 2351 0 4 3 2 n 0 0 1 n 0 0 1 2 4 3 2 4337 4338 3 4 3 4 33p 2352 2363 33p 5304 BLM18P T323 2354 33p 47K 3338 T321 4340 T343 2364 33p n 0 0 1 2 3 3 2 T352 p 0 1 5 3 3 2 4304 T333 33p 2365 33p 2362 p 0 1 3 4 3 ...

Страница 53: ...EN 53 3139 785 32530 7 Circuit Diagram and PWB Layout PWB Layout SD 9 2 Board Top view SD9 2 3139 243 35826 top a3 pdf_2007 02 13 ...

Страница 54: ...EN 54 3139 785 32530 7 Circuit Diagram and PWB Layout PWB Layout SD 9 2 Board Bottom view SD9 2 3139 243 35826 bot a3 pdf_2007 02 13 ...

Страница 55: ...2 1 3 7 K 2 F144 3128 F130 22R 3130 22R 22R 3131 10p 2130 F101 F140 5 1 2 5 2 1 3 7 K 2 74HCT1G66GW 7105 4 3 V 6 1 u 7 4 5 1 1 2 0 1 1 2 n 0 0 1 2 2 1 3 7 K 4 100n 2119 9 0 1 2 n 0 0 1 BLM18P 5102 60R 4 5 4 1 7 6 2 4 1 7 3 7106 2 74LVC08APW 7106 1 74LVC08APW 1 12 13 4 1 7 11 7106 4 74LVC08APW 2117 4n7 3112 10K 9 10 4 1 7 8 F115 7106 3 74LVC08APW F154 F152 F150 F113 22R 3129 5 3 1 2 7104 74HCT1G66G...

Страница 56: ...EN 56 3139 785 32530 7 Circuit Diagram and PWB Layout PWB Layout HDMI Board Top view HDMI 3139 243 35914 top a4 pdf_2007 02 13 ...

Страница 57: ...EN 57 3139 785 32530 7 Circuit Diagram and PWB Layout PWB Layout HDMI Board Bottom view HDMI 3139 243 35914 bot a4 pdf_2007 02 13 ...

Страница 58: ... u 7 4 2109 4u7 4u7 2105 8 0 1 2 p 0 3 3 p 0 3 3 7 0 1 2 F129 F124 _ D N G _ A A GND GND 3125 _ D N G _ A A AA_GND_ AA_GND_ K 0 0 1 1K0 5105 F110 0 2 1 2 p 0 0 1 F123 V 3 6 u 7 4 4 1 1 2 GND F115 AA_GND_ R 0 1 0 3 1 3 5107 1K0 AA_GND_ 5108 1K0 5102 600R GND GND 2133 2u2 3 0 1 3 2 K 1 2u2 2132 p 0 0 1 3 2 1 2 7104 BC857B 8 1 1 2 n 0 0 1 3120 330R 5104 1K0 600R 3127 5101 3 0 1 2 p 0 2 2 0 K 1 p 0 2 ...

Страница 59: ... 4 5 6 7 8 9 23 24 25 26 15 16 17 18 19 2 20 21 22 3 1 10 11 12 13 14 CSS 5022 0599F 1200 4K7 3206 6 1 2 2 p 0 7 4 5_MCU 5_MCU GND 5_MCU F215 7 K 4 5 5 2 3 1 0 2 2 GND 3 4 GND 9 p 3 BC847BS 7202 2 5 5_MCU 3V3 F203 GND 7 2 2 3 7 K 4 K 0 1 1 3 2 3 7 K 4 1 2 2 3 7213 3 1 2 BSN20 5_MCU 3V3 9 1 2 2 p 0 0 1 p 0 0 1 8 1 2 2 p 0 7 4 7 1 2 2 GND 4K7 3220 3228 100R 4 5 3226 4K7 B5B PH K 1201 1 2 3 GND F206 ...

Страница 60: ...EN 60 3139 785 32530 7 Circuit Diagram and PWB Layout PWB Layout IPOD Board Top view IPOD 3139 243 35865 top a4 pdf_2007 02 13 ...

Страница 61: ...EN 61 3139 785 32530 7 Circuit Diagram and PWB Layout PWB Layout IPOD Board Bottom view IPOD 3139 243 35865 bot a4 pdf_2007 02 13 ...

Страница 62: ...D_V 2 0 1 2 p 0 8 6 22n 2108 GND_A GND_A 3108 GND_V 3 4 5 6 7 8 9 1K0 10 11 12 13 14 15 16 17 18 2 1101 18FE BT VK N 1 3107 F102 1K0 F100 F101 F107 F104 F106 F105 2 0 1 3 K 0 0 1 7102 BC847B p 0 8 6 1 0 1 2 1K0 3103 F103 K 0 0 1 4 0 1 3 7 n 4 4 0 1 2 GND_V 1K0 BC847B 7101 GND_A GND_V 3101 5 0 1 3 K 0 0 1 K 0 0 1 6 0 1 3 1102 2 MT MRC 021V 29 PC 22 23 3 4 5 6 7 8 9 12 13 14 15 16 17 18 19 2 20 21 M...

Страница 63: ...EN 63 3139 785 32530 7 Circuit Diagram and PWB Layout PWB Layout SCART Board Top view SCART 3139 243 35802 top a4 pdf_2007 02 13 ...

Страница 64: ...EN 64 3139 785 32530 7 Circuit Diagram and PWB Layout PWB Layout SCART Board Bottom view SCART 3139 243 35802 bot a4 pdf_2007 02 13 ...

Страница 65: ... 33R 10K 3117 100R 3106 10p 2105 3148 33R 8 1 9 1 0 2 1 2 1 3 4 3 1 16 2 15 5 6 7 8 9 14 7 1 7109 TPA5050 Φ 10 11 12 4K7 3109 2115 470n 8 1 9 1 0 2 1 2 1 3 4 3 1 16 2 15 5 6 7 8 9 14 7 1 Φ TPA5050 7111 10 11 12 100R 3185 3121 33R 33R 3118 47R 3103 3105 R 0 0 1 V 6 1 2 2 1 2 u 0 1 100n 2139 3163 10K K 5 1 0 5 1 3 6 3 1 2 n 0 0 1 4 4 1 3 K 0 0 1 3179 100R 3 4 1 2 n 0 0 1 10K 3108 3145 33R 59 37 32 3...

Страница 66: ...33R F255 p 2 2 6 0 2 2 F247 5200 7 3 2 2 p 2 2 BLM18P 6 3 2 2 p 2 2 K 0 1 0 5 2 3 1 1 2 3 K 0 1 3247 100R 8 3 2 2 n 0 0 1 6201 BAS316 F212 BC857B 7216 4207 3244 100R 4206 8 0 2 3 7 K 4 1 2 3 4 5 6 7 8 1206 08FE BT VK N 22R 3252 3220 1K0 F216 5 K 1 4 6 2 3 100n 2207 3253 100R 2 20 3 4 5 6 7 8 9 1 10 11 12 13 14 15 16 17 18 19 20FE BT VK N 1202 3277 100R 3219 100R 3 2 2 2 p 0 1 p 0 1 4 1 2 2 K 0 1 3...

Страница 67: ...00R 3340 3338 100R F311 V 6 1 u 0 1 GND_A GND_A 2303 600R 5302 F329 2321 1u0 5300 600R GND_A 100R 3339 GND_A F323 2330 1u0 3312 8 3 3 2 p 0 1 5K6 p 8 6 2326 V 6 1 u 0 1 2300 2346 10p n 0 0 1 1 0 3 2 F312 u 0 1 V 6 1 0 1 3 2 GND_A GND_A GND_A 8 0 3 3 K 2 1 GND_TU p 5 1 0 2 3 2 2322 p 8 6 GND_A F302 p 0 0 1 3 2 3 2 1 2 3 4 5 6 7 8 08FE BT VK N 1302 F303 U T _ D N G GND_A U T _ D N G 1u0 2324 50V 2u2...

Страница 68: ...A B D E A B C D 3 4 5 F405 1400 B5B EH A 1 2 0 0 4 3 R 0 6 5 2409 F402 u 0 1 V 6 1 F403 1 3 2 4 GND_A LD1117S33 7410 220R 5405 7400 PBSS5220T F408 7401 BC847B V 6 1 4402 2413 u 0 1 BC847BW 7409 K 6 5 3411 F412 12 2 3 4 5 6 7 8 9 B12B EH A 1401 1 10 11 30R 5400 F 2 0A 1406 1 2 220R 3420 1402 B2B EH A F413 F410 K 0 1 6 1 4 3 F409 F 1A 1409 F404 GND_A F407 5403 220R 3414 10R F411 220R 5402 3413 2401 ...

Страница 69: ...EN 69 3139 785 32530 Power Box PWB Layout AV Board Top view Power Box AV Board 3139 243 36064 top a3 pdf_2007 02 09 7 Circuit Diagram and PWB Layout ...

Страница 70: ...EN 70 3139 785 32530 Power Box AV Board 3139 243 36064 bot a3 pdf_2007 02 09 Power Box PWB Layout AV Board Bottom view 7 Circuit Diagram and PWB Layout ...

Страница 71: ...B4 2100 A2 2101 A2 2104 C1 2105 A4 3100 A1 3102 C2 5100 B1 7100 B1 2105 10p 2 OUT 3 VS 1 10u 5100 JFJ2000 010111 7100 GND 2100 100n 1103 05FE BT VK N 1 2 3 4 5 2104 100u 16V 100R 3102 p 7 4 1 0 1 2 1102 B2B EH A 1 2 R 2 8 0 0 1 3 2 1 2 3 4 5 6 7 8 LPR6520 K410G 1100 08FE BT VK N 1101 1 5VL 5VL 3139 243 36242 130 01 a4 pbx pdf 2007 01 26 ...

Страница 72: ... 32530 7 Circuit Diagram and PWB Layout PWB Layout AIO Board Top view Power Box AIO Board 3139 243 36242 top a4 pdf_2007 02 09 PWB Layout AIO Board Bottom view Power Box AIO Board 3139 243 36242 bot a4 pdf_2007 02 09 ...

Страница 73: ... 5 1 4 2 0 n 1 4 2 4 2 n 0 1 5 2 4 2 3 R 3 2 2 4 3 3 2 4 2 n 0 1 1 2 3 4 2405 100n 04FE ST VK N 1402 1 2 3 4 5 6 1 770969 0 1406 6404 BAS316 9 1 4 3 3 R 3 3406 100K 3411 100K 4 5 6 7 8 9 1 10 11 12 2 3 WH12D 1 1403 2400 470n 3 R 3 7 1 4 3 0 M 1 4 1 4 3 0 M 1 8 0 4 3 0 M 1 2 0 4 3 0 n 1 8 2 4 2 2 1 4 3 0 M 1 11 12 2 3 4 5 6 7 8 9 S12B EH 1401 1 10 8 1 4 3 3 R 3 3 R 3 1 2 4 3 2408 470n 0 n 1 2 1 4 2...

Страница 74: ... Circuit Diagram and PWB Layout PWB Layout Speaker Board Top view Power Box Speaker Board 3139 243 36223 top a4 pdf_2007 02 09 PWB Layout Speaker Board Bottom view Power Box Speaker Board 3139 243 36223 bot a4 pdf_2007 02 09 ...

Страница 75: ...EN 75 3139 785 32530 8 Exploded View 8 1 Main Unit Exploded View Figure 8 1 8 Exploded View Spare Parts List 3139 249 4105 110 pdf 2006 09 08 ...

Страница 76: ...EN 76 3139 785 32530 8 Exploded View Spare Parts List 8 2 Power Box Exploded View Figure 8 2 3139 249 40841 110 01 A1 pbx pdf 2006 10 06 ...

Страница 77: ...P MIS 26OS 8004 313911102931 CBLE MIS 04P 080 04P MIS 26OS 8005 313911027881 CBLE PH 06P 180 06P PH 26ST BK 8007 313911027731 CBLE PH 04P 080 04P PH 26ST BK 8008 313911102731 CBLE MIS 02P 080 02P MIS 26OS 8009 313911102821 CBLE MIS 03P 080 03P MIS 26OS 8010 313924100391 FFC FOIL 24P 280 24P AD0 5MMP 8011 313924103291 FFC FOIL 18P 340 18P AD FOLD 8013 313924103451 FFC FOIL 30P 220 30P AD FOLD 8014 ...

Отзывы: