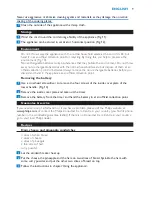
Note: During the cooking process, the green ready-to-cook light goes out and the red heating-up light
goes on from time to time. This indicates that the heating elements switch on and off to maintain the
correct temperature.
8
Open the sandwich maker after -5 minutes to check whether the sandwiches are golden
brown.
The cooking time depends on the type of bread and the filling and on how crispy and brown you
want your toasted sandwiches to be.
9
Remove the sandwiches with a wooden or plastic utensil (e.g. a spatula). (Fig. 9)
Do not use metal, sharp or abrasive kitchen utensils, as they damage the non-stick coating.
10
If you want to make more sandwiches, wait until the red heating-up light goes out and the
green ready-to-cook light goes on. Then put new sandwiches in the sandwich maker.
11
Unplug the sandwich maker after use.
timer
The timer indicates the end of the cooking time, but does NOT switch off the appliance.
setting the timer
1
Press the timer button to set the cooking time in minutes (Fig. 10).
’00’ appears on the display.
Keep the button pressed to set the minutes forward quickly. Release the button once the
required cooking time has been reached.
The maximum time that can be set is 14 minutes.
A few seconds after you have set the cooking time, the timer starts to count down.
Note: If the preset time is not correct, you can erase it by pressing the timer button for 2 seconds when
the timer starts to count down (i.e. when the time starts to flash). Keep the button pressed until ‘00’
appears on the display. You can now set the correct cooking time.
While the timer counts down, the remaining cooking time flashes on the display. The last
minute is displayed in seconds.
When the preset time has elapsed, you hear an audible signal. After 10 seconds the audible
signal is repeated.
Press the timer button to stop the audible signal.
Cleaning
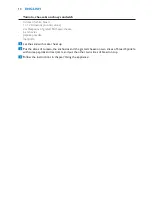
Never immerse the appliance in water nor rinse it under the tap.
1
Unplug the sandwich maker.
Let the sandwich maker cool down completely in open position.
Remove any sticky food residues (e.g. solidified cheese) from the cooking plates with a
wooden or plastic spatula.
Remove excess oil from the cooking plates with a piece of kitchen paper before you remove
them.
5
Remove the cooking plates from the appliance.
6
Clean the cooking plates with a soft cloth or sponge in hot water with some washing-up
liquid or put them in the dishwasher.
,
,
,
,
EnglisH
8
Содержание HD2415/80
Страница 1: ...HD2415 ...
Страница 2: ... ...
Страница 3: ... I C D E G H 1 ...
Страница 4: ... ...
Страница 82: ...82 2 3 4 5 6 7 8 9 10 11 12 13 14 ...
Страница 83: ...83 ...
Страница 84: ...4222 002 6182 3 ...


