background image

33

English

3140 115 29791

WARNING
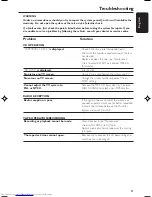
Under no circumstances should you try to repair the system yourself, as this will invalidate the
warranty.  Do not open the system as there is a risk of electric shock.

If a fault occurs, first check the points listed below before taking the system for repair. If you
are unable to solve a problem by following these hints, consult your dealer or service centre.

Problem

Solution

CD OPERATION

UNREADABLE DISC

 is displayed.

– Check if the disc is inserted upside down.
– Wait until the moisture condensation at the lens

has cleared.

– Replace or clean the disc, see “Maintenance”.
– Use a finalised CD-RW or a correct MP3-CD

format disc.

NO DISC

 is displayed.

– Insert a disc.

No picture on TV screen.

– Connect the cable betwen the system and TV.

No colour on TV screen.

– Change the system to the respective PAL or

NTSC setting.

Cannot adjust the TV system to

– Remove the MP-3 CD from disc tray 1 or press

PAL or NTSC.

DISC CHANGE to select a non MP3 disc tray

RADIO RECEPTION

Radio reception is poor.

– If the signal is too weak, adjust the antenna or

connect an external antenna for better reception.

– Increase the distance between the Mini HiFi

System and your TV or VCR.

TAPE OPERATION/RECORDING

Recording or playback cannot be made.

– Clean deck parts, see “Maintenance”.

Use only NORMAL (IEC I) tape.

– Apply a piece of adhesive tape over the missing

tab space.

The tape deck door cannot open.

– Remove and reconnect the AC power plug and

switch on the system again.

Troubleshooting

Содержание FW-V330

Страница 1: ...1 Mini Hi Fi System FW V330 FW V330 ...

Страница 2: ...optimum disc playability This is an important parameter for CD players other than CD Audio and especially for theVideo CD applications because any loss of data from the disc will at best cause disturbances in the reproduced picture and at worst can cause the player to lose track so that disc playing fails Presenting Super Error Correction To ensure consistently good results when playing Video CD d...

Страница 3: ...3 1 2 6 4 5 7 8 9 0 3 3 ...

Страница 4: ...4 CAUTION Use of controls or adjustments or performance of procedures other than herein may result in hazardous radiation exposure or other unsafe operation ...

Страница 5: ...5 E n g l i s h Bahasa Melayu Bahasa Indonesia Index English 6 35 Bahasa Melayu 64 Bahasa Indonesia 93 ...

Страница 6: ...perations Adjusting the TV system 20 On screen display OSD 20 Playing a video CD with PBC functions 21 Returning to menu screen 21 Quick review 21 Playing a specific passage repeatedly 22 Resume playback from the last stop point 22 Picture effect 22 Slow Zoom Changing vocal 23 Adjusting the microphone echo 23 Adjusting the key tone 23 Radio Reception Tuning to radio stations 24 Storing preset radi...

Страница 7: ...k that the operating voltage indicated on the typeplate or the voltage indication beside the voltage selector of your system is identical with the voltage of your local power supply If not please consult your dealer Place the system on a flat hard and stable surface Place the system in a location with adequate ventilation to prevent internal heat build up in your system Allow at least 10 cm 4 inch...

Страница 8: ... equipped with a Voltage Selector set theVOLTAGE SELECTOR to the local power line voltage All other connections have been made WARNING For optimal performance use only the original power cable Never make or change any connections with the power switched on B Antennas Connection Connect the supplied AM loop antenna and FM antenna to the respective terminals Adjust the position of the antenna for op...

Страница 9: ...ence with the picture on yourTV do not position the front speakers too close to theTV E Connecting other equipment to your system Use a cinch cable to connect AUX CDR IN to the analogue audio out terminals of an external equipment TV VCR Laser Disc player DVD player or CD Recorder Note If you are connecting equipment with a mono output a single audio out terminal connect it to the AUX CDR IN left ...

Страница 10: ...ape to start playback for Plug Play on the system only to initiate and start plug play mode SEARCH TUNING à ALBUM SEARCH TUNING á ALBUM for MP3 CD to select previous next album forVCD to move the zoomed picture to the left or right for CD VCD to search backward forward forTuner to tune to a lower or higher radio frequency forTape to rewind or fast forward for Clock on the system only to set the ho...

Страница 11: ...ecording MASTERVOLUME VOLUME to increase or decrease the volume Display screen to view the current status of the system Disc tray VCD operations on remote control only OSD to switch on or off the On Screen Display on theTV ZOOM to enlarge a still picture of theVCD on theTV screen RESUME to continue playback again from where you have stopped forVCD with PBC switched off VOCAL to fade out the origin...

Страница 12: ...s on the remote control for exampleTAPE 1 2 TUNER Then select the desired function for exampleÉ í ë REPEAT to playback track disc programme repeatedly Numeric keys 0 9 numbers consisting more than two figures must be keyed in within 2 seconds to direct key in a track number for CD VCD MP3 CD ª B to switch the system to standby mode 27 ...

Страница 13: ...red or the memory for 40 presets are used the last preset radio station will be played To reinstall Plug and Play 1 In standby or demonstration mode press and holdÉ Åon the system until AUTO INSTALL PRESS PLAY is displayed 2 PressÉ Åagain to start installation All previously stored radio stations will be replaced To exit without storing the Plug and Play Press Çon the system If you do not complete...

Страница 14: ...APE 1 2 or AUX Press OPEN CLOSE The system will switch to CD mode Switching the system to standby mode In demonstration mode Press and hold Ç on the system In any other source mode Press STANDBY ON or B on the remote control The clock will appear on the display when the system is in standby mode Dim mode You can select the desired brightness for the display In any source mode except standby mode p...

Страница 15: ...three DBB settings to enhance the bass response 1 Press DBB The selected DBB is shown except for DBB OFF mode 2 Adjust the jog control or press DBB on the remote control repeatedly to select DBB 1 DBB 2 DBB 3 or DBB OFF Note Some discs or tapes might be recorded in high modulation which causes a distortion at high volume If this occurs switch off DBB or reduce the volume Basic Functions Automatic ...

Страница 16: ...rded video CDs MP3 CDs CD ROMs with MP3 tracks Make sure filename ends with mp3 About MP3 disc Supported formats ISO9660 Joliet Multisession Max track number plus album is 255 Max nested directory is 8 levels The max album number is 32 The max MP3 programme track number is 99 SupportedVBR bit rate Supported sampling frequencies for MP3 disc are 32 kHz 44 1 kHz 48 kHz Supported Bit rates of MP3 dis...

Страница 17: ...o one disc Playing discs a disc is loaded in the disc tray the current selected disc tray is empty the current selected disc tray is loaded or playing To play all discs on the disc tray PressÉ Å All the available discs will play once then stop During playback the selected disc tray track number and elapsed playing time of the current track are displayed For MP3 disc TITLE is shown For mixed mode d...

Страница 18: ...r MP3 CD and 99 for VCD CD Selecting a desired Album Title MP3 disc only To select a desired album Press ALBUM à or á repeatedly ALB starts flashing and the album s name will scroll through the display once To select a desired title Press TITLE repeatedly à á or numeric keys 0 9 on the remote control TITLE starts flashing and the title s name will scroll through the display once Repeat play You ca...

Страница 19: ... MP3 disc total playing time will not be shown 7 To start programme play pressÉ Å PLAY PROGRAM is displayed Notes To programme from a video CD the PBC mode has to be switched off It is not possible to create a programme with MP3 tracks from multiple CDs or combined with normal audio tracks If the total playing time is more than 99 59 then is displayed instead of the total playing time If you attem...

Страница 20: ...ure that there is no MP3 CD in disc tray 1 during power up On screen display OSD If you are playing a video CD yourTV screen will able to display the messages of the current operating status for example PLAY STOP and the information stored in the disc Press OSD on the remote control repeatedly to switch on or off the On Screen Display mode When OSD is switched on you can see the following display ...

Страница 21: ...D disc menu level PBC mode must be switched on Quick review This feature allows you to scan through aVCD for a quick review PBC mode must be switched off There are four digest modes for selection 1 Press DIGEST on the remote control DIGEST is displayed 1 INTRO SCAN 2 DIGEST DISC 3 DIGEST TRACK and 4 EXIT DIGEST MENU appear onTV screen 1 INTRO SCAN 2 DIGEST DISC 3 DIGESTTRACK 4 EXIT DIGEST MENU Pre...

Страница 22: ... start playback again from where you have stopped Note Resume information is lost if you have changed the disc opened the disc tray change source or disconnected the system from the power supply Resume is not available when PBC mode is switched on Picture effect Slow 1 Press SLOW on the remote control to watch a VCD at a slower speed There are three types of slow modes to select The sound is muted...

Страница 23: ...e singing or talking through a microphone Press ECHO on the remote control to decrease increase or switch off the echo effect ECHO X or ECHO OFF is displayed Notes X denotes the echo level You are advised to switch off the echo effect when not using the feature If microphone is not inserted INSERT MIC is displayed Echo will switch off automatically when unplug the microphone from the system VCD Op...

Страница 24: ...t radio stations in the memory Automatic Preset Programming Plug and Play setting refer to Basic Functions Plug and Play OR 1 Press TUNER to selectTUNER mode To begin automatic preset from a desired preset number Press í or ë to select the desired preset number If a radio station has been stored in one of the presets it will not be stored again under another preset number 2 Press and hold PROG unt...

Страница 25: ...ation 1 Press í or ë to select the preset radio station to be erased 2 Press and hold Çon the system until PRESET DELETED is displayed The deleted radio frequency remains on the display The preset numbers of all other preset radio stations in the band with higher numbers are also decreased by one Repeat steps 1 2 to erase other preset radio stations Changing tuning grid not available for all versi...

Страница 26: ...e deck to open the tape deck door 2 Load the tape with the open side downward and full spool to the left 3 Close the tape deck door Playing tapes To playback a selected tape deck 1 Press TAPE or TAPE 1 2 on the remote control repeatedly to select tape deck 1 or 2 2 PressÉ Å To stop playback Press Ç To select automatic replay or one time playback Press A REPLAY repeatedly to select the different pl...

Страница 27: ...ringed upon Recording is possible only on tape deck 2 Preparation for recording 1 Press TAPE to selectTAPE 2 2 Load a recordable tape into tape deck 2 with full spool to the left 3 Prepare the source to be recorded VCD load the disc s TUNER tune to the desired radio station TAPE load the prerecorded tape into tape deck 1 with the full spool to the left AUX connect external equipment When recording...

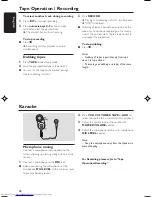
Страница 28: ...verse side at the end of side A flip the tape to side B and repeat the procedure To stop dubbing Press Ç Notes Dubbing of tapes is possible only from tape deck 1 to tape deck 2 To ensure good dubbing use tapes of the same length Microphone mixing Connect a microphone not supplied to the system allowing you to sing along with the music source 1 Connect a microphone to the MIC jack Before connecting...

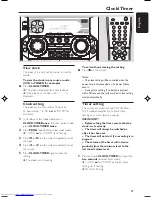
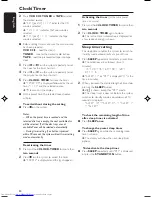
Страница 29: ...e setting The clock starts working To exit without storing the setting Press Çon the system Notes The clock setting will be cancelled when the power cord is disconnected or if a power failure occurs During clock setting if no button is pressed within 90 seconds the system will exit clock setting mode automatically Timer setting The system can switch on toVCD TUNER or TAPE mode automatically at a p...

Страница 30: ...mer setting mode automatically Deactivating the timer 1 Press and hold CLOCK TIMER for more than two seconds 2 Press Ç on the system to cancel the timer CANCEL is displayed and the disappears Activating the timer for the same preset time and source 1 Press and hold CLOCK TIMER for more than two seconds 2 Press CLOCK TIMER again to store The last set timer information is displayed for a few seconds...

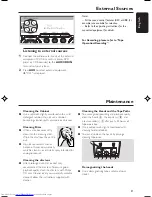
Страница 31: ...ing Discs When a disc becomes dirty clean it with a cleaning cloth Wipe the disc from the centre out Do not use solvents such as benzene thinner commercially available cleaners or antistatic spray intended for analogue records Cleaning the disc lens After prolonged use dirt or dust may accumulate at the disc lens To ensure good playback quality clean the disc lens with Philips CD Lens Cleaner or a...

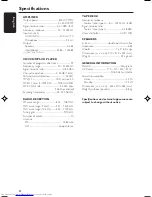
Страница 32: ...ies 32 44 1 48 kHz RADIO RECEPTION FM wave range 87 5 108 MHz MW wave range 9 kHz 531 1602 kHz MW wave range 10 kHz 530 1700 kHz Tuning grid 9 10 kHz Number of presets 40 Antenna FM 75 Ω wire AM Loop antenna TAPE DECK Frequency response Normal tape type I 80 12500 Hz 8 dB Signal to noise ratio Normal tape type I 48 dBA Wow and flutter 0 4 DIN SPEAKERS System double port bass reflex Impedance 6 Ω W...

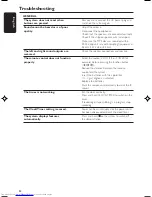
Страница 33: ... CD format disc NO DISC is displayed Insert a disc No picture onTV screen Connect the cable betwen the system andTV No colour onTV screen Change the system to the respective PAL or NTSC setting Cannot adjust theTV system to Remove the MP 3 CD from disc tray 1 or press PAL or NTSC DISC CHANGE to select a non MP3 disc tray RADIO RECEPTION Radio reception is poor If the signal is too weak adjust the ...

Страница 34: ...emote control does not function Select the source VCD 1 2 3 orTUNER for properly example before pressing the function button É í ë Reduce the distance between the remote control and the system Insert the batteries with their polarities signs aligned as indicated Replace the batteries Point the remote control directly towards the IR sensor The timer is not working Set the clock correctly Press and ...

Отзывы: