background image

12

Connecting to Optional
Equipment

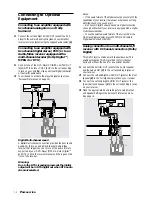
Connecting to an amplifier equipped with
two channel analog stereo or Dolby
Surround

1

Connect the Left and Right AUDIO OUT jacks of the DVD
Player to the audio left and right in jacks on your amplifier,
receiver or stereo system, using the supplied audio cables 

(A)

.

Connecting to an amplifier equipped with
two channel digital stereo (PCM) or to an
Audio/Video receiver equipped with a
multi-channel decoder (Dolby Digital™,
MPEG 2 or DTS)

1

Connect one of the DVD Player’s DIGITAL AUDIO OUT
jacks (OPTICAL 

G

 or COAXIAL 

F

) to the corresponding

in jack on your amplifier. Use an optional digital (optical 

G

or coaxial 

F

) audio cable.

2

You will need to activate the player’s digital output (see
‘Personal Preferences’ on page 14).

TV

Y

Z

X

AMPLIFIER

A

G

F

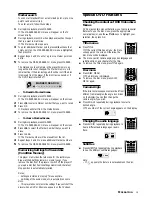
Digital Multi-channel sound

A digital multi-channel connection provides the best sound
quality. For this you need a multi-channel Audio/Video
receiver that supports one or more of the audio formats
supported by your DVD Player (MPEG 2, Dolby Digital

TM

and DTS). Check the receiver manual and the logos on the
front of the receiver.

Warning:
Due to the DTS Licensing agreement, the digital
output will be in DTS digital out when DTS audio
stream is selected.

Notes:
– If the audio format of the digital output does not match the
capabilities of your receiver, the receiver will produce a strong,
distorted sound or no sound at all.
– Six Channel Digital Surround Sound via digital connection
can only be obtained if your receiver is equipped with a Digital
Multi-channel decoder.
– To see the selected audio format of the current DVD, the
On-Screen Display display, press SYSTEM MENU (Select
Digital Audio Output) or AUDIO.

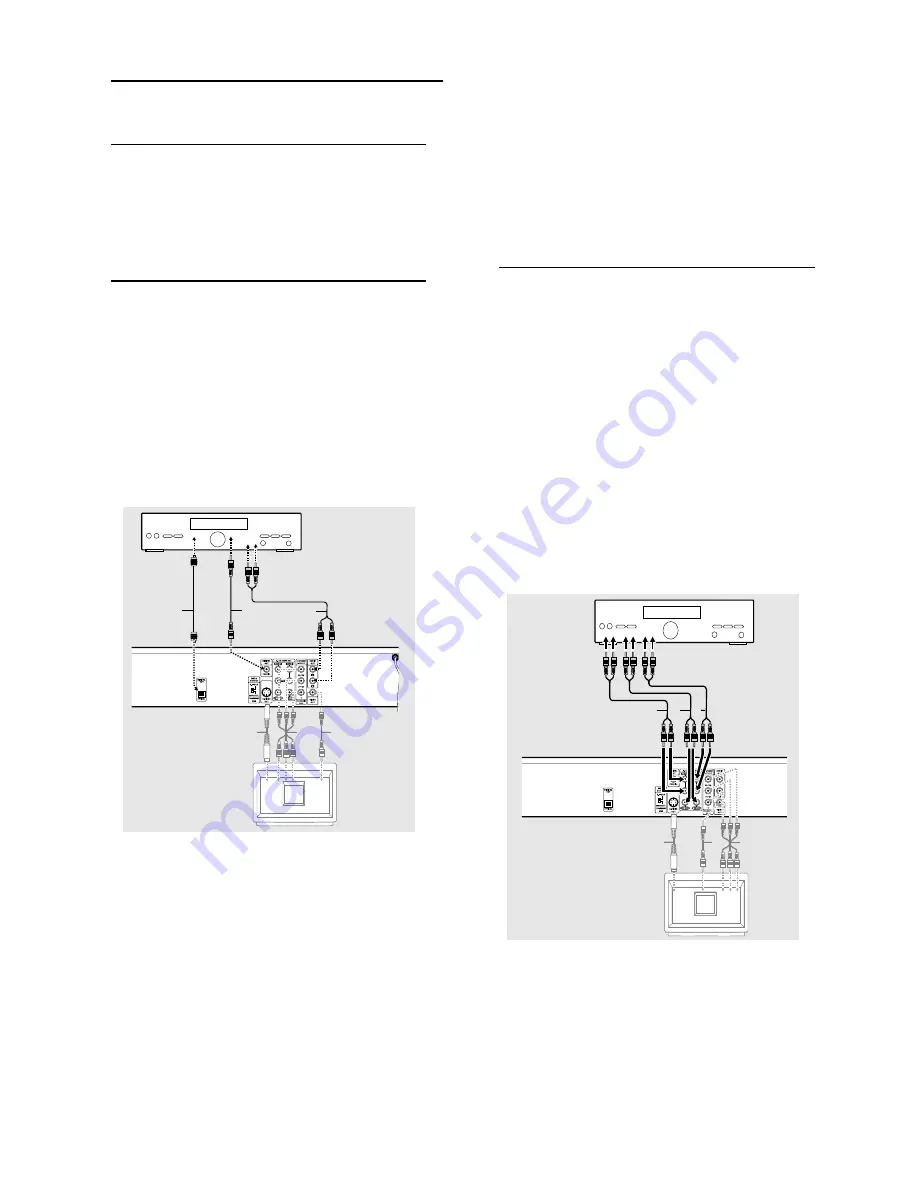
Analog connection to a multi-channel A/V
receiver with 6 Channel connectors (Dolby
Digital)

This DVD Player contains a multi-channel decoder. This
enables playback of DVDs recorded in Multi-channel
Surround without the need for an optional decoder.

1

Connect the AUDIO OUT jacks for the Center speaker
and the Subwoofer 

(C)

 to the corresponding in jacks on

your receiver.

2

Connect the Left and Right AUDIO OUT jacks for the Front
speaker 

(B)

 to the corresponding in jacks on your receiver.

3

Connect the Left and Right AUDIO OUT jacks for the
(Rear) Surround speaker 

(D)

 to the corresponding in jacks

on your receiver.

4

Make the appropriate Sound settings for Analog Output
and Speaker Settings in the Personal Preferences menu.
See page 14.

AMPLIFIER

D

B

C

TV

Y

Z

X

P

REPARATION

Содержание DVD 953

Страница 1: ...f you have any problems Philips Representatives can help you get the most from your new product by explaining Hookups FirstTime Setup and Feature Operation Do not attempt to return this product to the store For fast help call us first 1 800 531 0039 Thank you for making Philips a part of your home Important Return your Warranty Registration Card within 10 days See why inside ...

Страница 2: ...ing in a PHILIPS product Sincerely Lawrence J Blanford President and Chief Executive Officer P S Remember to get the most from your PHILIPS product you must return your Warranty Registration Card within 10 days So please mail it to us right now Know these safetysymbols This bolt of lightning indi cates uninsulated material within your unit may cause an electrical shock For the safety of everyone i...

Страница 3: ... protected by method claims of certain U S patents and other intellectual property rights owned by Macrovision Corporation and other rights owners Use of this copyright protection technology must be authorized by Macrovision Corporation and is intended for home and other limited viewing uses only unless otherwise authorized by Macrovision Corporation Reverse engineering or disassembly is prohibite...

Страница 4: ... warns the user that uninsulated voltage within the unit may have sufficient magnitude to cause electric shock Therefore it is dangerous to make any kind of contact with any inside part of this unit This symbol alerts the user that important literature concerning the operation and maintenance of this unit has been included Therefore it should be read carefully in order to avoid any problems CAUTIO...

Страница 5: ...ed or grounding type plug A polarized plug has two blades with one wider than the other A grounding type plug has two blades and a third grounding prong The wide blade or the third prong are provided for your safety When the provided plug does not fit into your outlet consult an electrician for replacement of the obsolete outlet 10 Protect the power cord from being walked on or pinched particularl...

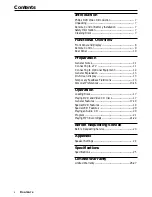
Страница 6: ... Optional Equipment 12 General Explanation 13 On Screen Display 13 Temporary Feedback Field Icons 13 Personal Preferences 13 16 Operation Loading Discs 17 Playing DVD andVideo CD discs 17 General Features 17 19 Special DVD Features 19 SpecialVCD Features 20 Playing an Audio CD 20 Program 21 Playing MP3 Recordings 21 22 Before Requesting Service Before Requesting Service 23 Appendix Speaker Setting...

Страница 7: ...rosonics are either registered trademarks or trademarks of Pacific Microsonics Inc in the United States and or other countries HDCD system manufactured under license from Pacific Microsonics Inc Unpacking First check and identify the contents of your DVD Player s package You should have the following items DVD Player Remote Control with batteries Audio cable Video cable S Video cable Instructions ...

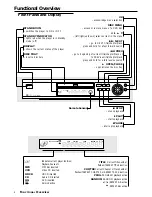
Страница 8: ...o NEXT title chapter track press and hold for a fast forward search S PREV go to beginning of current title chapter track or to PREVious title chapter track press and hold for a fast reverse search OPEN CLOSE opens closes the disc tray TITLE MP3 VCD HD CD PROG RANDOM ALL A B CHP TRK DVD Indicates current player function Playback Pause etc MP3 MP3 disc inserted VCD Video CD inserted HD CD HDCD inse...

Страница 9: ...ARKER SEARCH menu MARKER access or remove MARKER SEARCH menu FTS PROGRAM access or remove PROGRAM menu TITLE display the Title menu of the disc if available POWER switch DVD Player ON or OFF RETURN remove the DVD Player s menu DISPLAY access the On Screen Display T search forward go to next chapter or track S search backward go to beginning of current chapter or track or go to previous chapter or ...

Страница 10: ...nection front speakers connections rear surround speakers connections VIDEO OUTPUT Switch select either S Video Out or Component Video Out depending on how you connected the DVD Player to the TV S VIDEO OUT Y C connect to a TV with S Video Y C inputs COMPONENT PROGRESSIVE SCAN VIDEO OUT Y PR CR PB CB connect to a TV with Y PB CB PR CR inputs VIDEO OUT CVBS connect to a TV with CVBS video inputs Ca...

Страница 11: ...is a high definition or digital ready television you may take advantage of the DVD Player s progressive scan output for the highest video resolution possible If yourTV does not accept the Progressive Scan format the picture will appear scrambled if you try Progressive Scan on the DVD Player Make sure theTV s Sync Mode setting is correct For example on some PhilipsTVs set SYNC MODE to SYNC MODE 2 A...

Страница 12: ... DTS Licensing agreement the digital output will be in DTS digital out when DTS audio stream is selected Notes If the audio format of the digital output does not match the capabilities of your receiver the receiver will produce a strong distorted sound or no sound at all Six Channel Digital Surround Sound via digital connection can only be obtained if your receiver is equipped with a Digital Multi...

Страница 13: ...e Subtitle language Angle Sound Audio CD Video CD without PBC Playback Control Tracks Elapsed playback time Audio channel Sound Video CD with PBC PBC ON Elapsed playback time Audio channel Sound Temporary Feedback Field Icons TITLE RepeatTitle CHAPT Repeat Chapter ALL Repeat All TRACK RepeatTrack A B Repeat A B Resume play from this point Action prohibited or not available Personal Preferences You...

Страница 14: ...gital Audio Output according to the type of audio system you use DOLBY DIGITAL PCM Select DOLBY DIGITAL PCM if you connected the DVD Player s DIGITAL OUT jack to a Dolby Digital decoder or an amplifier or other equipment with a Dolby Digital decoder Stream PCM Select Stream PCM if you connected the DVD Player s DIGITAL OUT jack to an amplifier or other equipment with a DTS decoder Dolby Digital de...

Страница 15: ...l stereo sound Disc Subtitle Disc Menu Rating Password TV Aspect Menu Language Progressive Scan Digital Audio Output 5 1 Speaker Setup Others Disc Audio DRC Off Vocal On PBC On Parental control DVD only Movies on DVDs may contain scenes not suitable for children Therefore discs may contain Parental Control information that applies to the complete disc or to certain scenes on the disc These scenes ...

Страница 16: ...ing to Unlock in the DVD Player menu Follow steps 1 6 for Parental Control Rating choosing Unlock at step 5 After you set Rating to Unlock the disc will play as usual Or you may see this message if you insert a disc that exceeds the rating level The parental setting of this player prohibits play Would you like to allow this disc to play Press the 1 2 buttons to select Yes or No then press the OK b...

Страница 17: ...Y to resume playback from that point Notes DVDs may have a region code Your player will not play discs that have a region code different from your player The region code for this player is 1 one General Features Note Unless stated all operations described are based on remote control use Some operations can be carried out using the DVD Player s menu Moving to another TITLE When a disc has more than...

Страница 18: ...our chosen end point A B appears briefly on theTV screen and the repeat sequence begins a b repeat appears on the player s display To cancel the sequence press A B Time search TheTime Search function allows you to start playing at any chosen time on the disc Press DISPLAY during playback The on screen display appears on the screen TheTime Search box shows the elapsed playing time of the current di...

Страница 19: ...s its settings memorized the latest stop position is automatically recalled Notes Settings are stored in memory for use any time Switching of the audio mode etc is automatic on some discs This player does not memorize settings if you switch off the player when a DVD or title menu appears on theTV screen Special DVD Features Checking the contents of DVDVideo discs Menus DVDs may contain menus that ...

Страница 20: ...ume playback or STOP to stop playback The search will stop if the beginning or end of the disc is reached If the beginning of the disc is reached playback may begin again Moving to another track Press T or S briefly during playback to go to the next track or to return to the beginning of the current track Press S twice briefly to step back to the previous track To go directly to any track enter th...

Страница 21: ... that has the mp3 extension The restriction of playing MP3 This unit can play up to 200 files per disc A disc having more than 200 files cannot be played The unit may not play MP3 files in the order that you recorded them on the disc With a multi session disc the player plays only the last session It may take over 30 seconds to read the MP3 files depending on the contents of the disc The limitatio...

Страница 22: ...ACK 1 mp3 Erasing a track from a Program 1 Press FTS while playback is stopped The E mark will appear 2 Press 2 to move to the Program list 3 Use 3 4 to select the track that you wish to erase from the Program list 4 Press CLEAR The track will be erased from the Program Erasing the complete Program 1 Press FTS while playback is stopped The E mark will appear 2 Use 1 2 to select Clear All then pres...

Страница 23: ...gital output is set correctly Check if the audio format of the selected audio language matches your receiver capabilities Disc can not be played Ensure the disc label is facing up Clean the disc Check if the disc is defective by trying another disc Check if the disc is badly scratched or warped not flat No return to start up screen when Reset by switching the DVD Player off then on again disc is r...

Страница 24: ...n Digital Audio Output 5 1 Speaker Setup Others Disc Audio Front L Volume 0 dB Size Large Delay 0 ms Test Return R R Delay Press 1 2 to customize the sound to conform to the acoustics of your room by adding a delay effect to the Center Speaker and Rear Surround Speakers When 5 1 Channel Surround is played you can enjoy the best sound if the distance between you and each speaker is the same You can...

Страница 25: ...e red 6 Channel Analog Output Audio Front Left Right Cinch white red Audio Surround Left Right Cinch white red Audio Center Cinch black Audio Subwoofer Cinch black Digital Output 1 coaxial 1 optical IEC958 for CDDA LPCM IEC1937 for MPEG1 2 AC 3 DTS POWER SUPPLY Power Inlet 120V 60Hz Power usage 16 Watt Power usage standby less than 3 Watt CABINET Dimensions w x h x d 16 93 x 3 45 x 9 72 inches 430...

Страница 26: ...tempt to exchange the product although there may be a delay if the appropri ate product is not readily available MAKE SURE YOU KEEP Please keep your sales receipt or other document showing proof of date of purchase Attach it to the owner s manual and keep both nearby Also keep the original box and packing material in case you need to return your product BEFORE EXCHANGINGTHE PRODUCT Please check yo...

Страница 27: ...change Form a copy of the original sales receipt and the proper payment amount into an envelope DO NOT SEND CASH Do not staple or clip these items together Label the envelope Return Documents Enclosed Place this envelope in the box with the product 5 Seal the box with packing tape and return the product via United Parcel Service UPS insured and freight prepaid to Philips Recovery Center Rojas 6 12...

Страница 28: ...NSUMER ELECTRONICS COMPANY A Division of Philips Electronics North America Corporation Knoxville Tennessee 37914 1810 USA The products and services described herein are not necessarily available in all countries Due to continuous product improvements this document is subject to change without notice ...

Отзывы: