7
2. Setting up the monitor
2.2 Operating the monitor
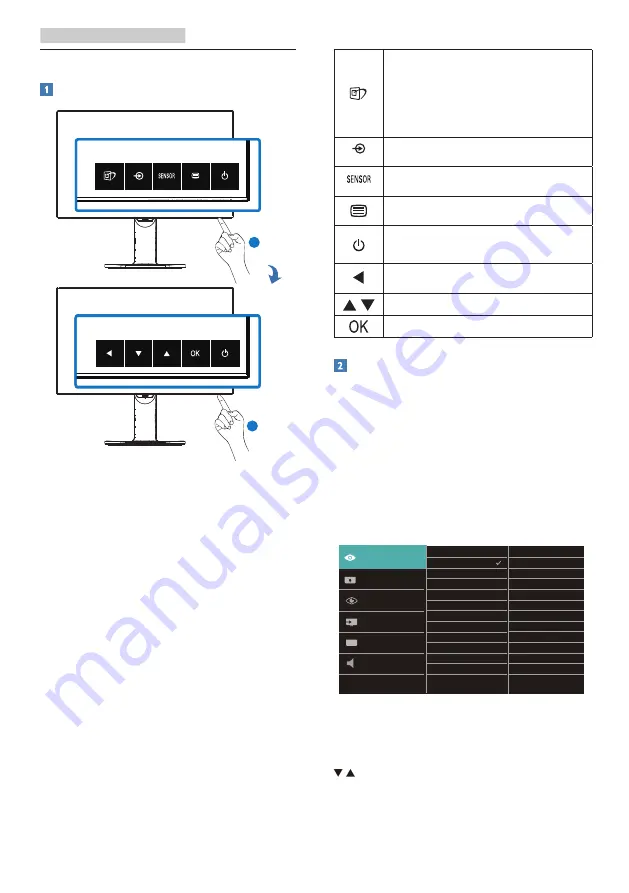
Operating the control symbols
2
1
To power on the monitor, gently press
the 1st button on the extreme right side
under the chin area. To access more
display settings, press any other button
under the chin. A display showing
the first layer of the “Quick control
symbols” will pop up on the screen.
Now select the desired function to be
adjusted by pressing the button exactly
under the visible symbol. The monitor
will now enter and show the second
layer adjustment symbols. You can now
adjust the function to your desired level
by again pressing the button under
the function. You can confirm your
preference setting by selecting OK.
SmartImage. There are
multiple selections: EasyRead
,
Office, Photo, Movie, Game,
Economy, LowBlue Mode,
SmartUniformity and Off.
Change the signal input source.
PowerSensor
Access the OSD menu.
Switch monitor’s power ON and
OFF
.
Return to previous OSD level.
Adjust the OSD menu.
Confirm the OSD adjustment.
Description of the On Screen Display
What is On-Screen Display (OSD)?
On-Screen Display (OSD) is a feature
in all Philips LCD monitors. It allows an
end user to adjust screen performance
or select functions of the monitors
directly through an on-screen
instruction window. A user friendly on
screen display interface is shown as
below:
<
Basic and simple instruction on the
control keys
In the OSD shown above, you can press
buttons at the front bezel of the
monitor to move the cursor, and press
OK button to confirm the choice or
change.


