15
E
N
Clock
Clock
A
A
djustment
djustment
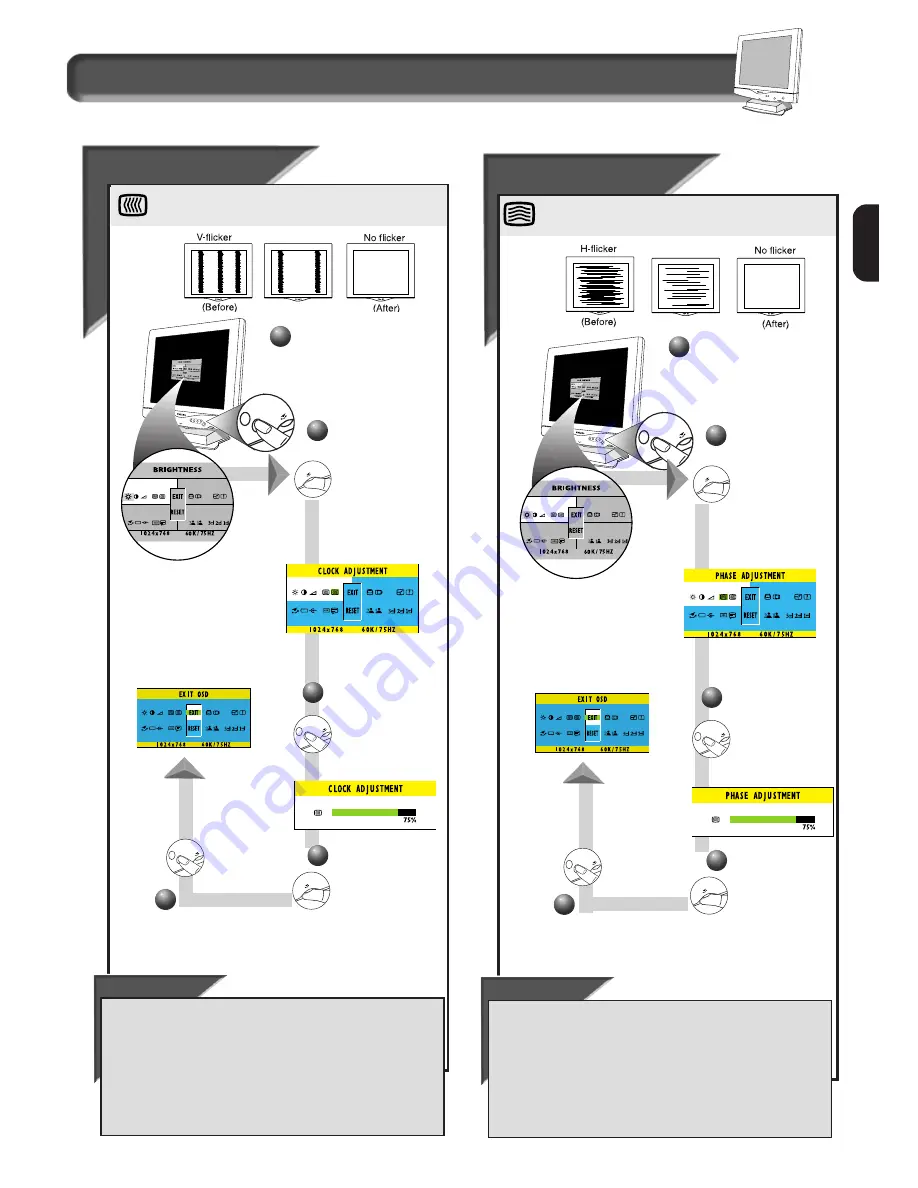
Clock Adjustment reduces the vertical flicker of the image
on the screen to a minimum.
2
2
Press the OSD button.
3
Press the OSD
button to bring
up the C
LOCK
A
DJUSTMENT
screen.
4
Turn the R
OTARY
knob
until the image on the
monitor does not flicker.
(Vertical flicker)
Turn the R
OTARY
knob clockwise
until the C
LOCK
A
DJUSTMENT
icon
is highlighted.
1
Press the OSD button to
return to E
XIT
window.
5
How to Use the On Screen Display (OSD)
F i r s t w i n d o w
Phase
Phase
A
A
djustment
djustment
Phase Adjustment reduces the horizontal flicker of the image
on the screen to a minimum.
Smart Help
After returning to Exit . . .
. . . to continue to the Phase Adjustment, turn the R
OTARY
knob
clockwise until the P
HASE
A
DJUSTMENT
icon is highlighted. Next,
press the OSD button. Follow steps 3-5 under P
HASE
A
DJUSTMENT
.
. . to exit completely, press the OSD button and choose either
S
AVE
or Don’t S
AVE
in setting mode, then push OSD button to exit
OSD. (See page 23 for other exit options.)
2
2
Press the OSD
button.
3
Press the OSD
button to bring
up P
HASE
A
DJUSTMENT
screen.
4
Turn the R
OTARY
knob
to adjust the Phase
Adjustment.
Turn the R
OTARY
knob clockwise
until the P
HASE
A
DJUSTMENT
icon
is highlighted.
1
Press the OSD button to
return to E
XIT
window.
5
Smart Help
After returning to Exit . . .
. . . to continue to the Vertical Position
,
turn the R
OTARY
knob
until the V
ERTICAL
P
OSITION
icon in the second window is
highlighted. Next, follow steps 3-5 under V
ERTICAL
P
OSITION
(on
the next page).
. . . to exit completely, press the OSD button and choose either
S
AVE
or Don’t S
AVE
in setting mode, then push OSD button to exit
OSD. (See page 23 for other exit options.)


