Recording a Cue or Look
65
Palette II Lighting Control Console
Installation & Setup Guide
The following properties are optional:
[S1]
- If needed, select the "Cue List" to record to. The default is the cue list you currently have selected.
[S3]
- Change the "Record" option if needed. The default option is to record your Live as exactly what you
see on stage coming from the selected cue list. To find out what the other options mean and when to use
them, refer to the PaletteOS software
Help Menu
.
[S4] -
Enter a Cue Label. This label will appear in the Cue List next to the cue (optional).
[S5]
- Change the Default Cue Time. This box will automatically be stuffed with the value from the Default
Cue List Options.
[S6]
- If you don't enter a Down Time, the Down Time will be the Cue time. If you do enter a Down Time,
the Cue Time is equivalent to the Up Time. If you need the cue to wait a specified amount of time before it
starts to fade (either Up or Down), use the Wait/Fade syntax in the time field.
[S7]
- If you are recording to an existing cue and want to update in the changes, select "Update." Updating
means that the new data will be merged into the existing cue, not destroying data that is currently there. If
you are recording to an existing cue and don't select "Update," you will see the dialogue box shown below
after you press [ENTER].
[S8]
- Check "Record Minus Subs" if you don't want to pull in levels from recorded submasters that are
active on stage.
[S9]
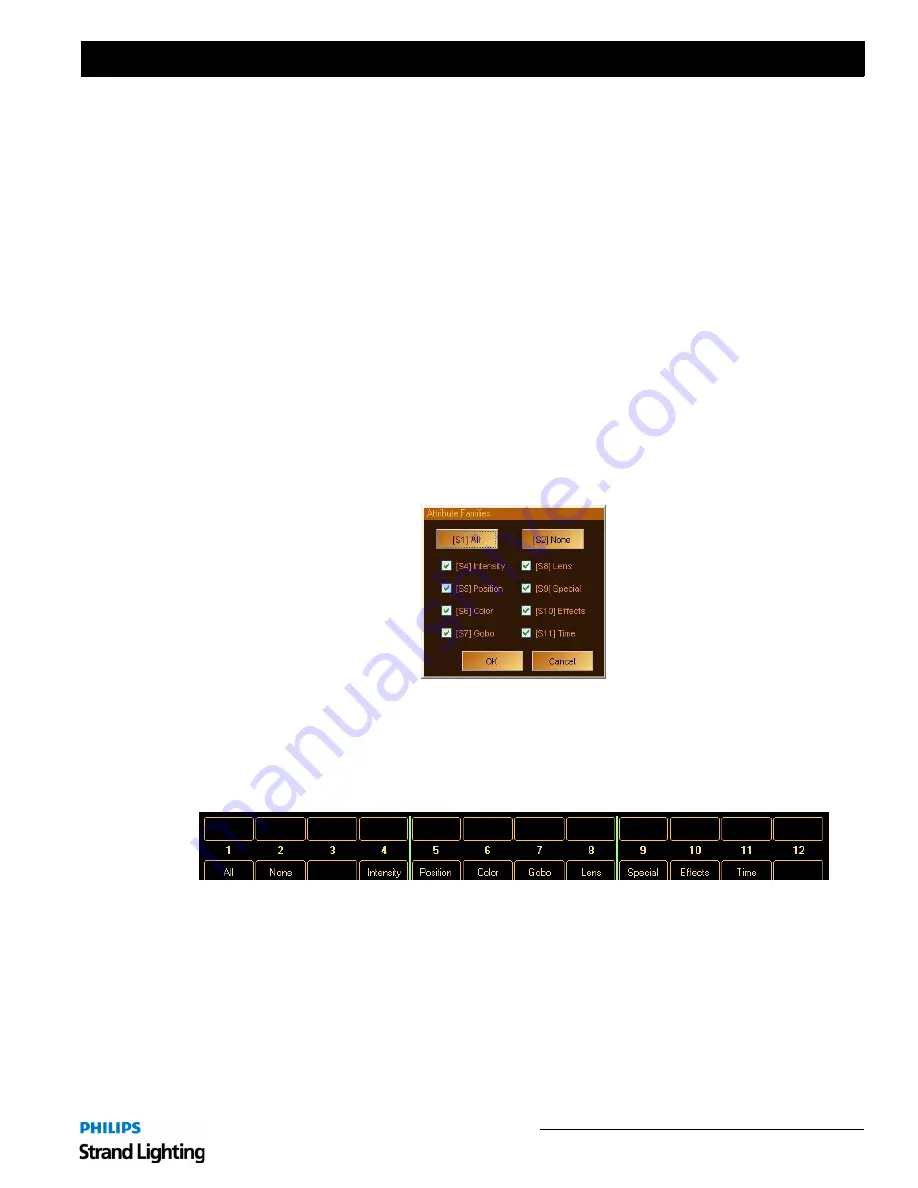
- Opens the "Attribute" dialogue box to filter what will be recorded in this cue:
Notes:
• If you double-click [S5] (or any other softkey), it will 'solo' Position. That is, all other check marks will clear and
Position will remain checked. These softkeys are also mapped to the "Moving Light" buttons to the left of the
encoders.
• While in the main Record dialogue box, if you press [SHIFT], the softkeys will be displayed as follows:
Again, these softkeys are also mapped to the "Moving Light" buttons to the left of the encoders. Pressing any of these
changes the attribute masking without the need to open the "Attribute" dialogue box. You can also double-click any
attribute family to solo it.
[S10] -
Select "Cue Only Mode" if you are updating a cue which is not the last cue in the cue list and you
don't want the changes you've just made to go past this cue. Tracking is ON by default, however, you can
change the default in [S2] "Show Options." (This option is disabled if you are appending to the cue list.)
Step 5. Press [ENTER] to close the dialogue box. If you are attempting to record over an existing cue and you have
not selected "Update" as described in [S7] above, you will be presented with the following dialogue box.
Содержание basicPalette II
Страница 1: ......
Страница 4: ...Installation Setup Guide Palette II Lighting Control Console ii Notes ...
Страница 16: ...Installation Setup Guide Palette II Lighting Control Console 8 Overview Notes ...
Страница 60: ...Installation Setup Guide Palette II Lighting Control Console 52 Controls Notes ...
Страница 68: ...Installation Setup Guide Palette II Lighting Control Console 60 Setup Notes ...
Страница 79: ...71 Palette II Lighting Control Console Installation Setup Guide A Specifications ...
Страница 81: ...73 Palette II Lighting Control Console Installation Setup Guide B Software Tips ...
Страница 87: ...Notes ...
Страница 88: ...Part No 2 450181 010 ...


