31
English
Note
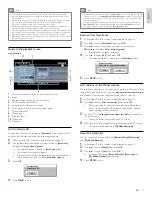
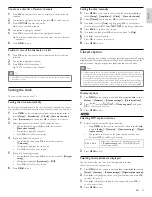
The range of input numbers is between 0 and 255.
•
If you enter a number larger than 255, the number will automatically be 255.
•
The manually entered number will be saved even if you change the setting to
[Auto]
.
•
When you enter a wrong number, press
Color buttons (red)
to cancel. (the number will
be back to
[0]
.)
•
If you want to enter 1 or 2 digit number in one cell, press
OK
to move on to the next cell.
K
•
If the entered IP address or the default gateway or primary DNS number is same
as the default setting, IP address setting will be set to
[Auto]
. (The manually entered
number will be saved).
•
When IP address setting is set to
[Manual]
, the setting of DNS setting will
automatically be
[Manual]
and when IP address setting is set to
[Auto]
, you can set
either
[Auto]
or
[Manual]
for DNS setting.
Proxy con
fi
guration
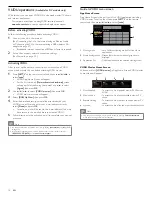
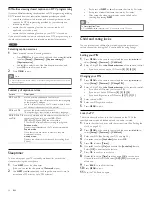
1
Press
MENU
on the remote control and then use
Î
/
ï
/
Í
/
Æ
to
select
[Setup]
>
[Installation]
>
[Network]
kk
>
[Proxy con
fi
guration]
.
2
Use
Î
/
ï
to select a setting and then press
OK
.
•
For default settings, select
[Do Not Use]
.
•
If you need to change the proxy setting as instructed by your
internet service provider to set the designated proxy address
and port, select
[Use]
.
Setting items
Description
Proxy setting
Do not Use
Not use the proxy server.
Use
Uses the proxy server.
Proxy address
*
Selects the number or word by using
Î
/
ï
/
Í
/
Æ
, then press
OK
.
[Clear]
: Clear the entered number or word.
[All clear]
: Clear all the entered numbers or
words.
[a/A/@]
: Switch between abc, ABC and @ ! ?
[Cancel]
: Shows the cancellation display.
[
OK]
: Set the entered number or word.
Proxy port
*
Use
Î
/
ï
or
the Number buttons
to input
numbers.
* Items can be selected only when
[Proxy port]
is set to
[Use]
.
3
Press
MENU
to exit.
Note
•
The range of input numbers for the port number is between 0 and 65535.
(If you enter a number larger than 65535, it will be regarded as 65535.)
•
For proxy port, the selected ports may be blocked and not be able to use depending
on your network environment.
•
If the proxy address is entered with blank only, proxy server setting will be set to
[Do Not Use]
.
Setting status
You can check the status of network settings.
1
Press
MENU
on the remote control and then use
Î
/
ï
/
Í
/
Æ
to
select
[Setup]
>
[Installation]
>
[Network]
kk
>
[Setting status]
.
•
Network setting list will be displayed.
•
MAC address of this unit will be displayed in the list.
2
Press
MENU
to exit.
Disclaimer
Displays the network service disclaimer.
1
Press
MENU
on the remote control and then use
Î
/
ï
/
Í
/
Æ
to
select
[Setup]
>
[Installation]
>
[Network]
kk
>
[Disclaimer]
.
2
Press
MENU
to exit.
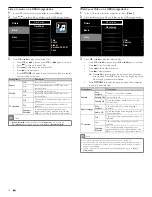
Wireless network setting (Manually enter your SSID)
Set up the connection to the Wireless LAN Access Point (AP) (e.g. wireless
router) manually by entering the wireless network name (SSID).
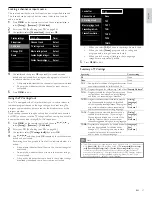
1
Press
MENU
on the remote control and then use
Î
/
ï
/
Í
/
Æ
to
select
[Setup]
>
[Installation]
>
[Network]
kk
>
[Wireless network]
kk
>
[Wireless network setting]
>
[Manually enter your SSID]
.
•
Wireless LAN Access Point (AP) (e.g. wireless router) Name
(SSID) entry screen will appear.
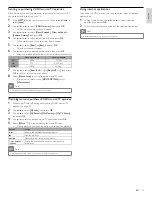
Enter the wireless network name (SSID) using
Î
/
ï
/
Í
/
Æ
, then
press
OK
.
[Clear]
: Clear the entered number or word.
[All clear]
: Clear all the entered numbers or words.
[a/A/@]
: Switch between abc, ABC and @ ! ?
[Cancel]
: Shows the cancellation display.
[OK]
: Set the entered number or word.
2
Follow steps
3
to
4
in ‘Wireless network setting(Auto)’ on page 30.
Wireless network status
This menu displays only when you set
[Wireless]
in
[Network selection]
.
You can check the status of Wireless network status.
1
Press
MENU
on the remote control and then use
Î
/
ï
/
Í
/
Æ
to
select
[Setup]
>
[Installation]
>
[Network]
kk
>
[Wireless network]
kk
>
[Wireless network status]
.
•
Wireless network status list will be displayed.
2
Press
MENU
to exit.
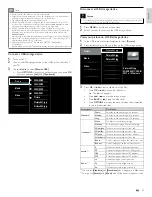
IP con
fi
guration
In following cases, select
[IP con
fi
guration]
to set each setting as necessary.
- When connection test failed with the setting of
[Connection test]
.
- When instructed by your internet service provider to make speci
fi
c
settings in accordance with your network environment.
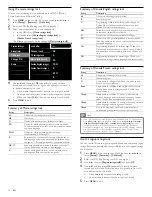
1
Press
MENU
on the remote control and then use
Î
/
ï
/
Í
/
Æ
to
select
[Setup]
>
[Installation]
>
[Network]
kk
>
[IP con
fi
guration]
.
2
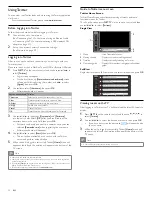
Use
Î
/
ï
to select a setting and then press
OK
.
Setting items
Description
IP setting mode
Auto
Sets the IP setting automatically.
Manual
Sets the IP setting manually.
IP address
*
1, 3
A set of numbers which are assigned to
devices participating in a computer network.
Subnet mask
*
1, 3
A mask which is used to determine what
subnet an IP address belongs to.
Default gateway
*
1, 3
IP address of the network device (such as
router) which provides internet access.
DNS setting
mode
Auto
Sets the DNS setting automatically.
Manual
Sets the DNS setting manually.
Primary DNS
*
2, 3
A server which handles the name and IP
address over the internet.
Secondary DNS
*
2, 3
A server which handles the name and IP
address over the internet.
MAC address
An address which recognizes the devices
connecting to the network. It is also called
Hardware Address.
*
1
Items can be selected only when
[IP setting mode]
is set to
[Manual]
.
*
2
Items can be selected only when
[DNS setting mode]
is set to
[Manual]
.
*
3
Use
Î
/
ï
or
the Number buttons
to input numbers. When you press
Î
/
ï
to input numbers then press
OK
or input the triple digits by using
the Number buttons
, the cursor moves to the next entry field. When you
press
Î
/
ï
to input numbers then press
OK
or input the triple digits by using
the Number buttons
at the rightmost entry field, numbers will be stored and
go back to the previous menu.
3
Press
MENU
to exit.
EN

