


17
1070_0_Product_Manual - October 28, 2010 8:52 AM
It’s generally a good idea to catch server connect and disconnect and Phidget attach and detach events in order to
know the state of the connections. It’s also a good idea to catch error events - this is where network errors will be
reported.
If reliability is important, you should consider writing a program to run locally on the PhidgetSBC, and communicate
with it through the Dictionary interface. This way, if the connection is broken, the local application will notice and be
able to take any appropriate actions. See the advanced chapter for more information.
Finding Phidgets on the Network
Any Phidgets attached to the PhidgetSBC can be identified using the Status >> Phidgets page in the configuration
interface, and should be seen on the network through the Webservice.
The Phidget Control Panel has a Bonjour tab (under WebService >> Bonjour) that lists all detected network attached
Phidgets. The Phidgets connected to the PhidgetSBC should be seen here and can be opened by double clicking its
name in the menu.
Network attached Phidgets can also be located programmatically with the Phidget Manager. The Phidget Manager
is used with either hostname and port, or server ID, just like with ‘Open’. The manager can also be used to find all
Phidgets on any Webservice through Bonjour, by specifying a NULL Server ID. See your specific language’s guide for
more information about coding with the Phidget Manager.
Configuration
The PhidgetSBC is configured through a built-in configuration interface, through an internet browser much like
your wireless access point or router. You can double click on the device under the PhidgetSBC tab in the Phidget
Control Panel to bring up its configuration interface. Alternatively, if you have Bonjour installed, you can access the
PhidgetSBC by name. For example, by default you can use ‘http://phidgetsbc.local.’. Once you know the IP address
of your PhidgetSBC, you can also just type it into your web browser of choice.
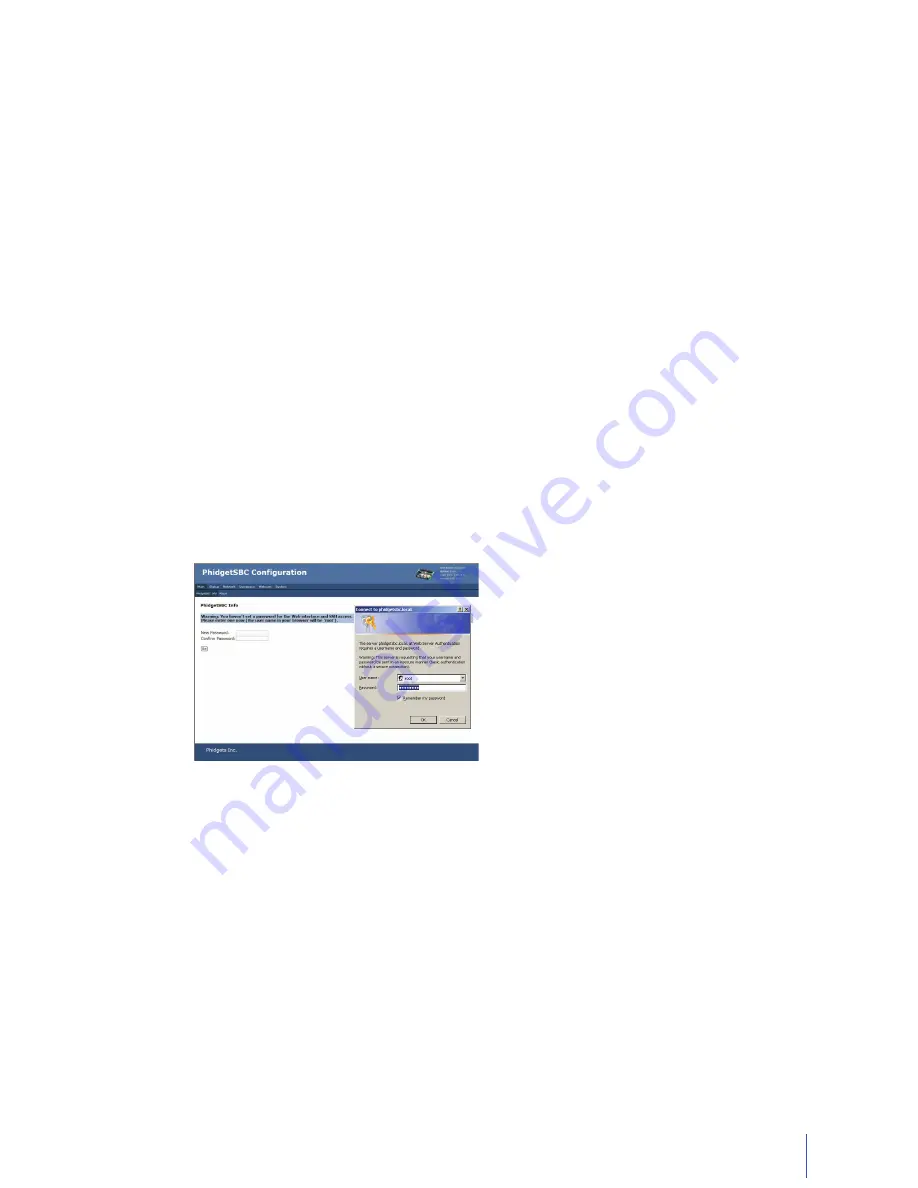
The first time you access the configuration page, the system will prompt you to set a password shared by the ‘root’
and ‘user’ accounts before you can continue. This is to maintain security, and cannot be left blank. After setting a
password, you can log onto the configuration page with user name ‘root’ and the password you chose.
From here you have the option to view the system information and status, configure network settings, start the ssh
server, set up custom applications and manage files, or view connected webcams. A breakdown of each function is
provided in this manual.
At this point you may also want to update the firmware and then configure the network settings if the default
settings are not appropriate.


