


www.petsafe.net 13
FR
IT
NL
DE
EN
ES
.
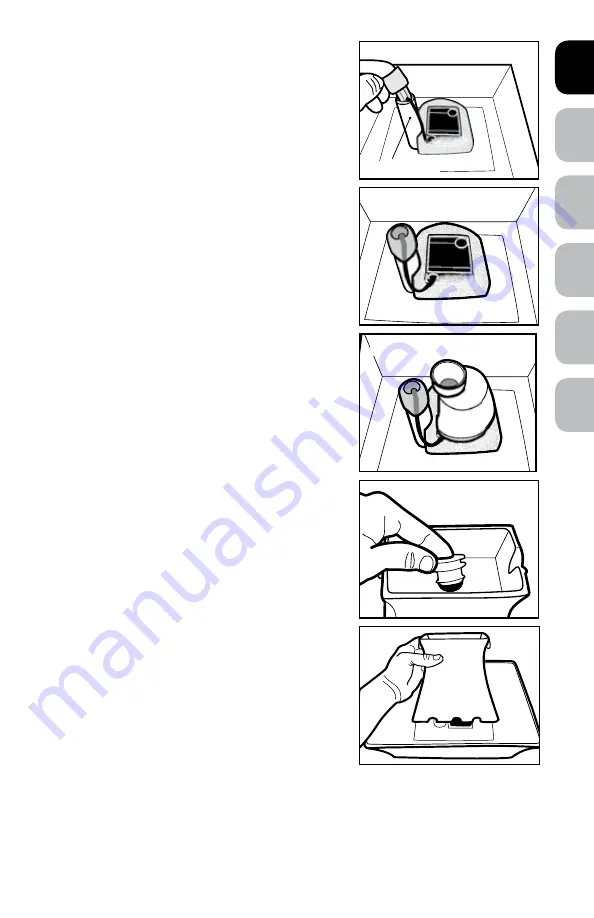
3. Remove the extra slack from the electrical power
cord and insert the Rubber Cap into the raised
post. Make sure the cord channel on the Rubber
Cap is aligned with the electrical power cord,
then insert your finger into the Rubber Cap and
push all the way down (
Fig. 20
).
4. Fold the top of the Rubber Cap over the raised
post to seal off the Bowl (
Fig. 21
).
5. Rinse a new Charcoal Filter thoroughly in cold
water to help remove any excess and loose
charcoal dust.
6. Once the Charcoal Filter is rinsed off, place
inside the Base of the Filter Housing with the
larger side facing down. The Charcoal Filter will
only fit inside the Filter Housing Base one way,
if it does not fit, flip it over. Attach the Lid to the
Filter Housing, press down until you hear it snap
in place.
7. Attach the Filter Housing to the Pump by
inserting the raised round notch inside the
circular opening on top of the Pump (
Fig. 22
).
The opening on top of the Filter Housing should
be right next to the sealed raised post.
8. Reinsert the Rubber Grommet into the hole at
the top of the Tower. Gently work the Rubber
Grommet into the hole so that the top edge rests
flat inside the dish (
Fig. 23
).
9. Align the Tower with the rectangular indentation
inside the Bowl and carefully lower it until it
rests flat (
Fig. 24
). The Rubber Grommet will
create a seal between the Filter Housing and
the Tower.
10. Place the Pet Fountain in desired location.
Do not pick up a full Pet Fountain by the Tower
piece. To properly pick up the Pet Fountain, use
both hands and grip the sidewalls of the Bowl
and lift.
Important:
To protect your floor always
use a protective mat, such as a towel or water-
resistant placemat. This will help protect your floor
from splashing or spills caused by your pet.
11. Fill the Pet Fountain by pouring water directly
into the Bowl. Leave at least a 1.27 cm of space
between the water level and the rim of the Bowl to
help control spills and splashing.
12. Before you plug in the Pet Fountain, make sure the electrical power cord, the
adaptor and your hands are completely dry. Connect the In-Line Plug and make
sure no silver is showing, then plug the adaptor into a standard electrical wall outlet.
Fig. 20
Cord channel
Fig. 21
Fig. 22
Fig. 24
Fig. 23