6
Wireless Pan & Tilt IP Surveillance Camera
1.6 HOW TO SET UP IP CAM
Before you set up IP CAM, you have to know the network environment and if the IP address is fixed
or float that provided by your ISP. If you do not know, please contact with your ISP. To set up IP-CAM
and IP address, the common way that people use is to change the obtaining of IP address of IP-
CAM. Detailed information is listed as 1.7 .
1.7 SETTING THE WAY TO OBTAIN THE IP ADDRESS OF IP-CAM
1.7-1 STATIC - IP Address Setting
- You computer must be equipped with network card and RJ-45 network connector.
- Connect the RJ-45 terminator on the rear of IP-CAM to the red test network cable. One end is
connected to the network card of computer; the other end is connected to the rear side of the
IP-CAM.
- Connect the power adaptor to the power port (on the rear) of IP-CAM. Now, the status LED on the
front of IP-CAM will light up.
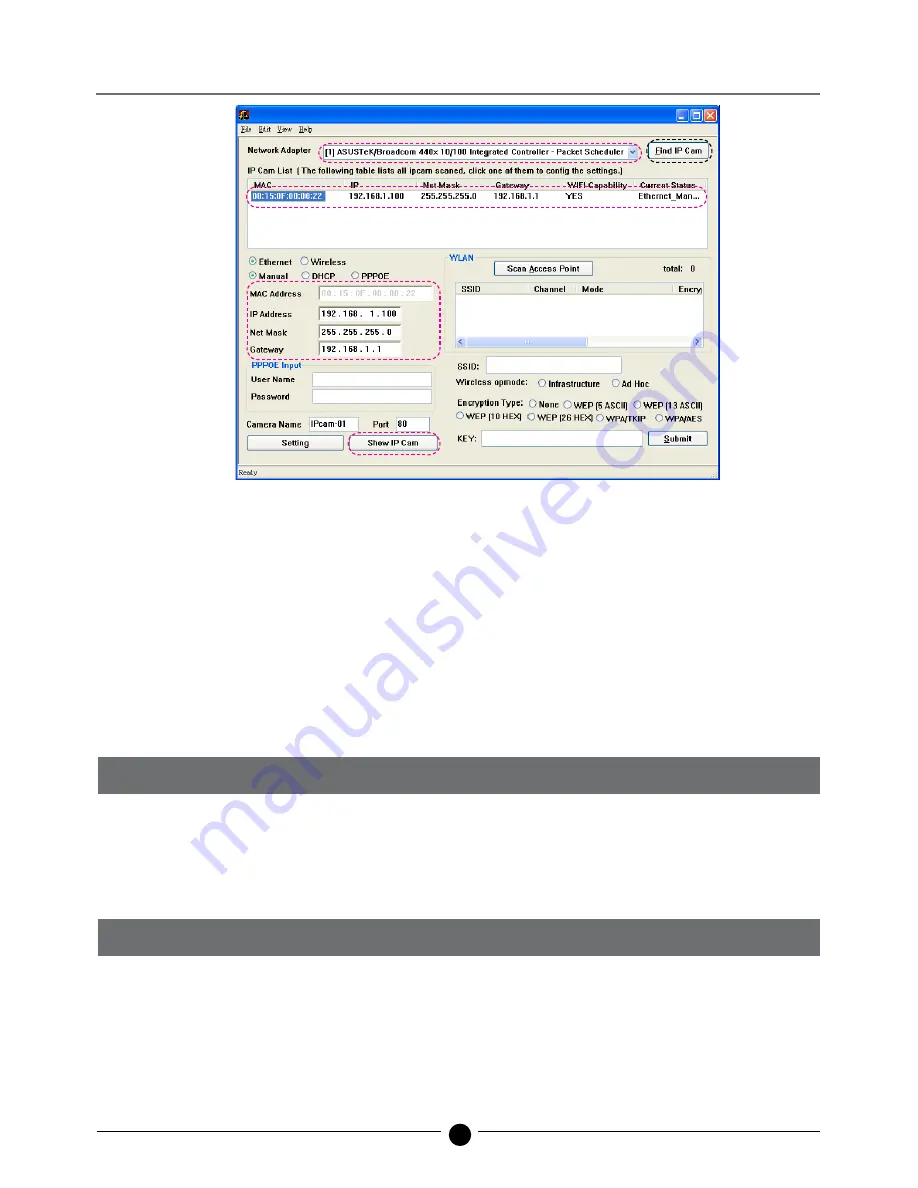
Step 1.
Select your PC’s Ethernet network card.
Step 2.
Click Find IP Cam with left mouse button, you with will see 00:15:0F:00:00:22 192.168.1.100
Step 3.
Click 00:15:0F:00:00:22 with left mouse button once, you will see following information
IP Address: 192.168.1.100
Net Mask : 255.255.255.0
GateWay : 192.168.1.1
Step 4.
Click Show IP Cam with left mouse button once which will start the Browser automatically. Login
using Username/Password into network monitor screen (refer to 3.1 for details). If you can see the
image screen, the IP-CAM is ready to use.
Figure
1.
2.
3.
3.
4.


