4 of 6
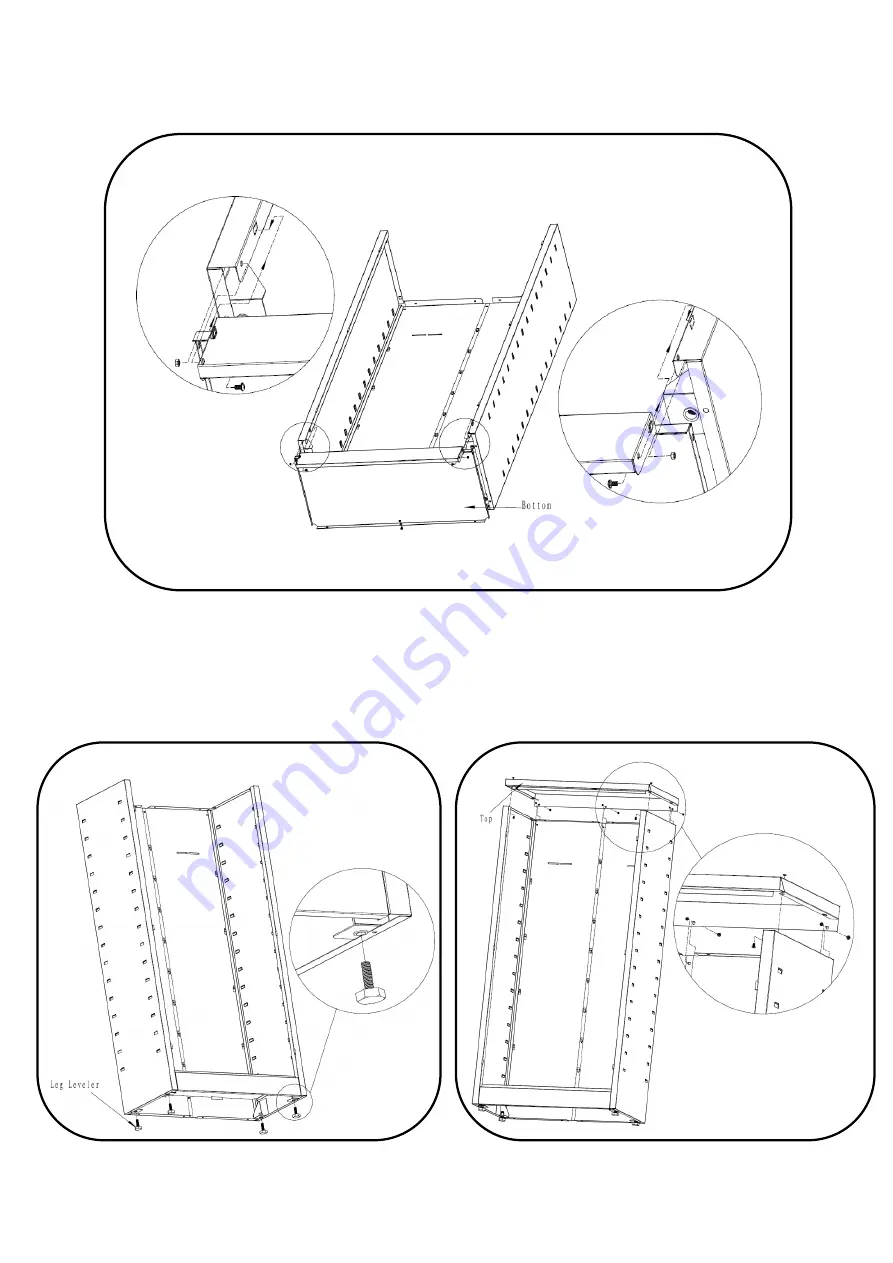
Figure 3
– Bottom Assembly
Step 4
– Leveler Assembly
Install the 4 leg levelers in the bottom. Screw all the way in. Adjust once unit is set in final position.
Figure4
– Leveler Assembly Figure 5 – Top Assembly
Страница 1: ...d handling some of the tabs that are used for assembly may have closed together Use a flat tipped screwdriver to either pry up or push from behind the tab to re open To assure the squareness of the un...
Страница 2: ...ls together may have become closed Visually inspect all panels and if found that some are closed use a small blade screwdriver to push the tabs from behind to open slightly it is recommended to push t...
Страница 3: ...sembly Slide the parts together making sure that the tabs and rectangular holes fully engage properly completed the side and back assembly will be even at both ends After assuring the correct side is...
Страница 4: ...f 6 Figure 3 Bottom Assembly Step 4 Leveler Assembly Install the 4 leg levelers in the bottom Screw all the way in Adjust once unit is set in final position Figure4 Leveler Assembly Figure 5 Top Assem...
Страница 5: ...olts to attach the top panel to the back panels Tighten all fasteners to ensure the unit is squared Step 6 Door Assembly With the door hinge pins pointed down select the door with the lock assembly se...
Страница 6: ...red not included Mark screw position in wall and drill 1 8 pilot hole Secure fastener into wall stud being sure not to engage screw too deeply to avoid bending the cabinet back Some of the materials u...