5
POWERING THE RADIO
1. Battery operation
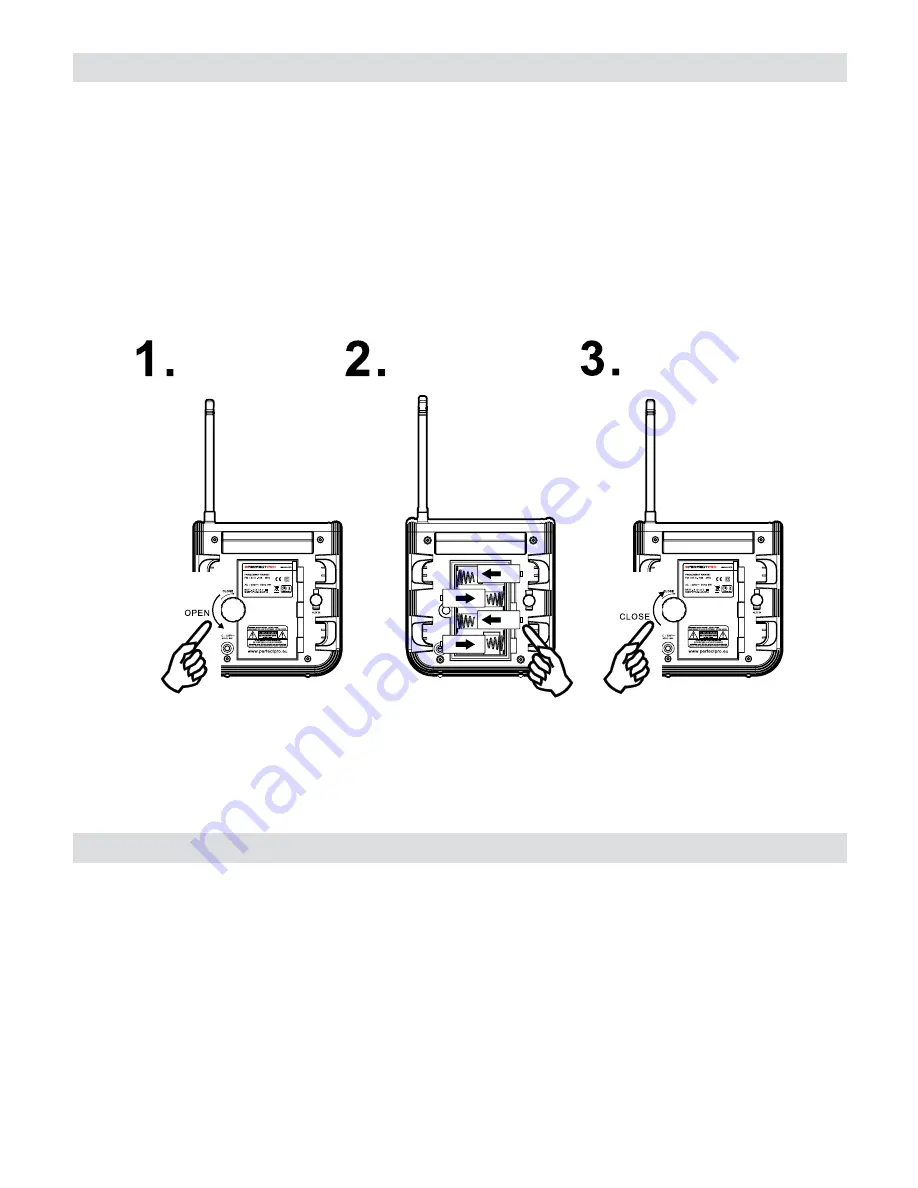
Installing the batteries; first turn battery compartment cover fixture anti-clockwise to loosen and pull out
the battery compartment cover to your right. Insert 4 x C size (UM-2) batteries into the compartment.
Ensure the batteries are inserted in accordance with the diagram shown.
Close the battery compartment cover and fasten the fixture by turning clockwise.
If the radio is not to be used for any extended period of time, it is recommended that the batteries are
removed from the radio.
Reduced power, distortion and a “stuttering sound“ or low battery sign flashing on the display are all
signs that the batteries need to be replaced.
2. AC operation
Before you plug the AC power cord into the AC socket, be sure the voltage is correct. If you have
batteries in the radio and use the AC power, the batteries will automatically be disconnected.
AC power cord storage is designed to store the cord when the radio is not in use.
SETTING THE CLOCK TIME
Setting the clock automatically - Radio Data System (RDS)
When you set the clock time using the RDS function, your radio will synchronize its clock time whenever
it tunes to a radio station using RDS with CT signals.
. When tuning to a station transmitting RDS data, press and hold the Menu button to enter the setting menu.
2. Rotate the Tuning control until “RDS CT” shows on the display. Press the Tuning control to enter the
setting.
3. Rotate the Tuning control until “CT ON” shows on the display. Press the Tuning control to confirm the
selection. The clock time of the radio will be set up automatically according to the RDS data received.
Note that the default of RDS CT is set as ON.


