29
Procedure
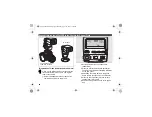
Turn on the power switch.
Press the flash mode button (MODE) until (A) is
displayed on the LCD panel.
Set the aperture value and ISO.
Press the select button (S) so that (f/stop) on
the LCD panel blinks.
Turn the adjustment dial to set the aperture
value.
●
The effective flash range is displayed on the LCD
panel bar graph.
Confirm that the subject is within the effective
flash range and press the select button (S).
Turn the adjustment dial to set the ISO after
(ISO) starts blinking.
Press the select button (S). The setting is
complete if (ISO) stops blinking.
Set the lens aperture to the same aperture value
as that set on the LCD panel.
●
The camera's aperture value is synchronized
with that of the flash unit when the camera
exposure mode is set to Programmed AE or
Shutter Priority AE.
Set the zoom position. (The setting method
differs according to your camera and lens. Refer
to page 21.)
●
Select (M.Zoom) regardless of the type of lens
being used.
Confirm that the subject is within the effective
flash range and the ready lamp is lit. Then take a
picture.
●
In the following cameras, if the correct flash
output is obtained, the flash mode indicator and
( ) in the viewfinder will blink.
645, LX, Super A/Super Program, MZ-M/ZX-M,
P30T, P30N/P3N, P30/P3, P50/P5, A3Date,
A3DateS, Program A/Program Plus
For details, refer to “Auto Check Display” on
page 11.
●
If the power is turned temporarily OFF, the flash
will be set to P-TTL or TTL auto. Return the
setting to Auto flash.
●
The sync mode will be fixed in leading curtain
sync.
1
2
3
4
5
6
00_AF540FGZ.book Page 29 Monday, April 10, 2006 11:42 AM


