


Sys-EV-560-Man August2016 REV A • 7
6 • Sys-EV-560-Man August2016 REV A
EN
EN
TROUBLESHOOTING
Problem
Cause
Correction
Softener fails to regenerate.
Electrical service to unit has been
interrupted.
Assure permanent electrical service (check fuse,
plug, pull chain, or switch).
Timer is defective.
Replace timer.
Power failure.
Reset time of day.
Meter not counting liters.
Check to see if cable is inserted into meter
assembly.
Softener delivers hard water.
By-pass valve is open.
Close by-pass valve.
No salt is in brine tank.
Add salt to brine tank and maintain salt level
above water level.
Injector screen plugged.
Clean injector screen.
Insufficient water flowing into brine tank.
Check brine tank fill time and clean brine line flow
control if plugged.
Hot water tank hardness.
Repeated flushings of the hot water tank is
required.
Leak at distributor tube.
Make sure distributor tube is not cracked. Check
O-ring and tube pilot.
Internal valve leak.
Replace seals and spacers and/or piston.
Unit used too much salt.
Improper salt setting.
Check salt usage and salt setting.
Excessive water in brine tank.
See “Excessive water in brine tank”.
Loss of water pressure.
Insufficient backwash flow rate
or Backwash cycle to short to
clean the resin bed
Iron buildup in line to water conditioner.
Clean line to water conditioner.
Iron buildup in water conditioner.
Clean control and add mineral cleaner to mineral
bed. Increase frequency of regeneration.
Inlet of control plugged due to foreign
material broken loose from pipes by recent
work done on plumbing system.
Remove piston and clean control.
Insufficient backwash flow rate or
Backwash cycle to short to clean the resin
bed.
Increase backwash cycle duration.
Check the DLFC size match with the tank size
and that it is not partially plug.
Check that drain line is not partially plugged
Loss of resin through drain
line.
Air in water system.
Assure that well system has proper air eliminator
control. Check for dry well condition.
Upper and/or lower screen damaged.
Check and replace damaged parts.
Iron in conditioned water.
Fouled resin bed.
Check backwash, brine draw, and brine tank
Increase frequency of regeneration. Increase
backwash time.
Excessive water in brine tank.
Plugged drain line flow control.
Clean flow control.
Incorrect brine setting.
Check valve settings.
SYSTEM START-UP continued
Manually Initiating a Regeneration
1. When timer is in service, press
button for 5 seconds on
the main screen.
2. The timer advances to Regeneration Cycle Step #1
(backwash), and begins programmed time count down.
3. Press the
button once to advance valve to Regeneration
Cycle Step #2 (brine draw & slow rinse ).
4. Press the
button once to advance valve to Regeneration
Cycle Step #3 (rapid rinse)
5. Press the
button once to advance valve to Regeneration
Cycle Step #4 (brine refill full cycle).
NOTE: A queued regeneration can be initiated by pressing
the
button. To clear a queued regeneration,
press the
button again to cancel. If regeneration
occurs for any reason prior to the delayed
regeneration time, the manual regeneration request
shall be cleared.
Cycle Step #
EVOLIO560
8
EVOLIO560
15
EVOLIO560
20
EVOLIO560
30
1. Backwash
2 min
3 min
3 min
4 min
2. Brine draw
& Slow rinse
20 min
38 min
76 min
114 min
3. Rapid Rinse
4 min
7 min
5 min
8 min
4. Brine
Tank Refill
3 min
5 min
7 min
11 min
DISINFECTION OF WATER SOFTENERS
NOTE: Every water softener should be disinfected after
installation; some will require periodic disinfection
during their normal life. In a few cases, disinfection with
every regeneration is recommended.
NOTE: Depending upon the conditions of use, the style of
softener, the type of ion exchanger, and the disinfectant
available, a choice can be made among the following
methods:
Sodium or Calcium Hypochlorite
5.25% Sodium Hypochlorite
IMPORTANT: Do not use any other chemical substance with
out manufacturer approval.
1.
Dosage: 0.022 fluid liters
2. Proceed with the normal regeneration.
ADDING SALT
NOTE: Your softener comes pre-charged and will supply you
with a day or two of soft water. Salt must be added to
the salt tank for the system to regenerate properly. This
must be done within the first 24 - 28 hours. For the
start up use the 10Kg salt bag included
Types of Salt
Any pellet type salt is recommended due to its cleanliness
and availability. Other salts such as block, solar and rock salt
can be used; however, they may alter performance or cause
maintenance problems.
Amount of Salt
One tank units have a salt capacity of (see table pag 2).
You are not required to fill your salt tank to capacity. It is
recommended that the salt level in the salt tank always be
above the water level in the tank. This will assure that the unit
always has the correct salt dosage when it regenerates.
MAINTENANCE AND REPAIR
This unit is designed and constructed to treat the most difficult
of water. Various screens have been included in the system to
protect orifices.
BEFORE doing any service work, be sure all screens are clean
and will pass water. Periodic cleaning of the screens will insure
long-term unit performance.
Lack of treated (soft) water is constant.
1. No salt in tank — Add salt to tank
2. Dirty screens — Clean screens
3. Faulted timer motor — Replace
Lack of treated (soft) water is intermittent.
Intermittent is often indicated by untreated water from the
heater (hot water) while the cold water tastes good. Intermittent
indicates excess water usage, a change in water chemistry,
or an improper frequency of regeneration. Review entire
application.
1. Low salt setting — Adjust brine value
2. Water consumption increased — Check for household leaks
3. Too infrequent regenerations — Review sizing and
reprogram timer
Brine tank overflow
1. Plugged screens or injector — Clean
2. Defective Brine Valve — Clean or replace
3. Defective timer or timer motor — Replace
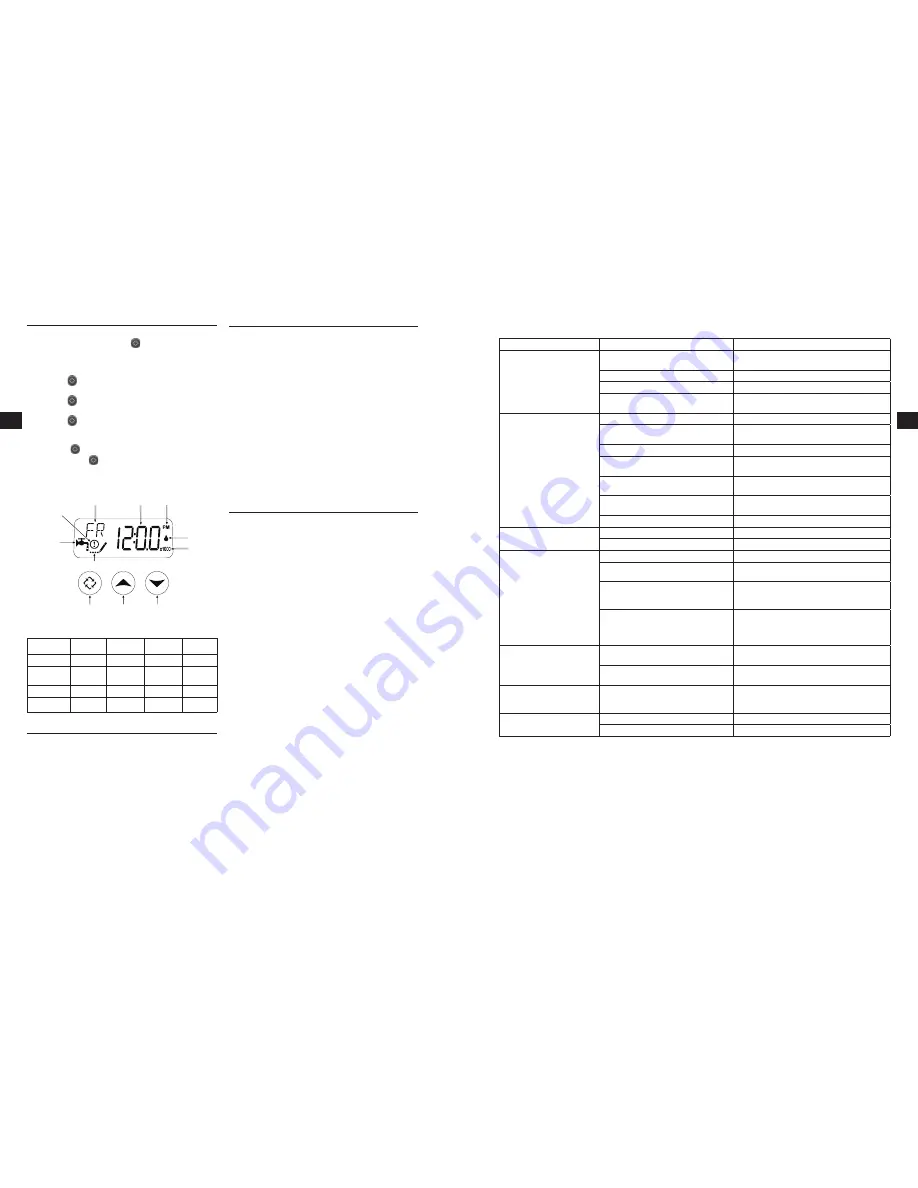
Service
Icon
Parameter Display
Programming Icon
Extra Cycle
Button
Down Button
Up Button
Data Display
PM Indicator
Flow Indicator
x1000 Indicator
Figure 9
Error/
Information
Icon


