P/N 82-00021 UM3105KL-AM_3105KG-AM_REV20220519
12
SET-UP INSTRUCTIONS (CONT)
Setting Auto Zero Option
When a scale is set to zero, it creates a reference point for weights that are placed on it. There are
two approaches to how this can take place. This option allows the user to select whether the scale
will re-set itself to ZERO each time it is powered up or whether it will use the zero reading from the
last time it was zeroed.
•
“Enable” means the scale will zero itself when it is powered on and there is no patient on the scale,
this may take a few seconds. If there is a patient on the scale when the scale is powered on, the
scale will skip the zeroing process and weigh the patient. After each use, the scale will clear the
weight of the patient and set itself back to the initial ZERO level it found on start-up or the last
stored zero. Health o meter
®
Professional recommends keeping the default setting which is
“Enable”.
Note:
Hitting a key to wake the scale from sleep mode will not prompt the scale to zero.
•
“Disable” means the scale does not attempt to find a zero when powered on, rather it will use the
last zero setting that was obtained from the last push of the zero button. There will be no delay in
using the scale if the Auto Zero is disabled. Health o meter
®
Professional recommends that if the
Disable option is selected, users should manually zero the scale before each weight measurement
by pressing . Users will see dashes appear on the screen as the scale is finding zero.
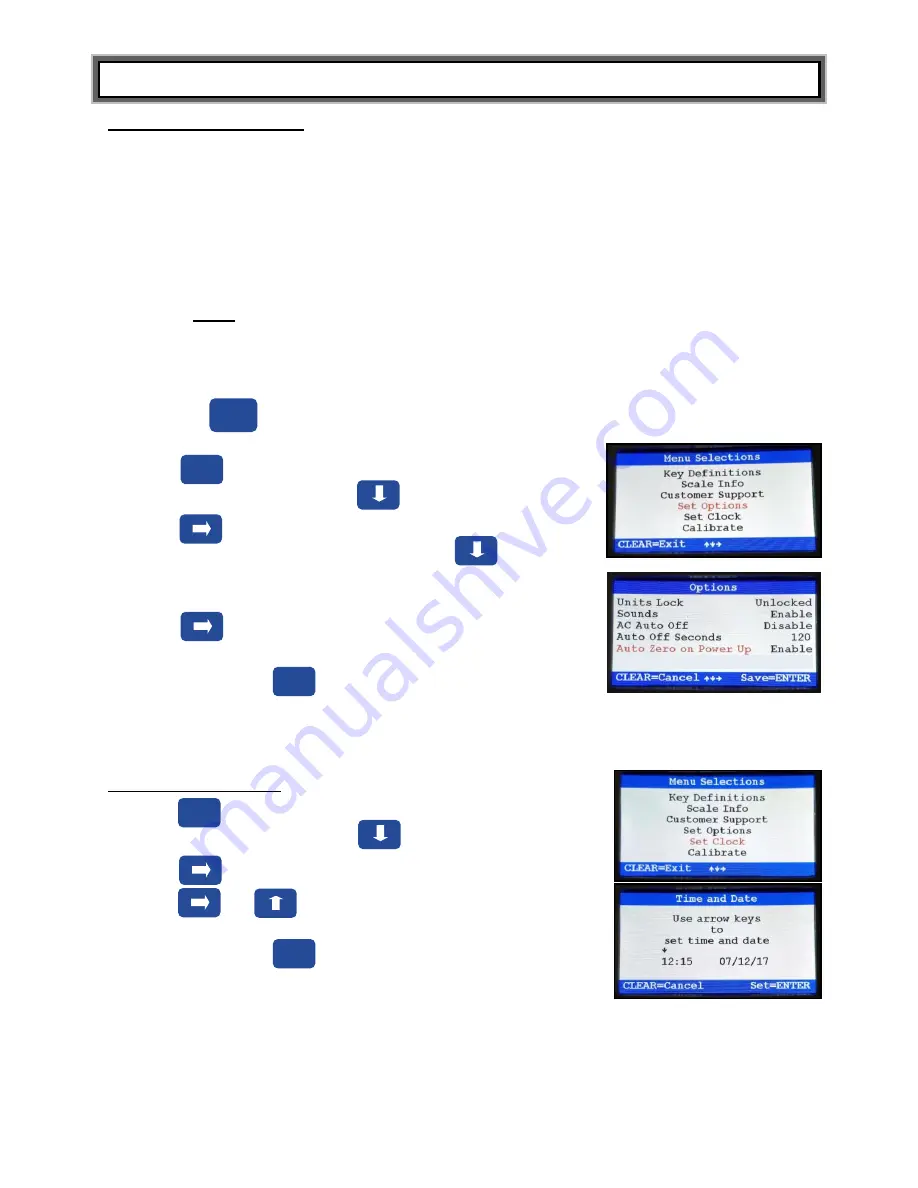
1. Press to access the Help menu options.
2.
While in the Help menu, press to select “Set Options”.
Press to advance to the next menu.
3.
While in the “Set Options” sub-menu, press to scroll
through the options until Auto Zero on Power Up
” is
highlighted in red.
4.
Press to change the “Auto Zero on Power Up” option.
Choose from Enable or Disable.
Note:
You must press to save your selection.
Setting Date and Time
1. Press to access the Help menu options.
2. Wh
ile in the Help menu, press to select “Set Clock”.
Press to advance to the next menu.
3. Use and to set the time and date.
Note:
You must press to save the information.
Help
Enter
Zero
(Clear)
Enter
Help


