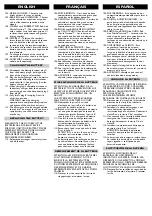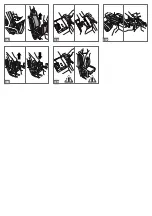
73 •Position the seat. Note: the seat can be
adjusted in length to two different
positions, depending on the height of the
child.
74 •Screw the knobs back into position.
75 •Lower the seat.
76 •Attach each seat with screw.
77 •Install the two parts of the windshield as
shown. Picture A shows the grille fitted
correctly
78 •Secure the grille with the three screws.
79 •Place the windshield on the hood hooking
the three central tabs.
80 •Fit the windscreen of the vehicle with
screws
81 •Remove the protectors from the rear axle.
82 •Insert the axle into the rear of the vehicle,
as shown in the figure.
83 •Position the driver hub in the inside of
each rear wheel (larger).
84 •Slide the rear wheel onto the axle with
the driver hub towards the inside of the
vehicle.
85 •Slide a small washer onto the rear axle
after inserting the rear wheel.
86 •Fasten the wheel, tightening one of the
four nuts supplied with the wrench
provided.
•Repeat the fitting operations for the other
rear wheel. Important: carry out the
operations while holding the axle still on
the opposite side with the help of the
second wrench provided.
87 •Remove the protectors from the front
axles.
ENGLISH
FRANÇAIS
ESPAÑOL
73 •Positionner le siège. Remarque : le siège
peut être réglé en longueur sur deux
positions différentes selon la taille de
l’enfant.
74 •Revisser les boutons.
75 •Baisser l’assise du siège.
76 •Fixer chaque siège à l’aide d’une vis.
77 •Monter le pare-brise. Sur le dessin A on le
voit entièrement monté.
78 •Fixer la partie grillagée au tube avec 3 vis.
79 •Placer le pare-brise sur le capot en
accrochant les trois broches centrales.
80 •Fixer le pare-brise au véhicule avec des vis.
81 •Enlever les protections du semi-axe
arrière.
82 •Enfiler le semi-axe sur la partie arrière du
véhicule tel qu’illustré sur le schéma.
83 •Positionner le moyeu à l’intérieur de
chaque roue arrière (plus grande).
84 •Enfiler la roue arrière sur l’axe avec le
moyeu du côté intérieur.
85 •Enfiler une petite rondelle sur l’essieu
arrière après avoir inséré la roue arrière.
86 •Fixer la roue en serrant l’un des 4 écrous
prévus avec la clé fournie.
•Répéter les mêmes opérations pour
monter l’autre roue arrière de l’autre côté.
Attention: effectuez ces opérations en
maintenant le semi-axe immobile du côté
opposé à l’aide de la seconde clé fournie.
87 •Enlever les protections des semi-axes
avant.
73 •Colocar el asiento. Nota: el asiento puede
regularse en altura en dos posiciones
diferentes según la altura del niño.
74 •Volver a atornillar los pomos.
75 •Bajar la silla del asiento.
76 •Fijar cada asiento con tornillos.
77 •Montar el parabrisas. En la ilustración A,
aparece perfectamente montado.
78 •Asegurar las redes al tubo con 3 tornillos.
79 •Colocar el parabrisas sobre el capó
acoplando las tres pestañas centrales.
80 •Asegurar el parabrisas al vehículo con los
tornillos.
81 •Eliminar las protecciones del eje posterior.
82 •Introducir el eje en la parte posterior del
vehículo tal y como se muestra en la
figura.
83 •Colocar el cubo motor dentro de cada
rueda trasera (más grande).
84 •Deslizar la rueda trasera en el eje con el
cubo motor hacia el interior del vehículo.
85 •Deslizar una pequeña arandela en el eje
trasero después de colocar la rueda
trasera.
86 •Fijar la rueda atornillando con la llave una
de las cuatro tuercas proporcionadas.
•Repetir la operación de montaje de la
rueda posterior en la rueda del lado
opuesto. Atención: realizar las operaciones
manteniendo firme el eje por la parte
opuesta con la ayuda de la segunda llave
puesta a disposición.
87 •Eliminar las protecciones de los ejes
delanteros.
Содержание Polaris Ranger RZR
Страница 4: ...15 14 13 1 2 R A B R L L 18 17 16 19 20 21 22 24 25 26 27 23 ...
Страница 6: ...D A A B B C A B C D D 28 29 30 1 A SX 2 37 38 39 40 41 42 31 32 33 34 35 36 ...
Страница 8: ...A B 43 44 45 D C E A A B B D E C A B 51 52 53 54 55 56 57 46 47 48 49 50 ...
Страница 10: ...58 59 60 A 61 62 63 64 65 66 67 68 69 70 71 72 ...
Страница 12: ...2 1 73 74 75 A 76 77 78 79 80 81 82 83 84 85 86 87 ...
Страница 18: ...115 116 117 118 119 ...
Страница 33: ...ELECTRICAL DIAGRAM DIAGRAMME ÉLECTRIQUE DIAGRAMA ELÉCTRICO ...
Страница 34: ......
Страница 35: ......


