SolidWorks Student License
Academic Use Only
PCASPRM-W ISSUED 05/05/2011 REV0
For Technical Support call +44 (0)1923 200 100
Visit Peerless at www.peerless-av.co.uk
Page 2 of 4
Do not begin to install your Peerless product until you have
•
read and
understood the instructions and warnings contained in this Installation Manual.
If you have any questions regarding any of the instructions or warnings, please
contact Peerless using the information on the back of this manual.
This product should only be installed by someone of good mechanical
•
aptitude, has experience with basic building construction and fully understands
these instructions.
Make sure that the supporting surface is in good condition and will safely
•
support the combined load of the equipment and all attached hardware and
components.
Never exceed the Maximum Load Capacity on Page One.
•
If mounting to wood stud or joist, make sure that mounting screws are
•
anchored into the centre of the studs. Use of an “edge-to-edge” stud fi nder is
highly recommended.
If mounting to concrete, breeze block, brick or other masonry material, do not
•
drill into mortar joints. Ensure screw and anchor are installed into solid areas
of surface.
Always use an assistant or mechanical lifting equipment to safely lift and
•
position equipment.
Tighten screws fi rmly, but do not overtighten. Overtightening can damage the
•
screws, greatly reducing their holding power.
This product is intended for indoor use only. Use of this product outdoors could
•
lead to product failure and personal injury.
This product was designed to be installed on the following surfaces only:
•
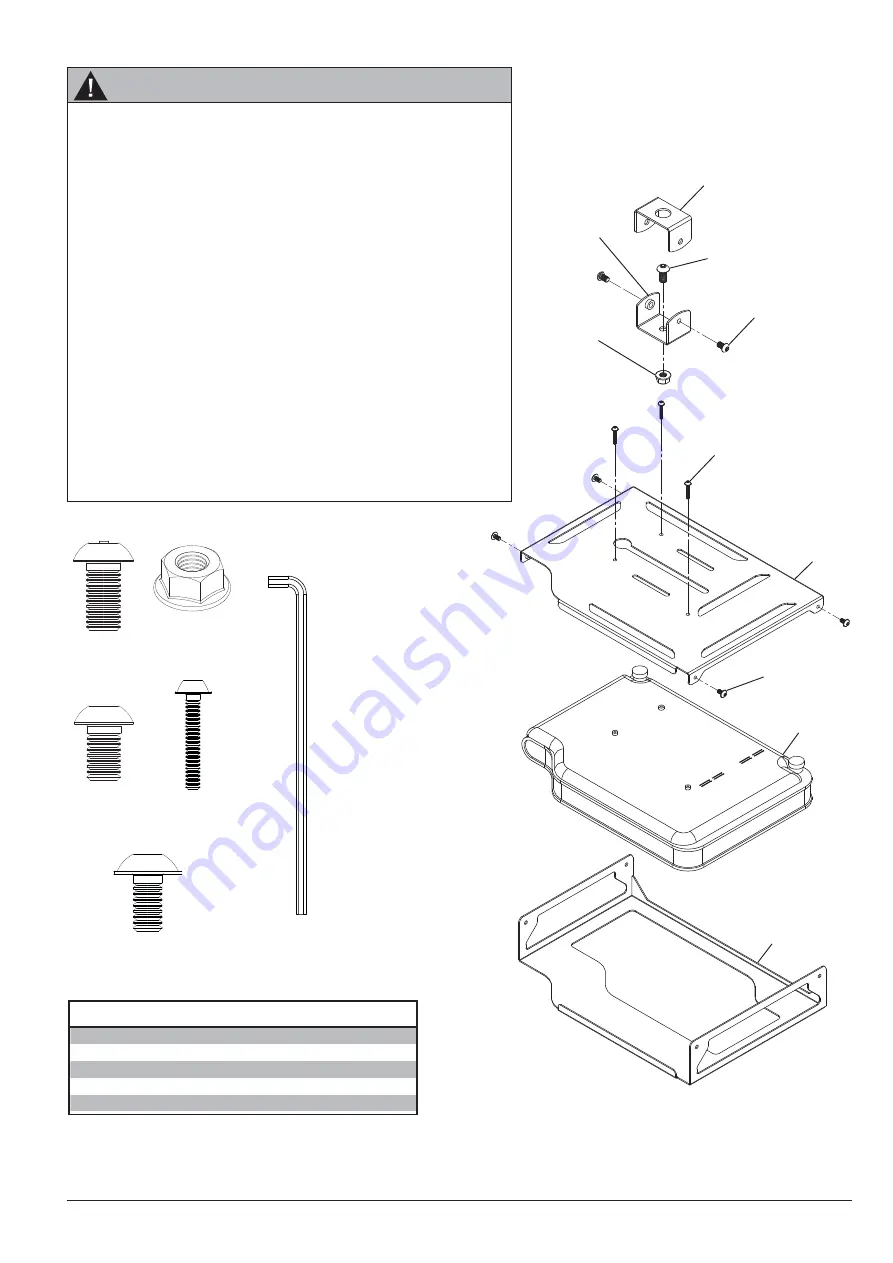
WALL CONSTRUCTION HARDWARE
7
Concrete, breeze block Included
7
Wood joist Included
7
Other surfaces See Accessories or contact Peerless
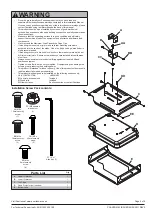
Installation Screw Pack contents:
WARNING
CC) M8 serrated
washer nut
(1)
AA) M8 x
15mm security
screw
(1)
BB) M6 x
10mm security
screw
(2)
DD) M3 x
20mm security
screw
(3)
EE) M4 x
8mm security
screw
(4)
A
B
BB
AA
DD
EE
CC
C
D
E
FF) 6” x 1”
Allen Key (1)
Parts List
Qty
A
Upper tilt bracket
1
B
Lower tilt bracket
1
C
Top Cage
1
D
Casio Projector (not included)
1
E
Bottom cage
1


