PedigreeTechnologies.com | Support: (701)-499-0022
5
Installation Steps, Continued
Install Power Cable
Continued
CameraView
STEP FOUR
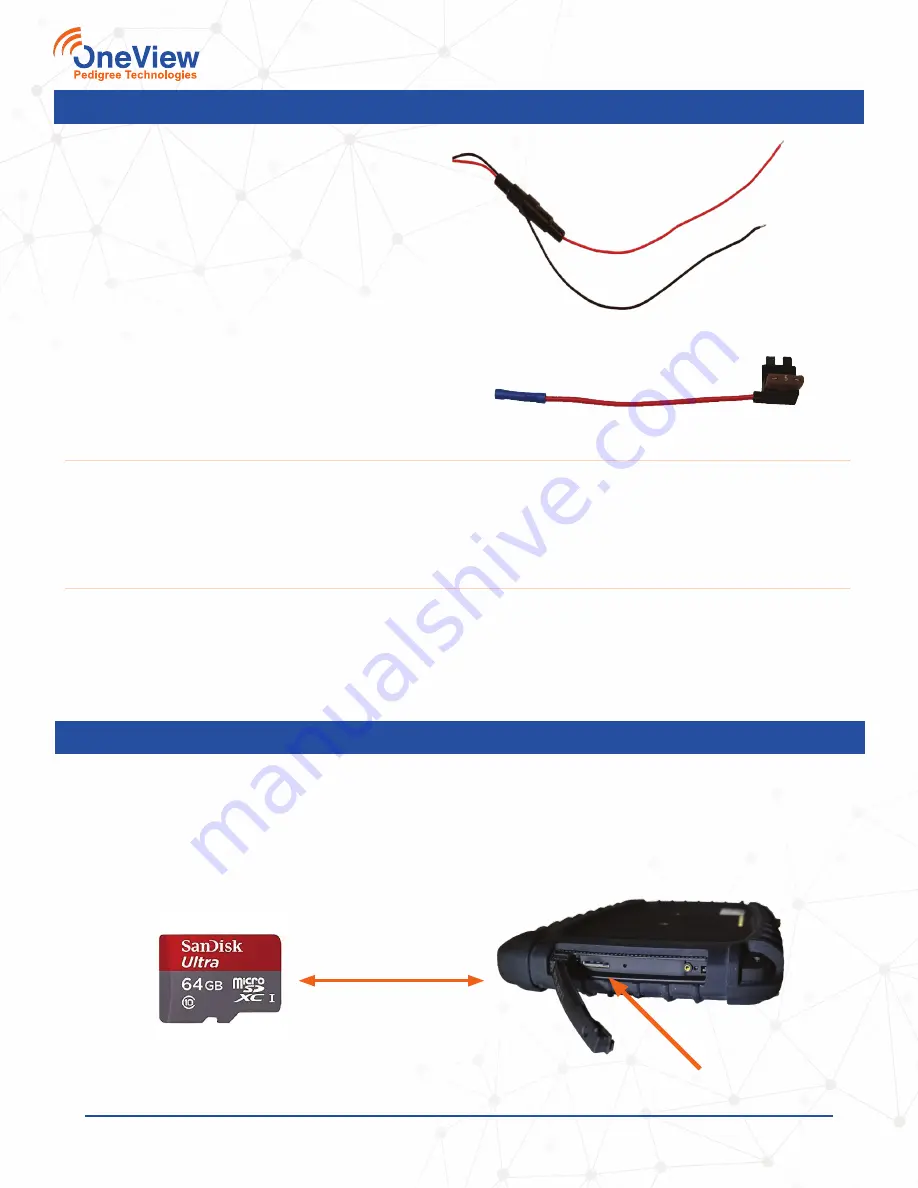
Connect the power (red) wire to ignition (or
other 12V power source that is powered on
when the ignition is on).
Black - Ground
Red - Power
Power to Fuse Tap
It may be necessary to connect the power wire to
a blade fuse adapter.
• Crimp the power wire in the open end of the
adapter
• Remove the ACC fuse and insert it into the
fuse adapter
(maximum 10 Amps)
• Plug the adapter into the open ACC fuse slot
POWER CABLE - CIGARETTE LIGHTER ADAPTER
An optional power cable is one that plugs into the cigarette lighter for power.
(Recommended only
for switched ignition power. Constant draw may drain battery while not in use.)
Be sure to route the
cable out of view as much as possible, tucking it into the headliner and dash panels as needed.
APMM POWER MODULE
(see page 8 for install instructions)
An optional power harness is one that plugs into the Cab-Mate One cradle for power. Be sure to
route the cable out of view as much as possible, tucking it into the headliner and dash panels as
needed.
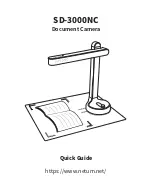
INSERT MICRO SD CARD
Insert the micro SD card into the SD port on the side of the tablet.
On the Cab-Mate One and Cab-
Mate Connect tablets, partially pull out the side rubber cover until it hinges out, revealing the SD
port.
Insert the micro SD card carefully. Do not force. If it seems not to go in smoothly, you may be
inserting the wrong end or the card is facing upside down.
Install SD Card
Insert this end


