background image

READ AND FOLLOW 

ALL INSTRUCTIONS!! 


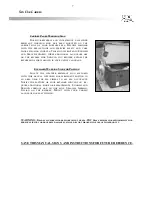
This unit is a professional-grade product. A knowledge of construction                  

techniques, plumbing and electrical installation according to codes are required 

for proper installation and user satisfaction. It is recommended that a licensed 

contractor perform the installation. Warranty is voided  

for improper Installation related issues. 


It is the responsibility of the home owner to ensure that all users of the spa are adequately                

informed of all precautions. 


Use the spa only as described in this manual. The spa is intended for home use only.  Do not use             

the spa in a commercial or rental setting. All warranties will be voided. 


GROUND ALL METAL ELECTRICAL EQUIPMENT 


 

A green colored terminal or a terminal marked G, GR, Ground, or Grounding,  is located    

inside the supply terminal box  or compartment.  This terminal must be connected to the 

grounding means provided in the electric supply service panel, using a continuous copper wire 

equivalent in size to the circuit conductors supplying this equipment.  *

according to, but not limited 

to: NEC, NFPA 70, Section 680.40, UL 1563., CAN/CSA C22.2 No. 281.1M89


 

At least two lugs marked “Bonding Lugs” are provided on the external surface or on the    

inside of the supply terminal box or compartment.  Connect the local common  bonding grid 

(household ground) in the area of the spa to these terminals, using an  insulated or bare     

copper conductor not smaller than No. 6 AWG. 


 

All field-installed metal components such as rails, ladders, drains or similar hardware       

located within 5 feet (1.52 m) of the spa or hot tub must be bonded to the equipment grounding 

bus with copper conductors not smaller than No. 6 AWG. 


 

All metal surfaces within 5 feet (1.52 m) of spa must be bonded to the home bonding grid. 

 


GROUND FAULT CIRCUIT INTERRUPTER PROTECTION  

(

OR EQUIVALENT; RCD, FOR EXPORT INSTALLS


 

All PDC Spas are permanently installed units.  GROUND FAULT CIRCUIT INTERRUPTER 

PROTECTION IS REQUIRED.   All spa equipment systems must be protected by a class a  

ground fault circuit interrupter (GFCI) or equivalent; RCD, for export installs.  A ground 

fault circuit interrupter type circuit breaker (NOT SUPPLIED) must be installed in the home 

panel box by a licensed electrician when making wire connection to the spa support pack equip-

ment. 


DANGER:  RISK OF ELECTRICAL SHOCK:   


 

Install the spa at least five feet (1.52 m) from all ungrounded (unbounded) metal surfaces. 


 

Ground fault circuit interrupter protection of the home power supply to the spa is necessary.  

Your electrician should explain how it works. (See spa maintenance) 


 

Do not permit any electric appliance, such as a light, telephone, radio or television, within five 

feet (1.52 m) of a spa.  Keep electrical appliances and extension cords away from the spa.             

Water is a conductor of electricity. 

READ AND FOLLOW ALL IMPORTANT SAFETY INSTRUCTIONS 


When installing and using this equipment basic safety precautions should always be taken to             

reduce the risk of electrical shock, to ensure safe usage, and to safeguard the user’s health. 

Safety Instructions 

Содержание Aruba LX

Страница 1: ...1 800 451 1420 www pdcspas com Owners Manual revised 02 2016...

Страница 2: ......

Страница 3: ...____________________________ Address ___________________________________________________ ___________________________________________________ ___________________________________________________ Install...

Страница 4: ...uipment Location 24 Installing the Thermal Cover 25 Wiring Installation Wiring Recommendations 26 U S State side Guidelines 27 Export in xm ce Platform 28 29 Export in xe ce Platform 30 Initial Start...

Страница 5: ...REPLACE ALL SAFETY SUCTION COVERS EVERY 7 YEARS Replace with similar VGB approved fittings at same or higher flow ratings Replacement applies to all spa models WARNING...

Страница 6: ...nit is a professional grade product A knowledge of construction techniques plumbing and electrical installation according to codes are required for proper installation and user satisfaction It is reco...

Страница 7: ...han No 6 AWG All field installed metal components such as rails ladders drains or similar hardware located within 5 feet 1 52 m of the spa or hot tub must be bonded to the equipment grounding bus with...

Страница 8: ...his spa is sized to match the specific water flow created by the pump Should the need arise to replace the suction fitting or the pump be sure that the flow rates are compatible Never operate the spa...

Страница 9: ...uld consult a physician before using a spa Persons using medication should consult a physician before using a spa since some medication may induce drowsiness while other medication may affect heart ra...

Страница 10: ...ors to complywith Section 422 20 of the U S National Electric Code The disconnecting means must be readily accessible to the tub occupant but installed at least 5 FT 1 5 M from the spa water WARNING F...

Страница 11: ...ot place spa in direct sunlight while unit is empty or when sealed in shipping materials Excessive heat build may cause damage to spa and void warranty Install spa so that water can easily be drained...

Страница 12: ...ing Sign for Posting Locate the weather resistant sign enclosed with this manual intended for permanent posting in an area near the spa visible to all spa occupants Notify the factory or your retailer...

Страница 13: ...e spa lip that control air water mix for a segment of the jets Air assage This appears as a number of tiny holes in the seating area whereby the bubbler blower pushes air through for extra therapy act...

Страница 14: ...ride the filtration cycle low speed For example if the spa has been programmed to circulate the system at a time when bathers are exiting the spa the pump will continue to operate at low speed even th...

Страница 15: ...40 2x16 1x32 Heater H 4 0 KW 2 0 KW Operation System Main Spa Side Control 7 Gecko 500 Series Gecko 500 Series Seating Capacity 5 Shell Material Acrylic Dimensions Domestic 82 6 10 sq x 36 3 Dimensio...

Страница 16: ...ent System OZ Ozone Filter 25 sq ft Slide Valves 2 Mega Swirl Jet A 2 Large Euro Jet w Eyeball E 28 Mega ssage Jet G 2 Ozone Jet O 2 Diverter Valves V 0 Safety Suction U 2 Mini Skimmer K 1 Air Control...

Страница 17: ...ystem Ozone Filter 25 sq ft Slide Valves 4 Mega Swirl Jet A 6 Large Euro Jet w Eyeball E 63 Mega ssage Jet G 3 Ozone Jet O 2 Diverter Valves V 0 Safety Suction U 5 Mini Skimmer K 1 Air Control I 4 Spa...

Страница 18: ...llons per Minute WATER SYSTEM photo ref Water Treatment System Ozone Filter 25 sq ft Slide Valves 2 Mega Swirl Jet A 2 Large Euro Jet w Eyeball E 28 Mega ssage Jet G 2 Ozone Jet O 2 Diverter Valves V...

Страница 19: ...stem OZ Ozone Filter 25 sq ft Slide Valves 4 Mega Swirl Jet A 1 Large Euro Jet w Eyeball E 63 Mega ssage Jet G 10 Ozone Jet O 2 Diverter Valves V 0 Safety Suction U 5 Mini Skimmer K 1 Air Control I 4...

Страница 20: ...c 60Hz Export 50Hz Pump 1 peak continuous HP 1 2 0 1 0 HP 2 0 1 0 HP Pump 2 peak continuous HP 2 4 0 2 0 HP 4 0 2 0 HP Pump 3 peak continuous HP 3 4 0 2 0 HP 4 0 2 0 HP Air Bubbler 4 1 5 HP 1 5 HP Ele...

Страница 21: ...0Hz Export 50Hz Pump 1 peak continuous HP 1 2 0 1 0 HP 2 0 1 0 HP Pump 2 peak continuous HP 2 4 0 2 0 HP 4 0 2 0 HP Pump 3 peak continuous HP 3 4 0 2 0 HP 4 0 2 0 HP Air Bubbler 4 1 5 HP 1 5 HP Electr...

Страница 22: ...omestic 60Hz Export 50Hz Pump 1 peak continuous HP 1 2 0 1 0 HP 2 0 1 0 HP Pump 2 peak continuous HP 2 4 0 2 0 HP 4 0 2 0 HP Pump 3 peak continuous HP 3 4 0 2 0 HP 4 0 2 0 HP Air Bubbler 4 1 5 HP 1 5...

Страница 23: ...3x16 Heater H 4 0 KW 3 8 KW Operation System 1000 1000 Main Spa Side Control 7 Gecko 1000 Series Gecko 1000 Series GENERAL rev 2016 02 60 5 x 84 7 x 33 2 9 Acrylic 3 Seating Capacity Shell Material Di...

Страница 24: ...ic 60Hz Export 50Hz Pump 1 peak continuous HP 1 2 0 1 0 HP 2 0 1 0 HP Pump 2 peak continuous HP 2 4 0 2 0 HP 4 0 2 0 HP Pump 3 peak continuous HP 3 4 0 2 0 HP 4 0 2 0 HP Air Bubbler 4 1 5 HP 1 5 HP El...

Страница 25: ...1 peak continuous HP 1 2 0 1 0 HP 2 0 1 0 HP Pump 2 peak continuous HP 2 4 0 2 0 HP 4 0 2 0 HP Pump 3 peak continuous HP 3 4 0 2 0 HP 4 0 2 0 HP Air Bubbler 4 1 5 HP 1 5 HP Electronics Electrical Can...

Страница 26: ...e positive support is adequate Call your builder 9 Area for placement of support equipment where adequate space will be needed to gain access to components for maintenance and general servicing 10 Be...

Страница 27: ...oof barrier protection underneath 9 The spa should have access to a power source capable of supplying 240 volts AC power It must be wired directly into a grounded circuit with a Ground Fault Circuit I...

Страница 28: ...g mesh or rod attached to a bond wire Make sure your dimensions are correct as you prepare the site for your new hot tub Click onto the web site or call your retailer for dimensions of the model you h...

Страница 29: ...e right features the XM platform Note that the XE platform used on the SE Series spas Refer to the spa specification page to identify the correct platform for your spa unit Check that all valves two p...

Страница 30: ...out of the reach of chil dren Spa Installation 25 Remove the spa cover from the box and place it on the spa Pull down one of the straps on the spa cover and hold latch against the cabinet side panel T...

Страница 31: ...OT SUPPLIED BY A QUALIFIED ELECTRICIAN IN ACCORDANCE WITH ALL CODES AND REGULATIONS REFER TO TYPICAL G F C I INSTALLATION ON FOLLOWING PAGE PDC SPAS DOES NOT SUPPLY THE GFCI PRIOR TO EACH USE TESTING...

Страница 32: ...ite To Spa To Spa OUTPUT Line BLACK House Input Line RED House Input Pig Tail WHITE From GFCI Breaker Going to Neutral Bar in Box Load Neutral Bar Line Neutral WHITE House Input From House INPUT IMPOR...

Страница 33: ...indicated on the sticker use the 14mm 9 16 wrench or flat screwdriver to tighten the bolts on the terminals After making sure wire connections are secure push them back into the box and close the door...

Страница 34: ...and hold for 5 seconds Subsequent presses will save changes and display the next option available or exit automatically if it was the last one Use Change button to change the parameters displayed Note...

Страница 35: ...lified licensed electrician only and in accord ance with local regulations Identify the correct CE platform on the spa unit in accordance with the home s electrical output and follow the guidelines be...

Страница 36: ...otating and free of excess air except the jets attached to ozone if this option is included on the system Allow the system to operate for five minutes in this position 10 Set the thermostat to the des...

Страница 37: ...r Touch the screen to turn on the keypad After 30 minutes without activity it will shut off Then follow the instructions on the screen to access the main screen Keypad functions Start or stop accessor...

Страница 38: ...red icon menu is shown in the middle screen or press on the menu name Water care The Water Care section will help you set up your ideal filtration and heating settings Choose between Away from Home Be...

Страница 39: ...alendar icon to go back Ensure that you have selected the desired Water Care option in the main Water Care menu Maintenance From the Maintenance you can access the following options Error log To acces...

Страница 40: ...cal Configuration Please do not make changes in this section unless you are a qualified electrician In this section you can change the low level configuration as well as modify the number of phases an...

Страница 41: ...he Speaker Sub menu adjust the Balance Fade and Sub Woofer by sliding the appropriate slider On Off Speaker Source Bluetooth Volume Up Down In stream2 Mute Play Last track Next track CODE MESSAGE HL H...

Страница 42: ...e of the devices running on your spa When an accessory has more than two states press the button until it reaches the desired state Pump 2 key Press Pump 2 key to turn Pump 2 on at low speed Press a s...

Страница 43: ...ameters Pressing Key 1 will take you back to the main settings menu Audio The audio selection in the settings menu gives you the option to disconnect or un pair your Bluetooth enabled device It is als...

Страница 44: ...to chlorine although in the free and combined form it is an effective sanitizing agent and causes no offensive odor or eye burn It is easier to maintain a bromine residual than chlorine and it is effe...

Страница 45: ...just pH to 7 2 7 6 Use scale inhibitor Dilute with makeup water Ozone Unit Location varies with spa model Refer to specifications for location and take note during installation positioning Ozone Your...

Страница 46: ...ter Periodic treatments with a vinyl conditioner will help protect against deterioration caused by UV rays from the sun Never allow anyone to stand or sit on the cov er and avoid dragging it across ro...

Страница 47: ...lued together These plas tic parts and their many glue joints are subjected to harsh treatment Every spa is tested with water to assure there are no leaks when it leaves the factory however sometimes...

Страница 48: ...down and turn off at the breaker 2 Drain spa of all water 3 Remove any remaining water with sponge 4 To remove water from the air channel the LX Series spas equipped with the Air assage design turn p...

Страница 49: ...estrictions blockages in jets and or main skimmer and pump Check water level Push pump button s to check if high speed is functioning on a dual speed pump Check to be sure the Ultra Massage Selector d...

Страница 50: ...____________________________________________________________ _______________________________________________________________ _______________________________________________________________ ___________...

Страница 51: ......

Страница 52: ...75 Palmer Industrial Road Williamsport Pennsylvania 17701 USA 1 800 451 1420 tel 1 570 323 8485 fax www pdcspas com www pdcspasinternational com...

Отзывы: