Manual
34
5.22 Firmware update
The device software (firmware) can be updated via the USB interface. First check whether an updated
version of the currently installed software is available. This can be found on our website under:
https://www.pce-instruments.com/deutsch/geraete-software-downloadbereich-win_4.htm
There you will see the most recently updated firmware version. The version number is composed of three
digits for the hardware and three for the software (hhh.sss). Only the last three digits are relevant for the
Firmware. The currently installed version is displayed on the PCE-VM 40 start screen. If firmware with a
higher version number is available on the website, please proceed as follows:
1. Download the firmware file vm40.hex from the above-named website. This contains the firmware
for the instruments PCE-VM 40A and PCE-VM 40B.
2.
Also download the program “Firmware Updater” from the above-named website and install it on
your PC.
3. Connect the PCE-VM 40 to the PC, using the supplied USB cable, and switch it on. The PC will
then recognize it as a USB device.
4.
Start the “Firmware Updater”, then select the instrument type “PCE-VM 40” and the virtual COM
port assigned by the PC. If you are not sure which of the available COM ports is correct, you can
check in the Windows system control manager in the device manager.
5.
Click on “Load” in the “Firmware Updater” and enter the path to the file where the downloaded
firmware file vm40.hex is located.
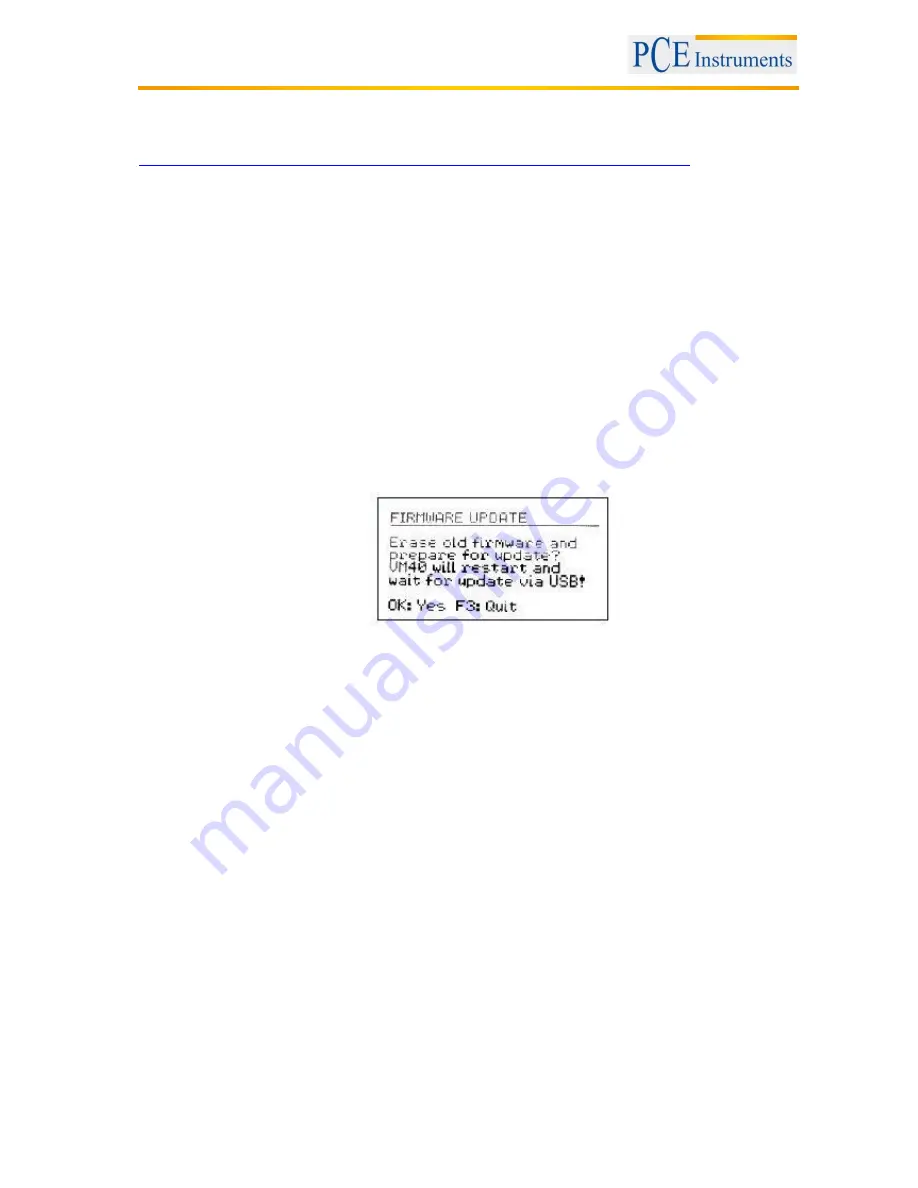
6. Within the PCE-VM 40
“Device settings”, select the option “Update firmware” and confirm the
subsequent warning by pressing OK. By carrying out this step, the old firmware is deleted. The
PCE-VM 40 will then indicate that it is awaiting new firmware data from the USB interface
(“Waiting for update”).
7.
Click on “Send” in the “Firmware Updater” and confirm the subsequent note. Transfer of the
firmware data has now begun. The transfer progress is displayed as a time bar on the PC and
also on the PCE-VM 40. When the update is finished, the PCE-VM 40 will carry out a restart and
the “Firmware Updater” will close. Please do not interrupt the update process. After transfer
failures, the update can be restarted at point 3.
5.23 Charging the battery
The integrated NiMH battery has a capacity of 9 Ah, which enables the PCE-VM 40 to operate
independently for more than 10 days. The charge level is displayed in the top left corner of the display.
Shortly after the battery symbol displays empty, the PCE-VM 40 switches off. The device measures
according to the specifications until it reaches this state. To recharge the battery, please connect the
charger provided to the charge socket of the device.
After connecting the charger, you need to switch the device on in order to start the charging process.
After a few seconds,
“Chg” appears in the top left corner of the screen in place of the battery symbol. The
battery has started charging
only when the “Chg” indicator appears and only while measurements are
being displayed. If you open a menu or switch off the device, the charging process will be interrupted. If
the battery is completely flat, it takes approximately 10 hours to be fully recharged. You can continue
taking measurements while the battery is being charged.
Содержание PCE-VM 40A
Страница 31: ...Manual 31...
Страница 32: ...Manual 32...


