5
4
Installation guide – Towel warmer PAX TR-i
THANk yOu FOR cHOOSING A PAX TOwEl dRyER
PAX TR-i is a range of electric towel warmers approved for installation in bathrooms and other damp areas. They are intended for
drying towels and similar textiles washed in water. To avoid danger for young children, the warmer’s lowest horizontal bar must be
placed at least 600 mm above the floor. The towel warmer reaches a temperature of around 60°C, which can be hot to the touch.
MOuNTING THE cONNEcTION BOX ON THE wAll
ATTENTION! On delivery, the separate connection box and wall bracket will be prepared for concealed electrical connection and
may only be installed by a qualified technician. The connection box must only be mounted with the circuit-breaker pointing down-
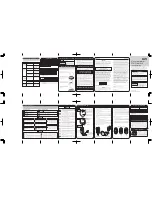
wards. The towel warmer can be mounted in the positions as shown in Figure 8A.
1: Pull out the connection box from the timer bracket.
2: Use the connection box as a drilling template. Make sure it is in level when marking out the positions of the drilling holes.
3: Choose a drill that is suitable for the wall type. Make sure you do not drill through electrical wires.
Seal the screw holes using silicon or other suitable sealing compound to prevent damp from penetrating into the wall.
ElEcTRIcAl cONNEcTION
ATTENTION! Must only be carried out by a qualified technician.
The towel warmer is labelled with an and must not be grounded.
4: Remove the cover on the connection box by pressing in the stop with a screwdriver.
5: Pull the wires through the connection box. Screw the connection box into position. Use the screws provided, use plugs if
necessary. If there are no crossbars or other attachment points available in which to fasten the screws, the use of fasteners
(such as Emhart Molly) is recommended.
6: Connect the live and neutral wires to the base as shown in the figure (230V 50Hz). Make sure the wires are placed as shown
in the figure, to avoid trapping when the cover is fitted.
7: Fit the cover back onto the connection unit and seal the top against the wall with silicon or other suitable sealing compound.
MOuNT THE TOwEl wARMER ON THE wAll
ATTENTION! Never drill holes in the wall until you have checked the dimensions of the actual towel warmer. There may be minor
variations in dimensions. PAX accepts no liability if pre-drilling is carried out without following the installation guide.
8 A: The towel warmer has movable and rotating wall brackets and can be mounted in the positions as described in Figure 8A
B: The towel warmer can be mounted with only one (or two) wall brackets to enable it to be rotated (180°).
9 A: The towel warmer is supplied with three separate wall brackets with associated inserts. Thread and position each of the
wall brackets onto the tube. See the approximate positioning for each model in the figures on the back of the guide.
Lock each wall bracket by pressing the insert into the tube by hand.
B: Push the timer bracket over the connection box. Check that the towel warmer is in level. Mark out the drilling holes
for each wall bracket. Remove the towel warmer. Protect the connection box from cuts from the drilling (use a plastic
bag or similar). Pre-drill the holes and seal them using silicon or other suitable sealing compound in order to prevent
damp from penetrating into the wall.
C: Push the towel warmer’s timer bracket over the connection box.
D: Fasten the wall brackets. Use the screws provided, using rawl plugs/fasteners if necessary.
E: Finally, apply screw E manually with a screwdriver (Torx T25). Do not use an electric screwdriver.
Tighten the screw so that it sits firmly in place. Do not tighten.
clEANING
The towel warmer can be wiped cleaned using a damp cloth with detergent. Do not use solvents.
TIMER
Read the separate user guide.
AccESSORIES
Cord (cord and plug): Art. no. 8340-1
Read this guide carefully before use.
We don’t take responsibility for printing errors and reserve the right to make changes to materials and designs.
EN
According to the standard EN 60335, the following shall be considered. This appliance may be used by people aged 8 years upwards
and by persons with reduced physical or mental capabilities or lack of experience and knowledge either under supervision or provided
they have been instructed on the use of the device in a safe manner and are aware of the risks. Children should not play with the
appliance. Children must not clean or maintain the appliance without adult supervision.
NO
Monteringsanvisning – Håndkletørker PAX TR-i
TAkk FOR AT du vAlGTE EN PAX HÅNdklETøRkER
PAX TR-i er en serie elektriske håndkletørkere som er godkjente for montering i våtrom. De er laget for og tørke tekstiler vasket
i vann, for eksempel håndklær, og generellt tøy som får plass. For og unngå fare for små barn skal laveste horisontale steg ha en
avstand på minimum 600 mm fra fra gulvet. Håndkletørkeren oppnår en temperatur på 60˚C som kan oppleves ubehagelig ved
berøring.
MONTERE kOBlINGSHuSET PÅ vEGGEN
OBS! Det separate koblingshuset med tilhørende fester er ved leveransen anpasset skjult tilkobling og skal derfor kun installeres
av godkjent installatør. Koblingshuset skal kun monteres med strømbryter pekende ned. Håndkletørkeren kan monteres i de
posisjoner som vises på figur 8A.
1: Dra ut koblingshuset fra håndkletørkerens timerfeste.
2: Bruk koblingshuset som mal til skrue hull, vær nøye med plasseringen så ikke skruehull blir synlige.
3: Velg riktig bor. Vær sikker på at du ikke borer i ledninger som ligger skjult i veggen.
Tett skruehull med silikon eller annen egnet tetningmasse for og forhindre fukt i veggen.
ElEkTRISk TIlkOBlING
OBS! Skal kun utføres av godkjent installatør.
Håndkletørkeren er -merket og skal ikke jordes.
4: Løsne lokket på koblingshuset ved og trykke inn låseknappen med en skrutrekker.
5: Før ledningene inn i koblingshuset. Skru koblingshuset fast. Bruk medfølgende skruer og evt plugger. Om ikke finnes tilgang
til reisverk eller treverk med bra hold så må egnede plugger benyttes for bra feste.
6: Koble til begge fasene i koblingshuset som figur viser (230V 50Hz). Vær nøye med at ledningene ligger som vist på figur
så de ikke kommer i klem når lokket settes på plass.
7: Sett lokket på plass på koblingshuset og tett oversiden med egnet tetningsmasse for og hindre fukt.
MONTERE HÅNdklETøRkEREN PÅ vEGGEN
OBS! Borr aldri hull i veggen uten og først kontrollere målene på håndkletørkeren. Det kan finnes mindre forskjeller på produkter.
PAX fritar seg alt ansvar om hull har blitt laget uten og ha fulgt monteringsanvisningen.
8 A: Håndkletørkeren har flytt og vridbare veggfester og kan monteres i posisjoner som vist på figur 8A.
B: Håndkletørkeren kan monteres med kun et ( alt to ) veggfester for og gjøre den svingbar (180°).
9 A: Håndkletørkeren leveres med tre stykk løse veggfester med tilhørende innsatser. Tre på og posisjoner hvert enkelt feste
på røret, se ca plassering for den respektive modell i figurene på baksiden av anvisningen. Lås hvert enkelt veggfeste
ved og hånd presse innsatsen mot røret.
B: Skyv håndkletørkerens veggfeste inn i koblingshuset. Kontrollere at håndkletørkeren sitter som du vil ha den.
Markere borrhullene for hvert veggfeste. Løft håndkletørkeren bort. Beskytt koblingshuset mot borrspon
(plastpose eller tekstil). Forborr hullene og tett de med egnet tetningsmasse for og forhindre fukt i veggen.
C: Skyv så håndkletørkerens timerfeste ut av koblingshuset.
D: Skru fast veggfestene. Bruk medfølgende skruer og evt plugger.
E: Skru til slutt innn skruen E for hånd med skrutrekker ( Torx T25 ) bruk ikke noe annet. Skru til så den sitter
hardt men ikke for hardt.
RENGjøRING
Håndkletørkeren kan tørkes av med en fuktig klut og vaskemiddel. Løsningsmiddel kan ikke benyttes.
TIMER
Les separat bruksanvisning.
TIlBEHøR
Ledning med stikk: Art.nr. 8340-1
Les nøye gjennom denne anvisning før anvenning.
Vi tar forbehold om trykkfeil, og forbeholder oss retten til material- og konstruksjonsendringer.
I følge standarden EN 60335 skal følgene bli tatt til etterretning. Dette apparatet skal kun benyttes av personer fra 8 år og oppover.
Personer med nedsatt fysisk eller mental helse skal kun benytte dette etter og ha fått opplæring sånn at apparatet blir benyttet på en
sikker og forsvarlig måte samt blitt informert om farene ved bruk. Barn skal ikke leke med apparatet. Rengjøring og vedlikehold skal
ikke gjøres av barn uten oppsyn.


