background image

16

FPX6000 Quick Start Guide

Transmit channels are advertised on the network. A receiver uses this advertisement to 
establish a subscription to the channel. A transmit channel can be sent to multiple 
receivers using unicast or multicast.

Receive channels are connected to transmit channels via a subscription. Each receive 
channel will receive audio over the network from at most one transmit channel.

When you click a blue square at the intersection between a transmit channel and a 

receive channel, a subscription will be created, and a green check symbol 

 will 

appear in the matrix intersection. You may initially see a gray hourglass symbol 


(usually very briefly) to indicate that the subscription is in process.

If there is a problem with the subscription, a warning 

 or an error symbol 

 may 

appear. If many devices have been subscribed at the same time, a yellow pending 


symbol may appear temporarily.

11.1  Routing video and audio signals

To route the video and audio signals from the FPX6000 Transmitter to the FPX6000 
Receiver, do the following:

1. Launch Dante Controller software.

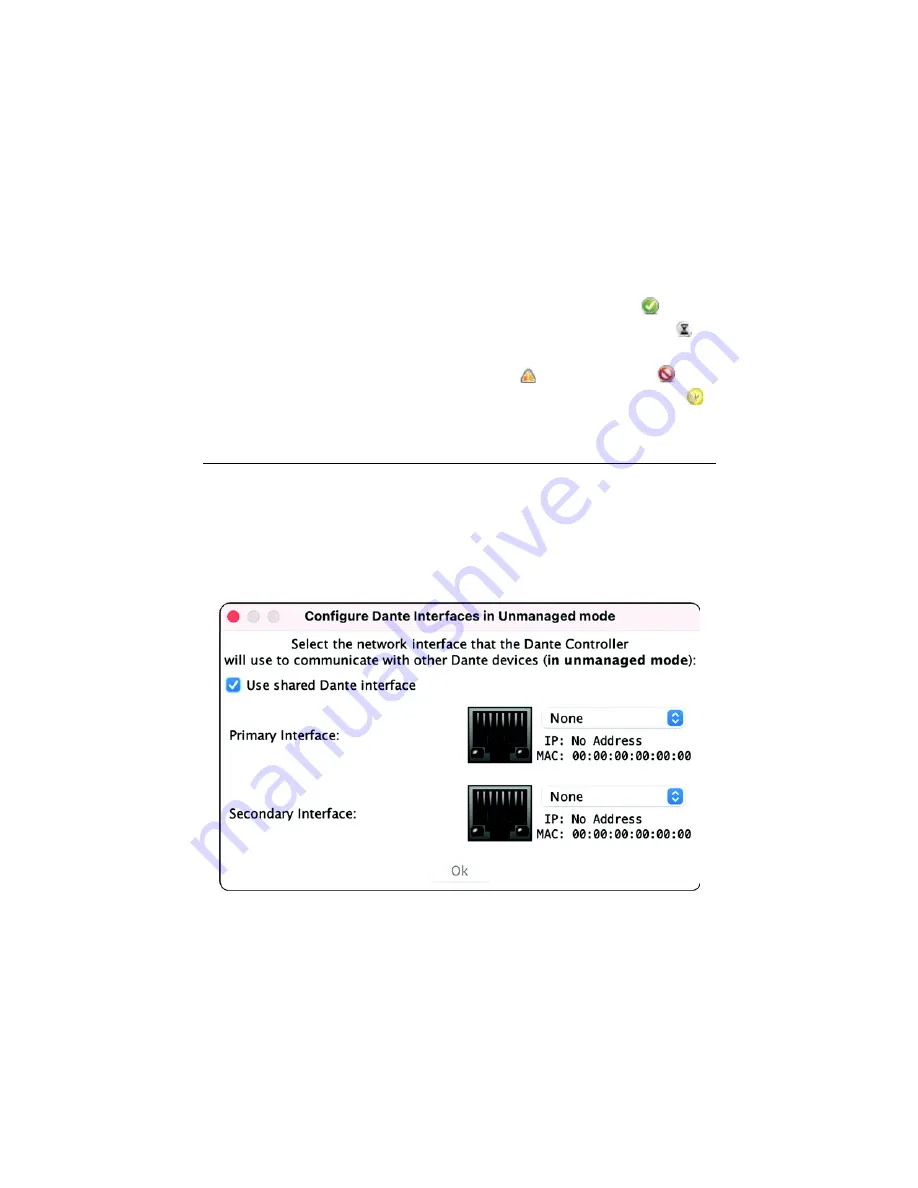
2. Choose an Ethernet Interface (see 

figure 13

). If your computer has multiple Ether-

net interfaces or Network Interface Cards, Dante Controller will ask you to choose 
the Primary Interface for its use.

Figure 13. 

Select the network interface

3. After launching the Dante Controller Software, the FPX6000T and FPX6000R will 

automatically be discovered.

Содержание FiberPlex FPX6000 Series

Страница 1: ...ght industrial commercial or residential environment It is not intended for use in a heavy industrial environment REGULATORY MODEL NUMBER FPX6000D4 Part Number 50000141 Rev A Revised November 18 2021...

Страница 2: ...the device indicates direct current DC In accordance with the requirements of council directive 2002 96 EC on Waste of Electrical and Electronic Equipment WEEE ensure that at end of life you separate...

Страница 3: ...24 48 VDC PS 03671H1 021 Power Supply AC DC Universal Input 54 VDC 1 2 A 65 W FP101E SFP BT90 52 Industrial Gigabit SFP Media Converter with IEEE802 3bt Power Injector 90 W 10 100 10000Base TX RJ45 1...

Страница 4: ...0 Connecting Power on page 12 4 Install the Dante Controller software Refer to section 10 0 Installing the Dante Controller Software on page 13 to download and install the software 5 Configure the FP...

Страница 5: ...FPX6000 Quick Start Guide 5 Figure 1 VESA mounting bracket holes Figure 2 VESA mounting holes example 1 Locate the VESA mounting holes on the rear panel of the TV or monitor see figure 2...

Страница 6: ...al that came with the TV or monitor 3 Place the FPX6000 in the bracket see figure 3 Figure 3 Placing the device on the VESA mounting bracket 4 Use 4 mounting screws included with the bracket to secure...

Страница 7: ...es in a 19 inch rack using the rack mounting bracket see figure 5 Figure 5 Rack mounting bracket 1 Remove 4 screws from below the rear panel as shown in figure 6 Figure 6 Removing the 4 screws from th...

Страница 8: ...rews that were removed in step 1 see figure 8 Figure 8 Installing 4 screws to the underside of the rack mount 4 If there is another FPX6000 to install in the bracket go to step 5 Otherwise use 4 mount...

Страница 9: ...ing mounting hardware appropriate for the wall material 3 Place the FPX6000 in the bracket as shown in figure 3 on page 6 4 Use 4 mounting screws included with the bracket to secure the FPX6000 in the...

Страница 10: ...rear panel of the FPX6000T Transmitter see figure 10 on page 11 as follows Connect an HDMI 2 0 1 4b video source input for example a PTZ camera broadcast camera or video player outputting up to 4Kp60...

Страница 11: ...ard pen Dante AV PDS keyboard mouse 3 Install cables on the rear panel of the FPX6000R Receiver see figure 11 on page 12 as follows Connect the HDMI 2 0 1 4b video endpoint a high quality 4K monitor i...

Страница 12: ...ise connect the power supply cable to the 48 VDC at 30 W port see figure 10 on page 11 for the Transmit ter or figure 11 on page 12 for the Receiver then go to step 3 2 Connect the Dante Network Ether...

Страница 13: ...n All OK Amber Booting up awaiting sync Red System failed to boot correctly Off No power Sync Solid Green Dante network clock slave sync achieved Blinking Green Dante Network clock master Amber Syncin...

Страница 14: ...ontroller on Windows OS To install Dante Controller you will need to be logged on with administrator privileges Do the following to install the Dante Controller 1 Log on to your computer as an adminis...

Страница 15: ...nse text and if you accept the terms of the agreement click Agree 6 If you do not accept these terms click Disagree to terminate the installation 7 Dante Controller software has been installed Refer t...

Страница 16: ...y see a gray hourglass symbol usually very briefly to indicate that the subscription is in process If there is a problem with the subscription a warning or an error symbol may appear If many devices h...

Страница 17: ...in red squares Figure 14 Displaying FPX6000T signal sending capabilities 5 Locate the FPX6000R in the receive channel on the left hand side of the Dante Con troller then click the sign next to the Un...

Страница 18: ...ical services If you have technical questions about the FPX6000 begin your search for answers by using our Knowledge base at https www patton com support kb asp To subscribe to multiple channels at th...

Страница 19: ...to radio or television reception which can be determined by disconnecting the unit the user is encouraged to try to correct the interference by one or more of the fol lowing measures moving the compu...

Страница 20: ...any in the United States and other countries FiberPlex is a trademark licensed to Patton Electronics Company The Adopted Trademarks HDMI HDMI High Definition Multimedia Interface and the HDMI Logo are...

Отзывы: