background image


13


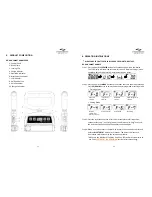
CONTROL


PANEL


1


POWER


Press


and


hold


the


button


to


power


on


and


off.


2


MENU


Mode


Setting


F

0:


Peak


Resistance


F

1:


Target


Resistance


F

2:


Repetition


Resistance


F

3:


Combo


(Target,


Rep)


F

4:


Bluetooth


Setting


F

5:


Volume


Control


(0,


1

5)


F

6:


Unit


(N,


lb,


kg)


F

7:


ID


setting


(0000

9999)


3


SET/RESET


Press


and


hold


the


button


to


set


the


parameters


for


each


mode,


or


clear


previously


recorded


data


and


reset


(zero)


the


transducer.


4


BLUETOOTH


Send


the


last


captured


data


set


via


Bluetooth®. Press


and


hold


the


Bluetooth®


button


for


2


seconds


to


start


the


sequence


for


smart


phone


or


tablet


identification.


5


DATA


Upgrade


the


firmware


and


calibrate


the


transducer


through


DATA


port


if


necessary.


6


CHARGE


Charge


the


battery,


the


“CHARGE”


indicator


is


lit


when


charge


is


activated


through


the


USB


charging


cable


or


DC


charger.


7


UP/DOWN


Press


+/

‐ 

to


select


up/down


the


MODE


and


Parameters.


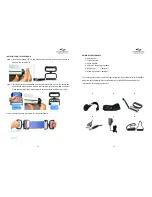
18


o


Door


Anchor


*For


safety,


place


the


door


anchor


between


the


door


and


the


door


frame.


Always


position


the


exerciser


so


that


the


door


opens


away


from


the


user

.


If


the


door


has


a


lock,


lock


it


to


prevent


unexpected


door


opening


by


another


person.


Tug


on


the


anchor


to


test


for


stability


before


exercise


to


make


sure


the


anchor


does


not


slip


during


exercise.


o


Upper/Lower


Extremity


Strap


*For


safety,


please


make


sure


the


hook


and


loop


are


firmly


attached.


For


the


people


who


suffer


from


muscular


dystrophies,


diseases,


or


muscle


weakness,


it


is


highly


recommended


to


use


extremity


strap


instead


of


handle


to


hold


the


device.


Содержание Rolyan Smart Handle Pro

Страница 1: ...The warranty is limited to repair or replacement of defective product Patterson Medical is not responsible for any damage or injury caused by misuse or non observance of the instructions set out in th...

Страница 2: ...IOUS MODES TO CLINICAL PRACTICE 22 BLUETOOTH TRANSMISSION 24 7 SPECIFICATIONS 28 8 TROUBLESHOOTING 29 9 MANUFACTURED FOR EU REPRESENTATIVE DISTRIBUTORS WARRANTY 30 30 9 MANUFACTURED FOR EU REPRESENTAT...

Страница 3: ...Rolyan smart handles provides real time feedback by displaying force and repetition data This enables therapists to see and record the specific data needed for reliable evidence based exercise progra...

Страница 4: ...ntly does not exist when using resistive elastic bands When having patients exercise with elastic bands the Rolyan smart handle helps therapists simply and quickly determine specific exercise resistan...

Страница 5: ...stance must be progressed for muscles to strengthen So progressive increases in resistance levels are necessary over subsequent exercise sessions The Rolyan smart handle enables these increases to be...

Страница 6: ...nt outcomes BIOFEEDBACK People typically perform at a higher capacity when they receive useful feedback relevant to their performance Therapy patients are no different The Rolyan smart handle provides...

Страница 7: ...th Services governmental agencies and medical insurance companies have steadily increased therapy documentation requirements They want to see objective data that reflects progress or lack thereof This...

Страница 8: ...and proprioception 24 BLUETOOTH TRANSMISSION Download App Find Rolyan Smart Handle Pro APP on the Google Play APP Store and install the APP on the device Turn Bluetooth on iOS iiii Get into general se...

Страница 9: ...e injury to the face or eyes Protective eyewear should be worn if performing this type of exercise o Avoid any exercise that could cause the patient or band user to lose balance and fall if the band a...

Страница 10: ...device and its antenna s must not be co located or operating in conjunction with any other antenna or transmitter 3 Changes or modifications to this unit not expressly approved by the party responsibl...

Страница 11: ...data via Bluetooth transmission at Radio Frequency Please keep a minimum separation distance of 2 5cm when using the Bluetooth transmission To prevent possible disruption of function keep Rolyan smar...

Страница 12: ...tion Press UP DOWN button to select the desired training mode or setting mode o Training Mode Peak Force Training Target Force Training Repetition Training Rep Target Force Training o Setting Mode Wir...

Страница 13: ...Close the Locking Clip by index finger to lock the clamp until hearing it click Step 3 Repeat the same procedure for the dumb handle Open Click 12 PRIMARY COMPONENTS 1 Door Anchor 2 Extremity Strap 3...

Страница 14: ...cer through DATA port if necessary 6 CHARGE Charge the battery the CHARGE indicator is lit when charge is activated through the USB charging cable or DC charger 7 UP DOWN Press to select up down the M...

Страница 15: ...ong the direction of arrow o Uninstallation Press and rotate 60 to release the KEY and then pull up the attachment Tip Using palm instead of fingers to press and rotate the hard piece of attachment is...

Страница 16: ...To avoid slipping risk due to band overstretch make sure to retain a safe grip length about the width of a hand palm on the lose end of the band when fastening the band into the grip o Note Do not ove...

Страница 17: ...32...

Страница 18: ...33 34...

Отзывы: