background image

PAGE

PAGE

13/25

14/25

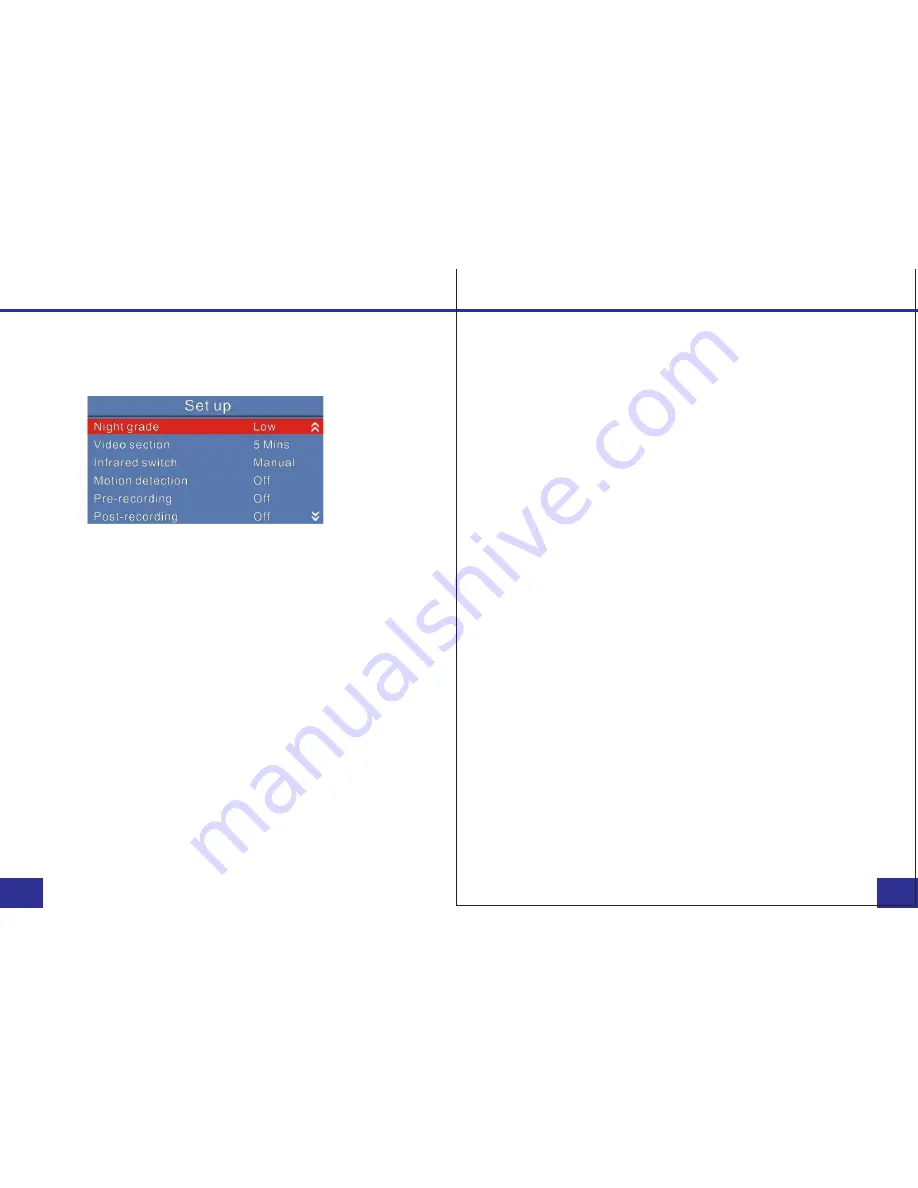
Setup - Night Grade

Setup - Video Duration

Night Grade

a. In the SET UP Menu, select “

Night Grade

” and press the 

    Confirm/Menu button.

b. There are three options to select from:


1. High

        2. Medium
        3. Low

c. Select the setting you prefer and press the Confirm/Menu 
    button.

d. Press the Playback button to return to the previous menu.

Note:

 Night grade refers to the sensitivity of the night vision

recording while the infrared switch is in auto mode. The higher
the setting the more easily the camera will turn on night vision
recording, and the lower the setting the darker it will become
before night vision recording turns on.

Video Duration

a. In the SET UP Menu, select “

Video Duration

” and press the 

    Confirm/Menu button.

b. There are four options to select from:


1. 5 minutes

        2. 10 minutes
        3. 15 minutes
        4. 30 minutes

c. Select the time interval you prefer and press the 
    Confirm/Menu button.

d. Press the Playback button to return to the previous menu.

Содержание SC-DV5

Страница 1: ...SC DV5_Main jpg SC DV5_Main jpg SC DV5_Main jpg SC DV5 ...

Страница 2: ...ting If you are having problems with your camera please first fully charge it and power it on then press the reset button Pressing the reset button will force the camera to shut off Press the power button to turn the device back on and your device should now be working properly Note Resetting the device will not delete any files Overview Overview Camera On screen Display PAGE PAGE 01 25 02 25 ...

Страница 3: ... the camera clip and LCD and as close to the base of the clip s attachment as possible Basic Operation 1 Press and hold the Power button located in the middle of the right side of the camera for about 2 seconds You will hear a chime and the camera will vibrate A green indicator light on top of the camera will turn on and remain green while it is powered on The camera and LCD monitor will turn on a...

Страница 4: ...located under the Audio button on the lower side of the device The camera will start taking pictures similar to a digital camera b To take photos while video recording press the Camera button and the camera will capture a photo of the picture recorded at that time without interrupting the video recording PAGE PAGE 05 25 06 25 c To take photos at night or in the dark press the Night Vision button t...

Страница 5: ...o in full screen d To return to the Playback Menu press the Playback button e To return to the Video Preview screen display continue to press the Playback button PAGE PAGE 07 25 08 25 To go to the SET UP interface press the Confirm Menu button located below the LCD monitor display 1 Resolution a In the SET UP Menu select Resolution and press the Confirm Menu button b There are five video resolutions ...

Страница 6: ...to the video bitrate The higher the setting the better the video quality and the larger the video size To achieve the most battery life please set to low PAGE PAGE 09 25 10 25 Photo Size a In the SET UP Menu select Photo Size and press the Confirm Menu button b There are four options to select from 1 5MP 2 8MP 3 12MP 4 16MP c Select the photo resolution you prefer and press the Confirm Menu button d...

Страница 7: ...Press the Playback button to return to the previous menu Photo Burst Mode a In the SET UP Menu select Burst Mode and press the Confirm Menu button b There are three options to select from 1 Off only takes one photo each time 2 3 Pictures 3 5 Pictures c Select the Burst Mode you prefer and press the Confirm Menu button d Press the Playback button to return to the previous menu PAGE PAGE 11 25 12 25 Se...

Страница 8: ...In the SET UP Menu select ID and press the Confirm Menu button The first digit will be highlighted b Press Confirm Menu button a second time and the digit will be highlighted and blinking c Press Up Down arrows to change to desired number or letter then press the Confirm Menu button d Press the Down arrow to move to the next digit then repeat steps b and c until the desired device ID is set e Press th...

Страница 9: ...rows to scroll to the correct day Once selected press the Confirm Menu button and the date will be set Time a In the SET UP Menu select Time and press the Confirm Menu button The hour will be highlighted b Use the Up Down arrows the select the correct hour Press the Confirm Menu button to move to the minutes c Use the Up Down arrows to select the correct minute Press the Confirm Menu button and the ti...

Страница 10: ...sitivity of the night vision recording while the infrared switch is in auto mode The higher the setting the more easily the camera will turn on night vision recording and the lower the setting the darker it will become before night vision recording turns on Video Duration a In the SET UP Menu select Video Duration and press the Confirm Menu button b There are four options to select from 1 5 minutes...

Страница 11: ... 25 Setup Infrared Switch Setup Motion Detection Motion Detection a In the SET UP Menu select Motion Detection and press the Confirm Menu button b There are two options to select from 1 On camera will record video when it detects motion 2 Off motion detection will be disabled c Select the option you prefer and press the Confirm Menu button d Press the Playback button to return to the previous menu No...

Страница 12: ...se the duration of the pre recorded video PAGE PAGE 17 25 18 25 Post Recording a In the SET UP Menu select Post Recording and press the Confirm Menu button b There are four options to select from 1 10 seconds camera will record for 10 seconds at the end of each recording 2 20 seconds camera will record for 20 seconds at the end of each recording 3 30 seconds camera will record for 30 seconds at the...

Страница 13: ...rn off PAGE PAGE 19 25 20 25 Auto Power Off a In the SET UP Menu select Auto Power Off and press the Confirm Menu button b There are four options to select from 1 10 min camera will automatically turn off after 10 min without operation to prolong battery life 2 5 min camera will turn off after 5 min 3 3 min camera will turn off after 3 min 4 Off camera will not turn off automatically c Select the Auto Powe...

Страница 14: ...acquire GPS signal if you wish to record your video with GPS location Please view our GPS video player software at www stuntcams com sc dv5 PAGE PAGE 21 25 22 25 Loop Recording a In the SET UP Menu select Loop Recording and press the Confirm Menu button b There are two options to select from 1 On If memory becomes full camera will save new video over oldest files 2 Off camera will stop recording when...

Страница 15: ...press the Confirm Menu button d Press the Playback button to return to the previous menu Note Resetting the device settings will NOT delete and saved photo or video files This will only set the settings back to the factory default settings PAGE PAGE 23 25 24 25 Firmware a In the SET UP Menu select Firmware Version b The current firmware version will display on the screen c Press the Playback button t...

Страница 16: ... also charge an additional battery by inserting it into the battery slot the red light will turn on while the battery is charging Note The drop in charging station will not allow you to transfer data to your PC Optional Accessories PTT Cable Additional Batteries Suction Cup Mount Epaulette Mount Carrying Case Lanyard Screen Protectors 8 Camera Docking Station Camera Management Software PatrolEyes ...

Отзывы: