


Calibration Procedure
Sample Preparation
Calibration of the Colorimeter is not always required, but is recommended for
better accuracy. You can calibrate the colorimeter when it is connected to either
an Xplorer or a USB link. All calibration readings are stored in flash memory
inside the PS-2121. When you unplug the sensor and reconnect it, the sensor
retains the last calibration reading.
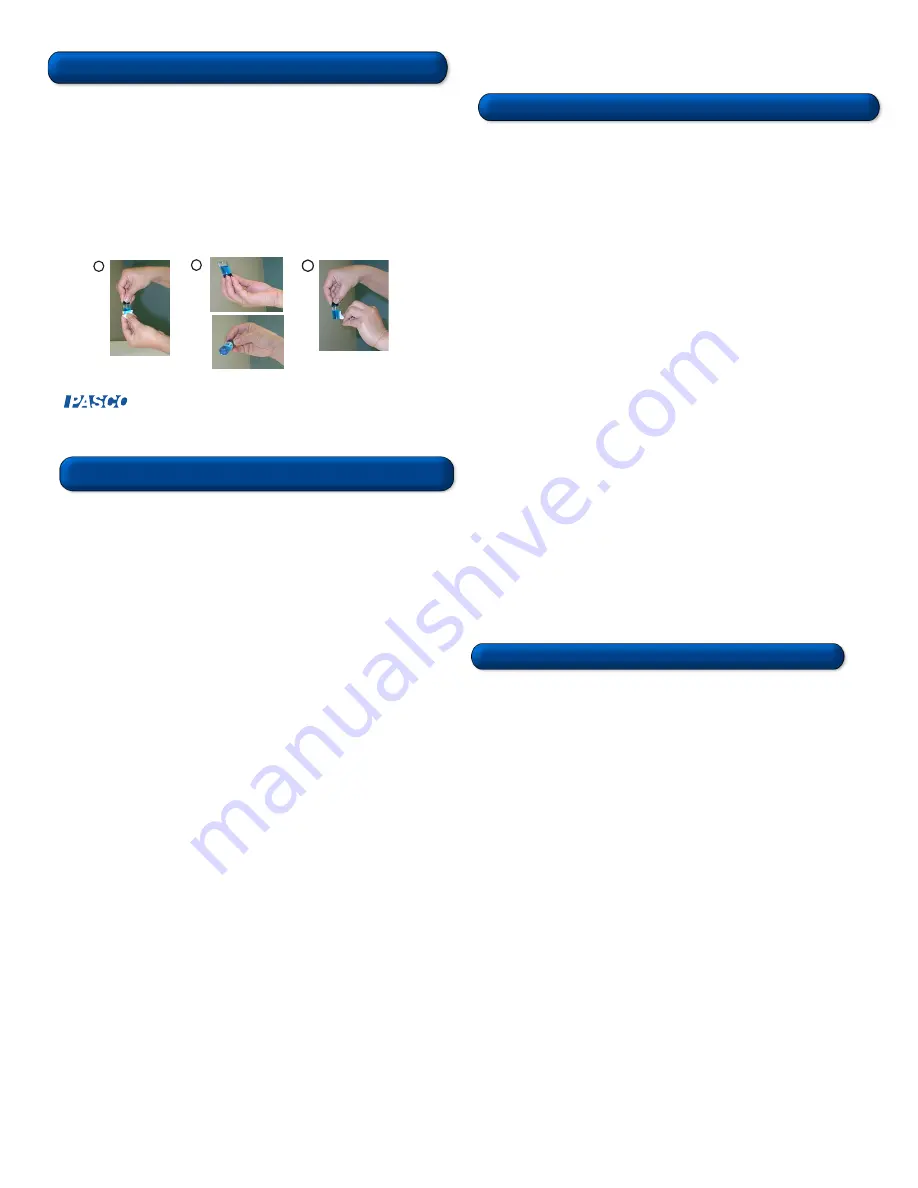
1. Fill the cuvette with at least 6 ml of sample. Screw the cap on securely.
2. Gently rock the cuvette back and forth to distribute the solute molecules
equally throughout the solution.
Do not shake the cuvette or allow air
bubbles to enter.
3. Handle the cuvette by the cap and wipe the outside glass lens clean with
a non-abrasive cleaning tissue.
Avoid touching the glass with your
fingers!
4. (Optional): Place one of the provided labels on the cap of the cuvette. (See
“Orienting the Cuvette” below.)
Before taking measurements, always do the following:
CAUTION:
To avoid errors when calibrating, do not use the Colorimeter
around bright lights or with turbid solutions. Always close the lid tightly before
taking measurements. For accurate readings, fill the cuvette to the lid with
sample.
1. To calibrate for 100% transmittance, insert a cuvette filled with distilled
water into the cuvette holder and tightly close the lid.
2. Press the green
Calibration
button on the sensor. The light
illuminates to indicate calibration is in progress.
3. Wait for the light to turn off and then remove the sample.
4. To check your calibration, reinsert the cuvette, close the lid, and click
the
Start
button in DataStudio. All color readings should approximate
100% transmittance.
1
2
3
Experiment Suggestions
• Performing reaction rate, enzymatic, and bacterial growth studies
• Monitoring the concentration of substances in water or other solutions
012-08158C
Orienting the Cuvette (Optional)
To minimize reading variance due to natural differences or imperfections in the
glass of the cuvette, do the following for each cuvette you plan to use:
1. Insert the cuvette containing distilled water or other solution into the
cuvette holder.
2. Put a piece of black cloth over your hand and the cuvette (so that no
light seeps through). Click the
Start
button in DataStudio.
3. With your covered hand, rotate the cuvette while observing the reading
in DataStudio. At the highest transmittance reading, click the
Stop
button. Do not rotate the cuvette any further.
4. With the cuvette still in the holder, place one of the provided arrow labels
on the cap, with the arrow pointing toward the screw on the holder. (For
subsequent measurements, always align the arrow with the screw on
the holder. Do not switch caps between cuvettes!)
Note:
While in calibration mode, please do not start collecting data. The
PS-2121 Colorimeter cannot communicate during this time and an error
will occur.
A blinking red light on the Calibration button means either (a): The dark
count is too high; stray light is entering the cuvette holder or (b): The
sensor measurement is out of range. The light turns off when the reading
is within the normal range.
800-772-8700 • 916-786-3800 • [email protected] • www.pasco.com
®
CARD 3A
CARD 3B


