X p l o r e r G L X U s e r s ’ G u i d e
15
Choosing Data to Display
Data Source
A graph is generated from two data sources: one on the vertical
axis and one on the horizontal axis. The possible types of data source are
•
a sensor measurement,
•
time (horizontal axis only),
•
a calculation,
•
manually entered numeric data, and
•
manually entered text data (horizontal axis only).
If you configure the Graph with data sources that already contain data, the data
will appear immediately. If the selected data sources have not yet collected data,
the Graph will initially be blank; when data collection starts, each data point will
be plotted as it is acquired.
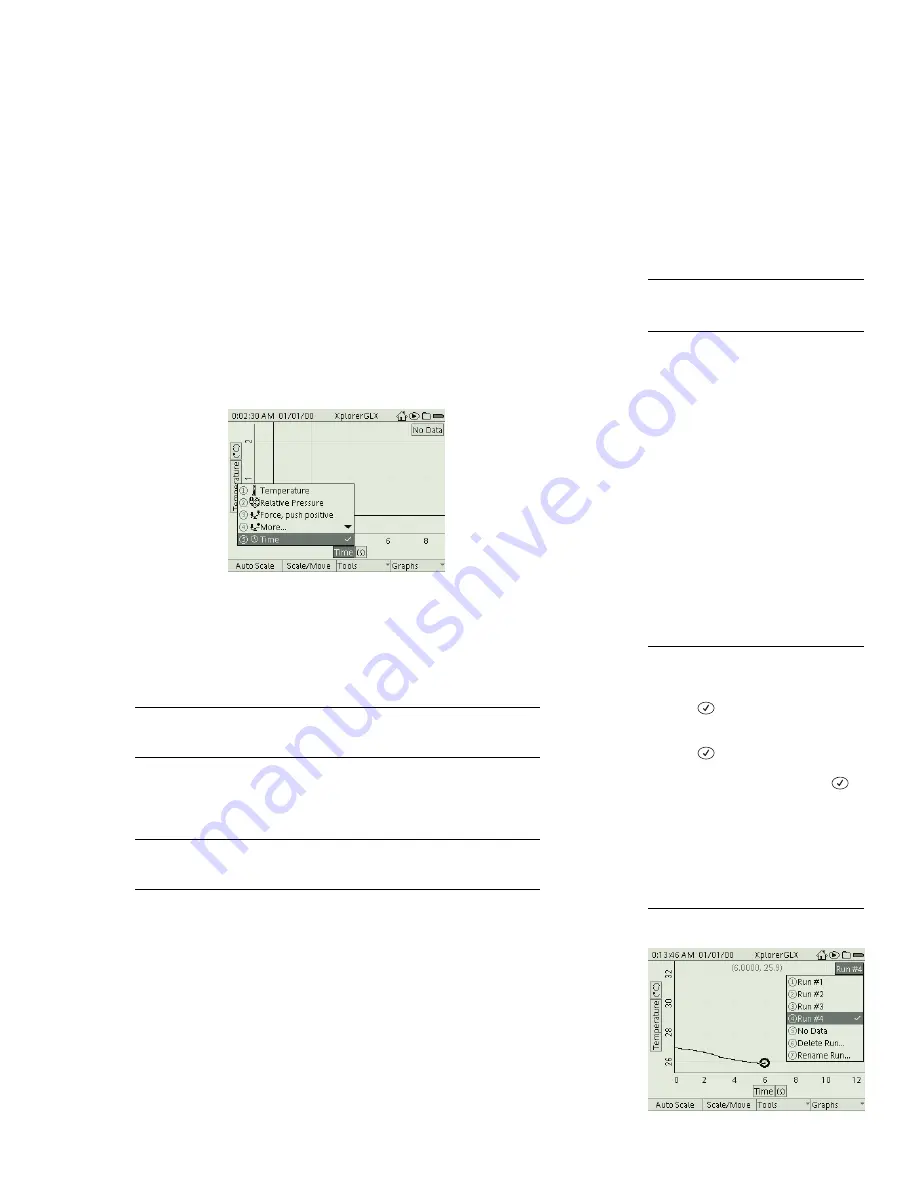
Data source menu for the horizontal axis
If there is at least one sensor connected to the GLX, the Graph will automatically
set one of the sensor measurements as the vertical data source, with time as the
horizontal data source. Select the vertical or horizontal data source field
to
choose a different source.
When you chose a data source, it replaces the previously displayed one.
See “Two Measurements” on page 23 and “Two Graphs” on page 24 for
instructions on displaying two vertical data sources simultaneously.
If you do not see the sensor measurement that you want in the data source menu,
select More to expand the menu.
For more information on selecting data from the Data Source menu when
you are working with more than one sensor, or with a multiple-measurement
sensor, see “Data Source Menus” on page 89.
Also from the Data Source menu, you can select Properties to edit the name and
other properties of the currently displayed data set. See “Data Properties” on
page 69 for more information.
Units
Select the units field
to choose different units (if available) for the chosen
data source.
Run Number
Select the run number field
to choose a different data run. You
can also choose to display no data.
1
For more information on calculations,
see page 41. For more information on
manually entered data see page 32.
2
To select a data source, units, or run
number field
Keypad
1. Press
to light up the active fields.
2. Use the arrow keys to move the high-
light to the desired field.
3. Press
again to open the menu.
4. Use the arrow keys to highlight the
desired menu option and press
;
or
press the number on the keypad
corresponding to the desired menu
option.
Mouse
1. Click the desired field to open the
menu.
2. Click the desired menu option.
Run number menu
Содержание Xplorer GLX
Страница 4: ......
Страница 6: ......
Страница 7: ...Part 1 Users Guide...
Страница 8: ......
Страница 18: ...12 O v e r v i e w o f t h e G L X...
Страница 94: ...88 S e t t i n g s S c r e e n...
Страница 98: ...92 P r i n t i n g...
Страница 104: ...98 O p e r a t i n g T e m p e r a t u r e...
Страница 112: ......
Страница 116: ...110 C a l o r i m e t r y...
Страница 132: ...126 V o l t a g e v e r s u s R e s i s t a n c e...
Страница 136: ...130 I n d u c e d E l e c t r o m o t i v e F o r c e...
Страница 146: ...140 B e a t F r e q u e n c y...
Страница 150: ......
Страница 152: ......


