background image

23 

GB/IE

 Safety instructions for batteries /  

rechargeable batteries


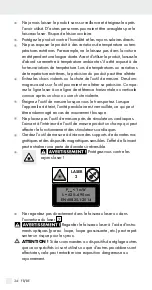
 DANGER TO LIFE! 

Keep batteries / rechargeable batteries out 

of reach of children. If accidentally swallowed seek immediate 
medical attention.

   Swallowing may lead to burns, perforation of soft tissue, and 

death. Severe burns can occur within 2 hours of ingestion.


DANGER OF EXPLOSION!

 Never recharge non-re-

chargeable batteries. Do not short-circuit batteries / re-
chargeable batteries and / or open them. Overheating, 

fire or bursting can be the result.


Never throw batteries / rechargeable batteries into fire or water.


Do not exert mechanical loads to batteries / rechargeable batteries.

Risk of leakage of batteries / rechargeable batteries


Avoid extreme environmental conditions and temperatures, which 
could affect batteries / rechargeable batteries, e.g. radiators / direct 
sunlight.


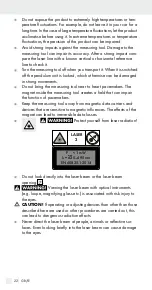
If batteries / rechargeable batteries have leaked, avoid contact 
with skin, eyes and mucous membranes with the chemicals! Flush 
immediately the affected areas with fresh water and seek medical 
attention!


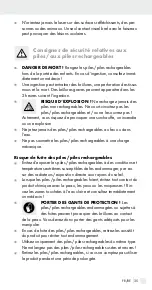
WEAR PROTECTIVE GLOVES!

 Leaked or damaged 

batteries / rechargeable batteries can cause burns on 
contact with the skin. Wear suitable protective gloves at 

all times if such an event occurs.


In the event of a leakage of batteries / rechargeable batteries, im-
mediately remove them from the product to prevent damage.


Only use the same type of batteries / rechargeable batteries. Do 
not mix used and new batteries / rechargeable batteries.


Remove batteries / rechargeable batteries if the product will not be 
used for a longer period.

Risk of damage of the product


Only use the specified type of battery / rechargeable battery!


Insert batteries / rechargeable batteries according to polarity 
marks (+) and (-) on the battery / rechargeable battery and the 
product.


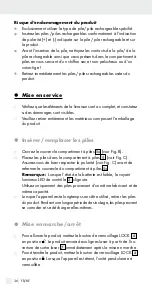
Use a dry lint-free cloth or cotton swab to clean the contacts on 
the battery / rechargeable battery and in the battery compartment 
before inserting!


Remove exhausted batteries / rechargeable batteries from the  
product immediately.

Содержание PKLL 10 B3

Страница 1: ...CROIX Traduction des instructions d origine KRUISLIJNLASER Vertaling van de originele gebruiksaanwijzing LASER KRZY OWY T umaczenie oryginalnej instrukcji obs ugi K OV LINIOV LASER P eklad origin ln h...

Страница 2: ...igine Page 30 NL BE Vertaling van de originele gebruiksaanwijzing Pagina 44 PL T umaczenie oryginalnej instrukcji obs ugi Strona 57 CZ P eklad origin ln ho provozn ho n vodu Strana 70 SK Preklad origi...

Страница 3: ...H V 1 2 7 8 10 1 1a 11 13 14 15 12 16 17 18 19 9 3 4 5a 6 A...

Страница 4: ...C 5a 1 2 B 6 5...

Страница 5: ...en Akkus Seite 10 Inbetriebnahme Seite 11 Batterien einsetzen wechseln Seite 11 Ein Ausschalten Seite 11 Nivellierautomatik verwenden Seite 12 Einzellinie und gekreuzte Linien verwenden Seite 12 Ohne...

Страница 6: ...linien Kreuzlinienlaser Einleitung Wir begl ckw nschen Sie zum Kauf Ihres neuen Produkts Sie haben sich damit f r ein hochwertiges Produkt entschieden Die Bedienungsanleitung ist Teil dieses Produkts...

Страница 7: ...rung aus gr n Nivellierung ein 3 V Taste zum Ein Ausschalten der vertikalen Linie 4 LOCK Schalter 5 Batteriefach 5a Batteriefachdeckel 6 Stativgewinde Unterseite 7 Laseraustritts ffnung 8 Befestigungs...

Страница 8: ...ige Umgebungsbedingungen z B direkte Sonneneinstrahlung verringert werden Sicherheitshinweise ERSTICKUNGSGEFAHR Verpackungsmaterialien z B Folien oder Polystyrol d rfen nicht zum Spielen verwendet wer...

Страница 9: ...des Produkts beeintr chtigt werden Vermeiden Sie heftige St e oder Stu rze des Messwerkzeuges Durch Besch digungen des Messwerkzeugs kann die Genauigkeit beeintr chtigt werden Vergleichen Sie nach ein...

Страница 10: ...atterien niemals wieder auf Schlie en Sie Batterien Akkus nicht kurz und oder ffnen Sie diese nicht berhitzung Brandgefahr oder Platzen k nnen die Folge sein Werfen Sie Batterien Akkus niemals in Feue...

Страница 11: ...efachdeckel 5a siehe Abb B Legen Sie die Batterien in das Batteriefach 5 ein siehe Abb C Vergewissern Sie sich dass die Batterien richtig herum eingelegt sind siehe Abb C bevor Sie den Batteriefachdec...

Страница 12: ...h einer erneuten Nivellierung die Position der waagrechten bzw senkrechten Laserlinie in Bezug auf Referenz punkte um Fehler zu vermeiden Einzellinie und gekreuzte Linien verwenden Wenn sich das Produ...

Страница 13: ...der alle drei Quergelenke verbindet wird zum Ende der Mittels ule bewegt 2 L sen Sie die Arretierhebel 16 und verl ngern Sie die Beine bis zu der gew nschten H he 3 Klappen Sie dann alle diese Arreti...

Страница 14: ...sammen mit der Schnell wechselplatte 19 vom Stativ durch die folgenden Schritte entfernen 1 Ziehen Sie den Hebel 11a des Stativ Flachkopfs 18 zur Seite 2 Entfernen Sie die Schnellwechselplatte 19 3 We...

Страница 15: ...n k nnen b a Beachten Sie die Kennzeichnung der Verpackungsmateria lien bei der Abfalltrennung diese sind gekennzeichnet mit Abk rzungen a und Nummern b mit folgender Bedeutung 1 7 Kunststoffe 20 22 P...

Страница 16: ...tzlichen Rechte werden durch unsere im Folgen den dargestellte Garantie nicht eingeschr nkt Sie erhalten auf dieses Produkt 3 Jahre Garantie ab Kaufdatum Die Garantiefrist beginnt mit dem Kaufdatum Bi...

Страница 17: ...onsfehler oder sonstige M ngel auftreten kontaktieren Sie zun chst die nachfolgend benannte Serviceabteilung telefonisch oder per E Mail Ein als defekt erfasstes Produkt k nnen Sie dann unter Beif gun...

Страница 18: ...tteries Page 23 Initial use Page 24 Inserting Changing batteries Page 24 Switching on off Page 24 Use automatic levelling system Page 24 Using individual lines and crossed lines Page 25 Working withou...

Страница 19: ...ne laser Introduction We congratulate you on the purchase of your new product You have chosen a high quality product The instructions for use are part of the product They contain important information...

Страница 20: ...off vertical line 4 LOCK switch 5 Battery compartment 5a Battery compartment cover 6 Tripod thread underneath 7 Laser beam opening 8 quick release fixing screw to align with tripod thread of cross lin...

Страница 21: ...the packaging material The packaging material is not a toy Do not work with the measuring tool in an environment where there is a danger of explosion where there are flammable liquids gasses or dusts...

Страница 22: ...ot bring the measuring tool near to heart pacemakers The magnet inside the measuring tool creates a field that can impair the function of pacemakers Keep the measuring tool away from magnetic data car...

Страница 23: ...h skin eyes and mucous membranes with the chemicals Flush immediately the affected areas with fresh water and seek medical attention WEAR PROTECTIVE GLOVES Leaked or damaged batteries rechargeable bat...

Страница 24: ...the LOCK switch 4 to the position Immediately after being switched on the product releases two laser lines from the laser beam opening 7 To switch the product off push the LOCK switch 4 to the positio...

Страница 25: ...LED indica tor 2 goes red Now automatic levelling is switched off and the crossed lines are permanently switched on even if the base of the measurement device deviates from the horizontal by more tha...

Страница 26: ...ten the long handle 12 by turning it clockwise 7 If necessary loosen the locking screw 13 to rotate the tripod flat head 18 up to 360 degree horizontally to get desired side Once reached the desired s...

Страница 27: ...only with original replacement parts This ensures that the safety of the measuring tool is maintained Storage If you will not be using the product for a prolonged period of time remove the batteries a...

Страница 28: ...tteries rechargeable batteries at a local collection point Warranty The product has been manufactured to strict quality guidelines and meticulously examined before delivery In the event of product def...

Страница 29: ...tom left or as a sticker on the rear or bottom of the product If functional or other defects occur please contact the service depart ment listed either by telephone or by e mail You can return a defec...

Страница 30: ...les rechargeables Page 35 Mise en service Page 36 Ins rer remplacer les piles Page 36 Mise en marche arr t Page 36 Utilisation du nivellement automatique Page 37 Utilisation de lignes uniques ou crois...

Страница 31: ...croix Introduction Nous vous f licitons pour l achat de votre nouveau produit Vous avez opt pour un produit de grande qualit Le mode d emploi fait partie int grante de ce produit Il contient des indic...

Страница 32: ...Bouton de verrouillage LOCK 5 Compartiment piles 5a Couvercle du compartiment piles 6 Filetage pour tr pied partie inf rieure 7 Ouverture de sortie du laser 8 Vis de fixation pour l alignement avec le...

Страница 33: ...par ex plastiques ou en polystyr ne ne doivent pas tre utilis s comme jouet Ne laissez jamais les mat riaux d emballages port e des enfants Le mat riel d emballage n est pas un jouet N utilisez pas l...

Страница 34: ...ou une chute violente teignez l outil de mesure lorsque vous le transportez Lorsque l appareil est teint l unit pendulaire est verrouill e ce qui peut tre endommag en cas de mouvement brusque Ne place...

Страница 35: ...umettre les piles piles rechargeables une charge m canique Risque de fuite des piles piles rechargeables vitez d exposer les piles piles rechargeables des conditions et temp ratures extr mes susceptib...

Страница 36: ...es piles Ouvrez le couvercle compartiment piles 5a voir Fig B Placez les piles dans le compartiment piles 5 voir Fig C Assurez vous de bien respecter la polarit voir Fig C avant de refermer le couverc...

Страница 37: ...st automatique ment r install Apr s le nouveau nivellement v rifiez la position de la ligne laser horizontale ou verticale avec des points de r f rence pour viter les erreurs Utilisation de lignes uni...

Страница 38: ...s est d plac e vers le centre de la colonne centrale 2 D bloquez les leviers de blocage 16 et rallongez les pieds jusqu la hauteur souhait e 3 Repliez ensuite tous les leviers de blocage 16 4 V rifiez...

Страница 39: ...e c t 2 Retirez la plaque changement rapide 19 3 Si vous souhaitez de nouveau fixer le laser en croix sur le tr pied tirez le levier 11a de t te plate de tr pied 18 et fixez de nouveau la plaque chang...

Страница 40: ...s 20 22 papiers et cartons 80 98 mat riaux composite Le produit et les mat riaux d emballage sont recyclables mettez les au rebut s par ment pour un meilleur traitement des d chets Le logo Triman n es...

Страница 41: ...de la demande d intervention de l acheteur ou de la mise disposition pour r paration du bien en cause si cette mise disposition est post rieure la demande d intervention Ind pendamment de la garantie...

Страница 42: ...Les pi ces d tach es indispensables l utilisation du produit sont disponibles pendant la dur e de la garantie du produit Le produit a t fabriqu selon des crit res de qualit stricts et contr l conscie...

Страница 43: ...nt appos sur la face arri re ou inf rieure du produit En cas de dysfonctionnement du produit ou de tout autre d faut contactez en premier lieu le service apr s vente par t l phone ou par e mail aux co...

Страница 44: ...erijen accu s Pagina 49 Ingebruikname Pagina 50 Batterijen plaatsen vervangen Pagina 50 In Uitschakelen Pagina 50 Automatische nivelleerfunctie gebruiken Pagina 50 Enkele lijn en gekruiste lijnen gebr...

Страница 45: ...htlijnen Kruislijnlaser Inleiding Hartelijk gefeliciteerd met de aankoop van uw nieuwe pro duct U heeft voor een hoogwaardig product gekozen De gebruiksaanwijzing is een deel van het product Deze beva...

Страница 46: ...ale lijn 4 LOCK schakelaar 5 Batterijvak 5a Batterijvak deksel 6 schroefdraad voor statief onderkant 7 Laser opening 8 bevestigingsschroef voor het uitlijnen met de statiefschroef draad van de kruisli...

Страница 47: ...ver pakkingsmateriaal is geen speelgoed Gebruik het meetapparaat niet in een omgeving waar explosiege vaar bestaat of waarin zich brandbare vloeistoffen gassen of stof wolken bevinden In het product k...

Страница 48: ...schadigd Breng het meetapparaat niet in de buurt van pacemakers Door de magneet binnenin het meetapparaat wordt een magnetisch veld opgewekt dat de functie van pacemakers kan be nvloeden Houd het meet...

Страница 49: ...ontact van de chemicali n met de huid ogen en slijmvliezen vermijden Spoel de desbetreffende plekken direct af met schoon water en raadpleeg onmiddellijk een arts DRAAG VEILIGHEIDSHANDSCHOENEN Lekkend...

Страница 50: ...tschakelen Voor het inschakelen van het product schuift u de LOCK schakelaar 4 in de positie Het product projecteert meteen na het inscha kelen twee laserlijnen uit de laseropening 7 Voor het uitschak...

Страница 51: ...De gekruiste lijnen kunnen bij dit product vastgezet worden Als het product zich in de automatische nivellering bevindt en de onderkant van het meetapparaat minder dan 4 van waterpas af wijkt groene...

Страница 52: ...st als de gewenste hoogte is bereikt 6 Draai voor een horizontale uitlijning van de statief kop 18 de lange draaigreep 12 los door deze tegen de klok in te draaien en net zo ver naar boven of beneden...

Страница 53: ...ud en reiniging Het product is onderhoudsvrij ATTENTIE Dompel het product nooit onder in water of andere vloeistoffen Bij het reinigen mag er geen vocht in het product bin nendringen Houd het product...

Страница 54: ...emeentelijke overheid Gooi het afgedankte product omwille van het milieu niet weg via het huisvuil maar geef het af bij het daarvoor bestemde depot of het gemeentelijke milieupark Over afgifteplaatsen...

Страница 55: ...t van toepassing op productonderdelen die onderhevig zijn aan normale slijtage en hierdoor als aan slijtage onderhevige onderdelen gelden bijv batterijen of voor beschadigingen aan breekbare onder del...

Страница 56: ...56 NL BE Service Service Nederland Tel 08000225537 E Mail owim lidl nl Service Belgi Tel 080071011 Tel 80023970 Luxemburg E Mail owim lidl be...

Страница 57: ...nie Strona 63 Wk adanie Wymiana baterii Strona 63 W czanie Wy czanie Strona 63 U ycie niwelacji automatycznej Strona 64 U ywanie linii pojedynczej i linii skrzy owanych Strona 64 Praca bez niwelacji a...

Страница 58: ...roduktu Laser krzy owy Wst p Gratulujemy Pa stwu zakupu nowego produktu Tym samym zdecydowali si Pa stwo na zakup produktu wysokiej jako ci Instrukcja obs ugi jest cz ci tego produktu Zawiera ona wa n...

Страница 59: ...zielona niwelacja w czona 3 Przycisk V do w czania wy czania linii pionowej 4 Prze cznik LOCK 5 Komora baterii 5a Pokrywa komory baterii 6 Gwint statywu strona dolna 7 Otw r wylotu lasera 8 ruba mocuj...

Страница 60: ...ekorzystne warunki otoczenia np bezpo rednie promienie s oneczne Wskaz wki bezpiecze stwa NIEBEZPIECZE STWO UDUSZENIA SI Materia y opako waniowe np folie lub polistyren nie mog by u ywane do zabawy Tr...

Страница 61: ...zez uszkodzenie urz dzenia pomiarowego dok adno mo e zosta ograniczona Po mocnym uderzeniu lub upadku nale y po r wna lini lasera ze znan poziom lub pionow lini referen cyjn w celu kontroli Podczas tr...

Страница 62: ...adzi do przegrzania po aru lub wybuchu Nigdy nie nale y wrzuca baterii akumulator w do ognia lub wody Nigdy nie nale y nara a baterii akumulator w na obci enia mechaniczne Ryzyko wycieku kwasu z bater...

Страница 63: ...B W o y baterie do komory baterii 5 patrz rys C Upewni si e baterie s poprawnie w o one patrz rys C przed ponownym zamkni ciem pokrywy komory baterii 5a Wskaz wka przy niskim stanie baterii lampka ko...

Страница 64: ...o ponownej niwelacji nale y sprawdzi pozycj poziomej lub pionowej linii lasera w odniesieniu do punkt w referencyjnych aby unikn b d w U ywanie linii pojedynczej i linii skrzy owanych Je li produkt zn...

Страница 65: ...tatywu Pier cie z tworzywa sztucznego 15 kt ry czy wszystkie trzy przeguby poprzeczne zostanie przesu ni ty do ko ca rodkowej kolumny 2 Poluzowa d wignie blokuj ce 16 i przed u y n ki a do danej wysok...

Страница 66: ...szybkiej wymiany Laser krzy owy mo na atwo zdj ze statywu z p ytk szybkiej wymiany 19 wykonuj c nast puj ce kroki 1 Przesun w bok d wigni 11a p askiej g wki statywu 18 2 Usun p ytk szybkiej wymiany 19...

Страница 67: ...a przekaza do utylizacji w lokalnym punkcie przetwarzania surowc w wt rnych b a Przy segregowaniu odpad w prosimy zwr ci uwag na oznakowanie materia w opakowaniowych oznaczone s one skr tami a i numer...

Страница 68: ...w jako ci i pod dano skrupulatnej kontroli przed wysy k W przypadku wad produktu nabywcy przys uguj ustawowe prawa Gwarancja nie ogranicza usta wowych praw nabywcy produktu Produkt obj te jest 3 gwara...

Страница 69: ...na gra werunku na stronie tytu owej jego instrukcji na dole po lewej stronie lub jako naklejk na stronie odwrotnej lub spodniej W razie wyst pienia b d w w dzia aniu lub innych wad nale y skon taktow...

Страница 70: ...a akumul tory Strana 74 Uveden do provozu Strana 75 Vlo en a v m na bateri Strana 76 Zap n n a vyp n n Strana 76 Pou it automatick nivelace Strana 76 Pou it jedn a k en ch lini Strana 76 Pr ce bez au...

Страница 71: ...se sm rnicemi EU p slu n mi pro dan v robek K ov liniov laser vod Blahop ejeme V m ke koupi nov ho v robku Rozhodli jste se pro kvalitn produkt N vod k obsluze je sou st tohoto v robku Obsahuje d le i...

Страница 72: ...ie 4 Sp na LOCK 5 P ihr dka na baterie 5a V ko p ihr dky na baterie 6 Stativov z vit spodn strana 7 Otvor pro v stup laserov ho paprsku 8 Upev ovac roub k se zen pomoc z vitu stativu k ov ho laseru 9...

Страница 73: ...jte s v robkem ve v bu n m prost ed ve kter m se na ch zej vzn tliv kapaliny plyny nebo prachy Ve v robku vznikl jiskry mohou zap lit prach nebo p ry Tento v robek mohou pou vat d ti od 8 let osoby se...

Страница 74: ...gnetu m e doj t k nevratn m ztr t m dat Chra te se p ed laserov m z en m LASER 2 Pmax 1 mW 620 690 nm EN 60825 1 2014 Ned vejte se nikdy p mo do laserov ho paprsku resp do v stup n ho otvoru 7 Pozorov...

Страница 75: ...n baterie nebo akumul tory mohou p i kontaktu s poko kou zp sobit jej polept n Noste proto vhodn rukavice V p pad vyte en ihned odstra te baterie nebo akumul tory z v robku abyste zabr nili jeho po ko...

Страница 76: ...matikou postavte v robek na pevn vo dorovn podklad a p i roubujte ho pomoc z vitu 6 na stativ Po zapnut vyrovn automatika nerovnosti v rozmez samo inn nivelace 4 Nivelace je ukon en jakmile se laserov...

Страница 77: ...vypnou jakmile se spodn strana v robku odch l od vodorovn polohy o v ce ne 4 LED kontrolka 2 potom sv t zase erven Pr ce bez automatick nivelace Nastavte sp na LOCK 4 do polohy P idr te tla tko H 1 st...

Страница 78: ...n ho hlu povolte nejd ve jist c roub 10 Po nastaven po adovan ho hlu ut hn te pevn jist c roub 10 P ipevn n k ov ho laseru Nasm rujte z vit 6 k ov ho laseru na upev ovac roub 8 rychlov m nn desky a ut...

Страница 79: ...h materi l b a P i t d n odpadu se i te podle ozna en obalov ch mate ri l zkratkami a a sly b s n sleduj c m v znamem 1 7 um l hmoty 20 22 pap r a lepenka 80 98 slo en l tky V robek a obalov materi ly...

Страница 80: ...rozhodnut bez platn oprav me nebo vym n me Tato z ruka zanik jestli e se v robek po kod neodborn pou il nebo neobdr el pravidelnou dr bu Z ruka plat na vady materi lu a v robn vady Tato z ruka se nevz...

Страница 81: ...81 CZ Servis Servis esk republika Tel 800600632 E Mail owim lidl cz...

Страница 82: ...torov ch bat ri Strana 87 Uvedenie do prev dzky Strana 88 V mena vkladanie bat ri Strana 88 Za vypnutie Strana 88 Pou vanie nivela nej automatiky Strana 88 Pou vanie jednotliv ch l ni a skr en ch l ni...

Страница 83: ...robok Kr ov l niov laser vod Blaho el me V m ku k pe V ho nov ho v robku Rozhodli ste sa pre ve mi kvalitn v robok N vod na obsluhu je s as ou tohto v robku Obsahuje d le it upozornenia t kaj ce sa b...

Страница 84: ...tie vertik lnej l nie 4 Sp na LOCK 5 Prie inok pre bat rie 5a Kryt prie inka pre bat rie 6 z vit stat vu spodn strana 7 V stupn otvor pre laserov l 8 Upev ovacia skrutka pre nasmerovanie s z vitom sta...

Страница 85: ...van na hranie Obalov materi l dr te v dy mimo dosahu det Obalov materi l nie je hra ka Nepou vajte merac n stroj v okol s nebezpe enstvom expl zie v ktorom sa nach dzaj hor av kvapaliny plyny alebo p...

Страница 86: ...stroj dr te v bezpe nej vzdialenosti od kardiostimul torov Magnet vo vn tri meracieho n stroja vytv ra pole ktor m e ovplyv ova funkciu kardiostimul torov Dr te merac n stroj vzdialen od magnetick ch...

Страница 87: ...rie akumul torov bat rie vytiekli zabr te kontaktu poko ky o a slizn c s chemik liami Ihne vypl chnite postihnut miesta v m mno stvom istej vody a okam ite vyh adajte lek ra NOSTE OCHRANN RUKAVICE Vy...

Страница 88: ...K 4 do poz cie Ihne po zapnut vysiela produkt dve laserov l nie z v stupn ho otvoru pre laserov l 7 Pre vypnutie v robku posu te sp na LOCK 4 do poz cie Pri vypnut je kyvadlov jednotka zablokovan Pou...

Страница 89: ...en LED svieti dr te tla idlo H 1 stla en a k m bude LED kontrolka 2 erven Teraz je automatick nivel cia vypnut a skr en l nie s permanentne zapnut aj ke sa spodn strana meracieho n stroja odchy uje vi...

Страница 90: ...by uvo nite poistn skrutku 13 aby ste ploch hlavu stat vu 18 oto ili a do 360 stup ov horizont lne a dosiahli elan poz ciu Ke dosiahnete elan poz ciu pevne zatiahnite poistn skrutku 13 8 V pr pade pot...

Страница 91: ...vykon va iba kvalifikovan od born person l a mo no pritom pou va iba origin lne n hradn diely T m sa zabezpe zachovanie bezpe nosti meracieho n radia Skladovanie Ak v robok dlh as nepou vate vyberte z...

Страница 92: ...v robok bol d kladne vyroben pod a pr snych akostn ch smern c a pred dodan m svedomito testovan V pr pade nedostatkov tohto v robku V m prin le ia z konn pr va vo i predajcovi produktu Tieto z konn p...

Страница 93: ...prednej strane V ho n vodu dole v avo alebo ako n lepku na zadnej alebo spodnej strane Ak sa vyskytn funk n poruchy alebo in nedostatky najsk r telefo nicky alebo e mailom kontaktujte n sledne uveden...

Страница 94: ...a 99 Puesta en funcionamiento P gina 100 Colocar cambiar las pilas P gina 100 Encendido apagado P gina 100 Utilizar nivelaci n autom tica P gina 100 Utilizaci n de una l nea nica y de l neas cruzadas...

Страница 95: ...er de l neas cruzadas Introducci n Enhorabuena por la adquisici n de su nuevo producto Ha optado por un producto de alta calidad El manual de ins trucciones forma parte de este producto Contiene impor...

Страница 96: ...5a Tapa del compartimento de las pilas 6 Rosca para tr pode parte inferior 7 Orificio de salida del l ser 8 Tornillo de fijaci n de para orientar con la rosca del tr pode de del l ser de l neas cruza...

Страница 97: ...ra del alcance de los ni os El material de embalaje no es un juguete No utilice la herramienta de medici n en zonas potencialmente explosivas en las que haya l quidos gases o polvos inflamables En el...

Страница 98: ...ede da arse con los movimientos bruscos No coloque la herramienta de medici n cerca de marcapasos El im n del interior de la herramienta de medici n genera un campo magn tico que puede da ar el funcio...

Страница 99: ...a piel los ojos y las mucosas con los productos qu micos En caso de entrar en contacto con el cido lave inmediatamente la zona afectada con abundante agua y busque atenci n m dica UTILICE GUANTES DE S...

Страница 100: ...ara encender el producto ponga el interruptor LOCK 4 en posi ci n Al encenderse el producto emitir inmediatamente dos l neas l ser desde el orificio de salida del l ser 7 Para apagar el producto ponga...

Страница 101: ...inferior de la herramienta de medici n difiera de la horizontal menos de 4 LED verde encendido mantenga pulsado el bot n H 1 hasta que el LED de control 2 se ilumine en rojo Entonces se apagar la niv...

Страница 102: ...gir ndolo en sentido contrario a las agujas del reloj y movi ndolo hacia arriba o abajo seg n sea necesario Cuando la burbuja del nivel 11 se encuentre justo en el centro del c rculo el cabezal plano...

Страница 103: ...ducto no requiere mantenimiento ATENCI N Nunca sumerja el producto en agua o en otros l quidos Al limpiar el producto no debe caer ning n l quido en su interior Mantenga el producto siempre limpio par...

Страница 104: ...de reciclaje Dir jase a la administraci n competente para obtener informaci n sobre los puntos de recogida de residuos y sus horarios Las pilas bater as defectuosas o usadas deben ser recicladas seg...

Страница 105: ...por ello puedan considerarse piezas de desgaste por ej las pilas Tampoco cubre da os de componentes fr giles como por ejemplo los interruptores bater as y piezas de cristal Tramitaci n de la garant a...

Страница 106: ...rier akkuer Side 110 Ibrugtagning Side 111 Is ttelse skift af batterier Side 112 T nding slukning Side 112 Anvende nivelleringsautomatik Side 112 Anvendelse af en enkelt linje og krydsede linjer Side...

Страница 107: ...dette produkt Krydslinjelaser Indledning Hjerteligt tillykke med k bet af dit nye produkt Med k bet har du besluttet dig for et f rsteklasses produkt Betjenings vejledningen er del af dette produkt D...

Страница 108: ...slukke den vertikale linje 4 LOCK kontakt 5 Batterirum 5a Batterirumsl g 6 stativgevind underside 7 Laserudgangs bning 8 Fastg relsesskrue til justering med krydslinjelaserens sta tivgevind 9 Metalho...

Страница 109: ...rkt jet i eksplosionsfarlige omgivelser hvor der befinder sig br ndbare v sker gasser eller st v I produktet kan der opst gnister der kan ant nde st v eller dampe Dette produkt kan benyttes af b rn fr...

Страница 110: ...t jet v k fra magnetiske datab rere og apparater der er f lsomme over for magnetisme Igennem magnetens virkning kan der ske uoprettelige datatab S rg for beskyttelse mod laserstr ling LASER 2 Pmax 1 m...

Страница 111: ...ge B R BESKYTTELSESHANDSKER Udl bne eller beskadigede batterier akkuer kan for rsage tsninger ved ber ring med huden B r i dette tilf lde derfor eg nede beskyttelseshandsker I tilf lde af en l kage h...

Страница 112: ...r pendulenheden l st Anvende nivelleringsautomatik For at arbejde med nivelleringsautomatikken opstil produktet p et vandret fast underlag eller fastg r produktet med stativge vindet 6 p stativet Efte...

Страница 113: ...re end 4 fra vater Du kan slukke denne tilstand idet du trykker p H tasten 1 og holder den trykket indtil LED kontrollampen 2 igen lyser gr nt Nivelleringsautomatikken er atter t ndt De krydsede linje...

Страница 114: ...osition sp nd sikringsskruen 13 fast 8 L sn ved behov sikringsskruen 10 for at indstille vinklen af det flade hoved p stativet 18 vertikalt med op til 90 grader og opn den nskede vinkel Hvis du har op...

Страница 115: ...rnes batterierne hvorefter produktet opbevares t rt og rent uden direkte sollys Bortskaffelse Indpakningen best r af milj venlige materialer som De kan bortskaffe over de lokale genbrugssteder b a Bem...

Страница 116: ...nti der beskrives i det f lgende De f r 3 rs garanti fra k bsdatoen p dette produkt Garantifristen begynder med k bsdatoen Opbevar den originale kassebon p et sikkert sted Denne kassebon beh ves som d...

Страница 117: ...nktionsfejl eller andre mangler skal De f rst kontakte nedenst ende serviceafdeling telefonisk eller via e mail Et produkt der er registreret som defekt kan De derefter sende portofrit til den meddelt...

Страница 118: ...GERMANY Model No HG05420 Version 07 2021 Stand der Informationen Last Information Update Version des informations Stand van de informatie Stan informacji Stav informac Stav inform ci Estado de las inf...

Отзывы: