background image

14

PHS 160 B3

GB

Reducer piece

Connection:


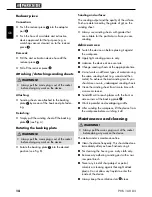
Push the reducer piece


 into the adapter

port  .


Push the hose of a suitable dust extraction 
device approved for that purpose (e.g. a 
workshop vacuum cleaner) on to the reducer 
piece


.

Removal:


Pull the dust extraction device hose off  the 
reducer piece


.


Pull off  the reducer piece


.

Attaching / detaching sanding sheets

 WARNING!


Always pull the mains plug is out of the socket 
before doing any work on the device.

Attaching:


Sanding sheets are attached to the backing 
plate   by means of the hook and pile fasten-
ing.

Detaching:


Simply pull the sanding sheet off  the backing 
plate   (see Fig. A).

Rotating the backing plate

 WARNING!


Always pull the mains plug is out of the socket 
before doing any work on the device.


Rotate the backing plate   into the desired 
position (see Fig. B).

Sanding and surfaces:

The sanding output and the quality of the surface 
fi nish are determined by the grade of grit on the 
sanding sheet.


Always use sanding sheets with grades that 
are suitable for the particular surface you are 
sanding.

Advice on use


Switch the device on before placing it against 
the workpiece.


Apply light sanding pressure only.


Advance the device at an even rate.


Change sanding sheets at the appropriate time.


Do not work on diff erent types of material using 
the same sanding sheet (e.g. wood and then 
metal). To achieve the best sanding results you 
should use unworn, undamaged sanding sheets.


Clean the sanding sheet from time to time with 
a vacuum cleaner.


Sand diffi  cult to reach places with the front or 
side corners of the backing plate  .


Work in parallel and overlapping widths.


After sanding the workpiece, lift the device from 
the workpiece before switching it off .

Maintenance and cleaning

 WARNING!


Always pull the mains plug is out of the socket 
before doing any work on the device.

The delta sander is maintenance-free.


Clean the device frequently. This should be done 
immediately after you have fi nished using it.


For cleaning the housing use a dry cloth only.


Remove any adhering sanding dust with a nar-
row paint brush.


Never any kind of sharp object or petrol, 
solvents or cleaning agents that might attack 
plastic. Do not allow any liquids to enter the 
inside of the device.


Always keep the ventilation slots   clear.

IB_100087_PHS160B3_LB1.indb   14

28.05.14   13:41

Содержание PHS 160 B3

Страница 1: ...IAN 100087 HANDSCHLEIFER PHS 160 B3 HANDSCHLEIFER Originalbetriebsanleitung DETAIL SANDER Translation of original operation manual...

Страница 2: ...ration manual Page 9 Klappen Sie vor dem Lesen die Seite mit den Abbildungen aus und machen Sie sich anschlie end mit allen Funktionen des Ger tes vertraut Before reading unfold the page containing th...

Страница 3: ...A B a b...

Страница 4: ...che Sicherheit 3 3 Sicherheit von Personen 3 4 Verwendung und Behandlung des Elektrowerkzeugs 4 5 Service 4 Ger tespezi sche Sicherheitshinweise f r Handschleifer 5 Inbetriebnahme 5 Staubabsaugung 6 S...

Страница 5: ...1 Schleifblatt K rnung 120 1 Reduzierst ck zur Fremdabsaugung 1 Bedienungsanleitung Technische Daten Nennaufnahme 160 W Nennspannung 230 V 50 Hz Nenndrehzahl n0 13000 min 1 Nennschwingzahl n0 26000 m...

Страница 6: ...ein Elektroger t erh ht das Risiko eines elektrischen Schlages d Zweckentfremden Sie das Kabel nicht um das Elektrowerkzeug zu tragen aufzuh ngen oder um den Stecker aus der Steckdose zu ziehen Halte...

Страница 7: ...der das Ger t weglegen Diese Vorsichtsma nahme verhindert den unbeabsich tigten Start des Elektrowerkzeuges d Bewahren Sie unbenutzte Elektrowerkzeuge au erhalb der Reichweite von Kindern auf Lassen S...

Страница 8: ...Schutzbrille und Staubschutzmaske Sorgen Sie bei der Bearbeitung von Kunst sto en Farben Lacken etc f r ausreichende Bel ftung Tr nken Sie Materialien oder zu bearbeitende Fl chen nicht mit l sungsmit...

Страница 9: ...ale Absaugleistung zu gew hrleisten die Staubbox zur Eigenabsau gung b rechtzeitig leeren Entnehmen Sie dazu die Staubbox b wie zuvor beschrieben vom Ger t nen Sie die Staubbox durch Ziehen an der Las...

Страница 10: ...e Garantie ab Kaufdatum Das Ger t wurde sorgf ltig produziert und vor Anlieferung gewissenhaft gepr ft Bitte bewahren Sie den Kassenbon als Nachweis f r den Kauf auf Bitte setzen Sie sich im Garantief...

Страница 11: ...e oder Stadtverwaltung Original Konformit tserkl rung Wir KOMPERNASS HANDELS GMBH Dokumen tenverantwortlicher Herr Semi Uguzlu BURGSTR 21 44867 BOCHUM DEUTSCHLAND erkl ren hiermit dass dieses Produkt...

Страница 12: ...ower tool use and care 12 5 Service 12 Safety advice relating speci cally to this device 12 Preparing for use 13 Vacuum dust extraction 13 Dust box for internal vacuum extraction 13 Reducer piece 14 A...

Страница 13: ...60 B3 1 Sanding sheet Grit 120 1 Reducer piece for external vacuum extraction 1 Operating instructions Technical details Nom power input 160 W Nominal voltage 230 V 50 Hz Non load speed n0 13000 min 1...

Страница 14: ...ing or unplugging the power tool Keep cord away from heat oil sharp edges or moving parts Damaged or entangled cords increase the risk of electric shock e When operating a power tool outdoors use an e...

Страница 15: ...ool accessories and tool bits etc in accordance with these instructions tak ing into account the working conditions and the work to be performed Use of the power tool for operations di erent from thos...

Страница 16: ...s the danger of re when working with electrical devices that have a dust box or can be connected to a vacuum cleaner Under certain conditions the wood dust in the dust ex traction bag or in the vacuum...

Страница 17: ...you are sanding Advice on use Switch the device on before placing it against the workpiece Apply light sanding pressure only Advance the device at an even rate Change sanding sheets at the appropriat...

Страница 18: ...riod is not prolonged by repairs made under the warranty This also applies to replaced and repaired parts Damage and defects present at the time of purchase must be reported immediately after unpackin...

Страница 19: ...ctive 2006 42 EC EU Low Voltage Regulations 2006 95 EC EMC Electromagnetic Compatibility 2004 108 EC RoHS Directive 2011 65 EU Applied harmonised standards EN 60745 1 A11 2010 EN 60745 2 4 A11 2011 EN...

Страница 20: ...IAN 100087 KOMPERNASS HANDELS GMBH BURGSTRASSE 21 44867 BOCHUM DEUTSCHLAND GERMANY www kompernass com Stand der Informationen Last Information Update 05 2014 Ident No PHS160B3 042014 2...

Отзывы: