


Installation and Setup
2-13
5100-A2-GB21-10
April 1997
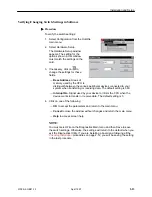
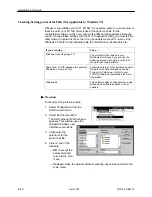
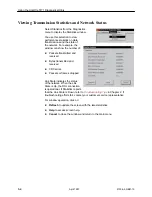
Verifying/Changing Switch Settings in Software
Procedure
To verify the switch settings:
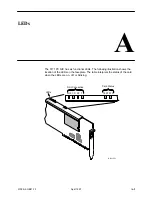
1. Select Configuration from the HotWire
main menu.
2. Select Hardware Setup.
The Hardware Setup window
appears. The setting for the
options shown in this window
must match the settings on the
card.
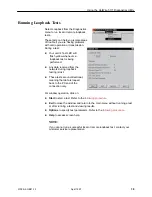
3. If necessary, click on
to
change the settings for these
fields:
— Base Address. Areas of
memory used by the CPU to
distinguish between the various peripheral devices connected to your
system when transferring or receiving data. The default setting is 380.
— Interrupt No. Signal used by your device to inform the CPU when the
device wants to transfer or receive data. The default setting is 5.
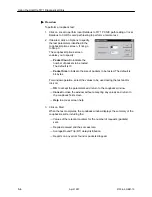
4. Click on one of the following:
— OK to accept the parameters and return to the main menu.
— Cancel to close the window without changes and return the main menu.
— Help to access screen help.
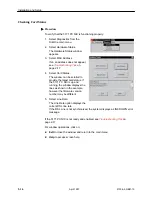
NOTE:
You must select File on the Diagnostics Main menu and then Save to save
the switch settings. Otherwise, the settings will return to the default when you
exit the Diagnostics Utility. If you are installing a board and following all the
Checking Installation
procedures on page 2-12, you will be saving the setting
in the last procedure.