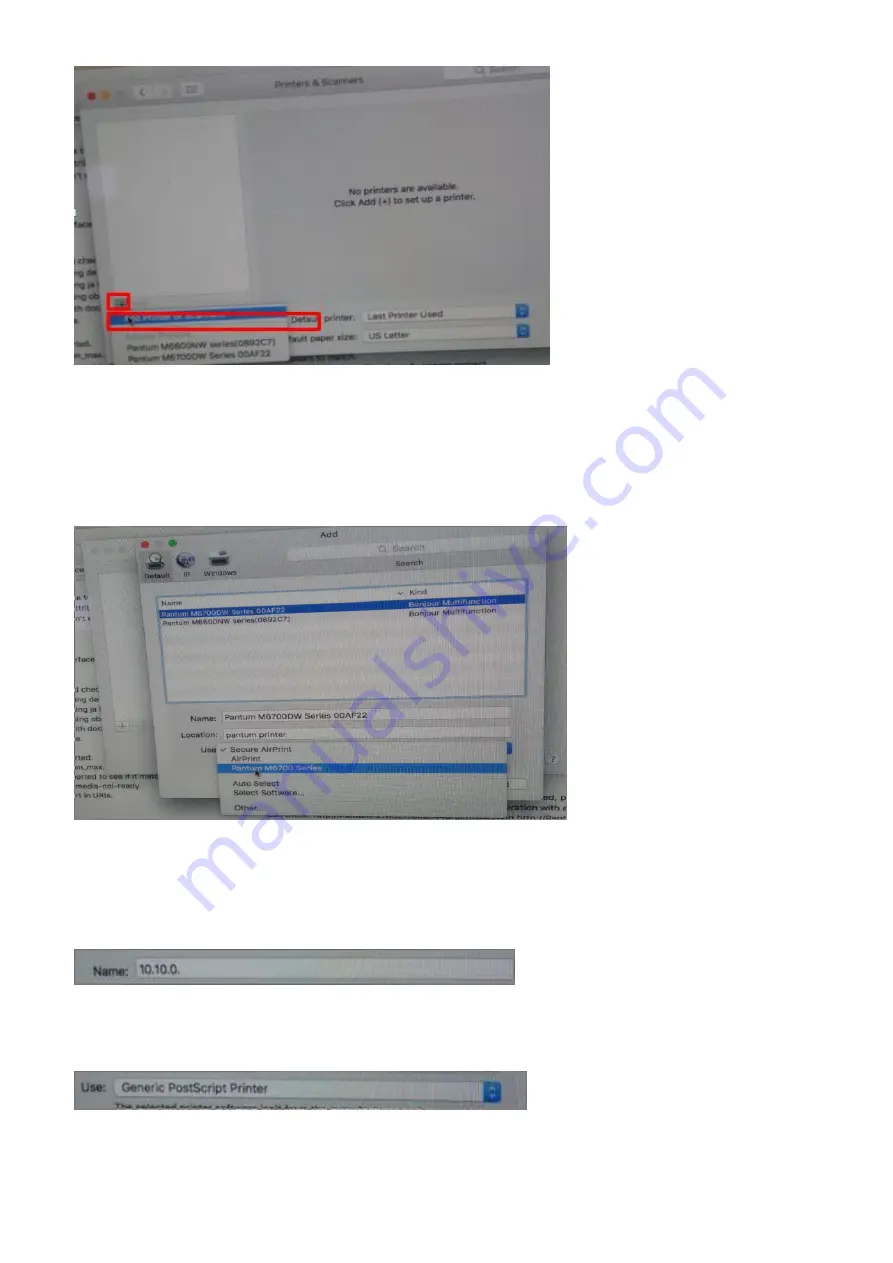
Step4:
Please choose the corresponding model from installed printer when pop up the dialog box. Then
chose the corresponding printer’s driver which installed on PC. (It is needed to be the same with printer
model.) After chose to save, it will be finished to install.
Remark:
If the internet needs to set up manually. You can chose to IP modified at the forth step.
Modify the IP address need to match to the IP agreement.
Here is the printer’s name without modifications.
Содержание M6700 Series
Страница 9: ......
Страница 15: ...Step3 Select NO3 Restore set by page down button Step4 Select NO2 YES and it will be done...
Страница 21: ...Step2 Chose Setting in the below picture Step3 Chose wireless Hotpot at the left column...
Страница 23: ...Step2 Select below option and click next Step3 Select below option and click next...
Страница 24: ...26 Step4 Select the WIFI name of your router and click next...
Страница 30: ......
Страница 37: ......
Страница 41: ...Step3 Click Printer properties Advanced New Driver Step4 Click next Have disk select the driver file...
Страница 42: ...Step5 Click finish and the printer driver has been installed...
Страница 43: ......
Страница 46: ...Step3 Select NO 2 Prt Info Page then chose OK it will be done...
Страница 50: ...Step3 Select NO 2 Prt Info Page then chose OK it will be done...
Страница 63: ...Step3 Please change to letter size in the printing document also...
Страница 65: ...8 Is my printer compatible with Linux Debian 9 system No our printer did not compatible with Linux Debian 9...
Страница 67: ...Step2 Switch on the printer Step3 Connect to the Printer Hotspot...
Страница 71: ...Step2 Please click on the version in red circle then the version will show as below...
Страница 77: ......
Страница 78: ......
Страница 88: ...8 What is my M6700 M7100 M6800 M7200 series printer Specifications...
Страница 89: ......
Страница 101: ...Step2 Click Properties of the printer Step3 Please check your original port in the port and keep it in mind...
Страница 102: ......
Страница 128: ......
Страница 131: ...10 How to change the scanning folder Step6 Turn on the Pantum application Click scan...
Страница 132: ...Step7 Click Folder to the folder settings interface Step8 Click Browse select the saving folder click OK...
Страница 133: ......
Страница 136: ......
Страница 139: ...Step5 Then you can choose the report status of NO 1 Turn off it will be done...
Страница 148: ...Step5 It will be taken an example as below...


