Installation Guide
AT-VTPG-1000VL-BL and AT-VTPG-1000VL-WH
9
IP Address: 192.168.XX.XX
Panel Setup Required
@
192.168.xx.xx
Copyright 2021Atlona Inc (
atlona.com
). All Rights Reserved. || Version: X.X.X ||
Gateway 1:
Active Gateway
ENABLE DEFAULT IP TO 192.168.41.68
Installation and Set Up
1
Connect the Ethernet cable into the back of the unit.
a
If the Ethernet cable is connected to a non PoE switch, use a PoE injector using 802.3at
(purchased separately).
2
Secure the unit in either the wall or optional stand, as explained in the mounting instructions.
3
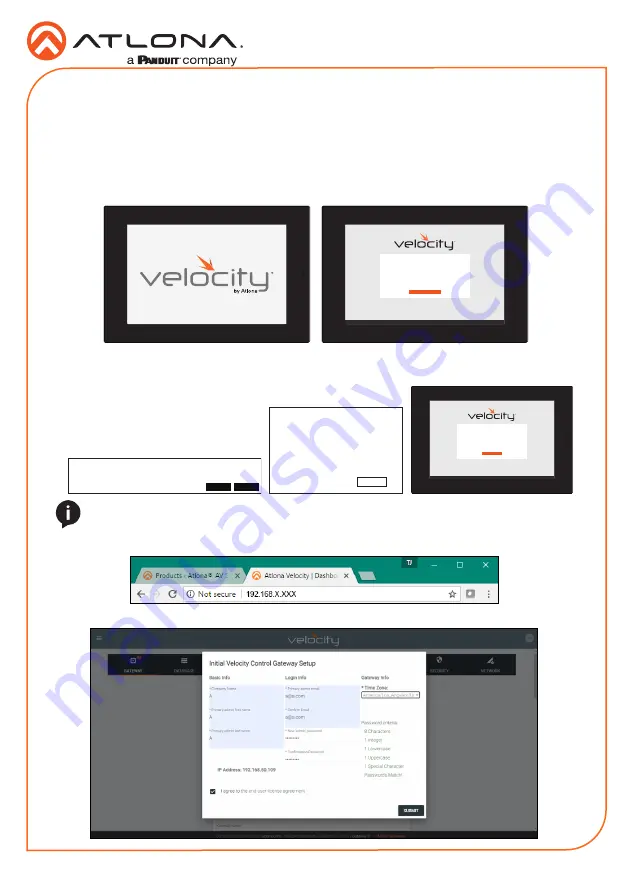
The Velocity logo will display during the booting process and then go to an IP screen.
4
Copy the IP and enter it into the browser address bar.
Velocity will automatically log in once the IP is launched and a pop up will appear.
If the network does not support DHCP or a static IP is preferred, the button on the IP screen
can be used to switch between DHCP and static IP. Once the static IP button has been
selected, a confirmation pop up will appear. Select the Submit
button. The process may take a couple minutes. When
complete a pop up will display. Press
OK. The same steps can be
followed to switch back to DHCP.
IP Address: 192.168.XX.XX
Panel Setup Required
@
192.168.41.68
Copyright 2021Atlona Inc (
atlona.com
). All Rights Reserved. || Version: X.X.X ||
Gateway 1:
Active Gateway
ENABLE NETWORK TO DHCP
Default Network Settings
Are you sure you want to set network to default static IP of 192.168.41.68?
CLOSE
SUBMIT
Network reset to default IP Address
OK
NOTE:
Once set to the static IP, the local computer must be set to an IP of
192.168.41.X
to be able to talk to the unit. The IP must not be in use by another device on the network.


