Before attempting to connect or operate this product,
please read these instructions carefully and save this manual for future use.
Model No.
WV-CS554
WV-CS854A
Combination Camera
Operating Instructions
ENGLISH
FRANÇAIS
Страница 1: ...ttempting to connect or operate this product please read these instructions carefully and save this manual for future use Model No WV CS554 WV CS854A Combination Camera Operating Instructions ENGLISH...
Страница 2: ...VER OR BACK NO USER SERVICEABLE PARTS INSIDE REFER SERVICING TO QUALIFIED SERVICE PERSONNEL CAUTION RISK OF ELECTRIC SHOCK DO NOT OPEN SA 1965 SA 1966 NOTE This equipment has been tested and found to...
Страница 3: ...ay 16 Preset 17 Deleting Preset Positions 22 Home Position Setting 22 Self Return Setting 22 Auto Mode Setting 23 AUTO PAN KEY Setting 24 DIGITAL FLIP ON OFF 25 LOCAL REMOTE Setting 25 SPECIAL 1 25 Ca...
Страница 4: ...noise reduction effect FEATURES Symbols Used in This Instructions This operating instructions is included both of the combination cameras WV CS554 and WV CS854A It uses the icons shown below to descr...
Страница 5: ...In case of these set the REFRESH mode on the special 2 menu see page 46 To use with the WJ SX550B Matrix Switcher set the auto cleaning function on each unit side then clean WV CS554 WV CS854A one tim...
Страница 6: ...rature or high humidity exists Do not place near heat sources such as radiators stoves or other units that produce heat Use the camera under conditions where temperature is between 10 C 50 C 14 F 122...
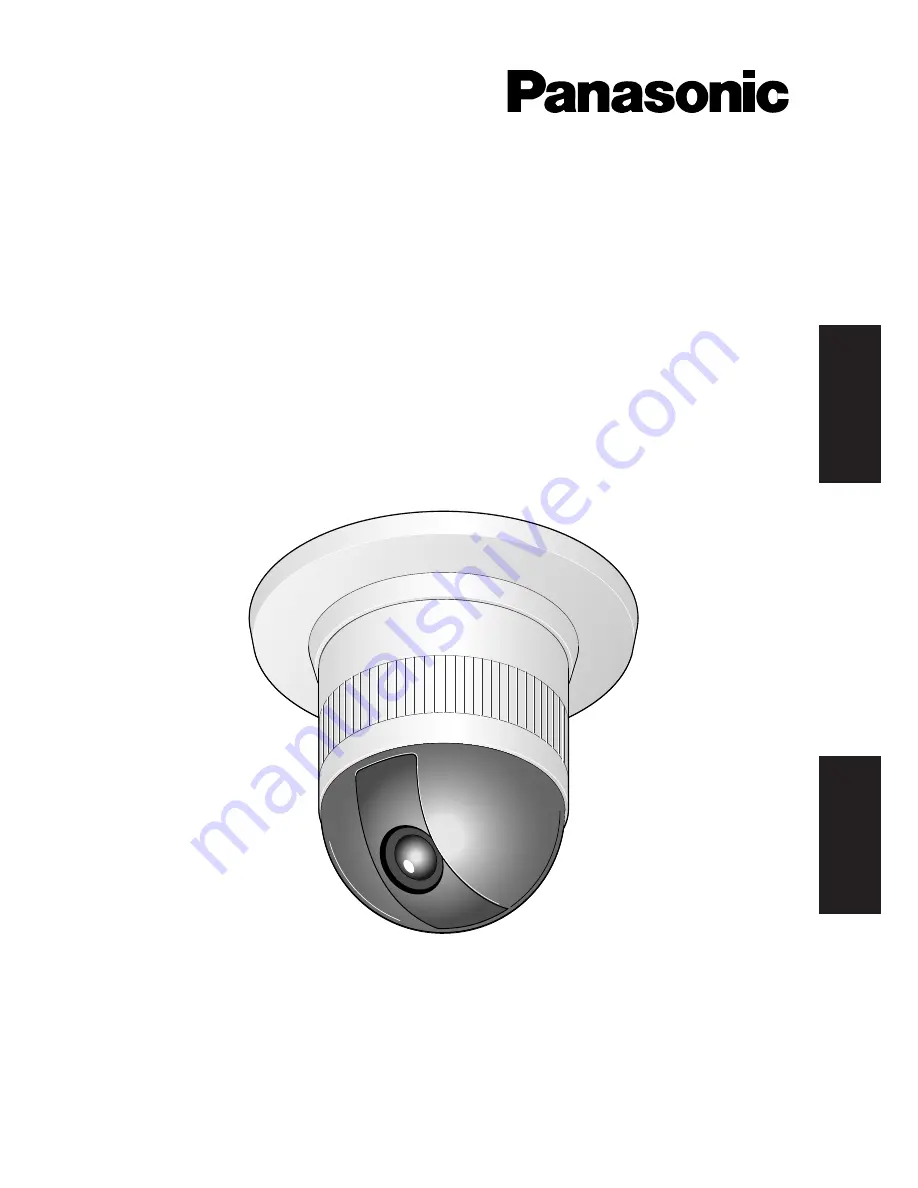
Страница 7: ...i 0 y Camera Mounting Base u Panning Start Point i Fall Prevention Wire o Decoration Cover 0 Dome Cover q Alarm Input Connector w Alarm Output Connector e Video Output Connector r Data Port t Power C...
Страница 8: ...ructure from the Setup menu at the top down to Manual Mask Area Selection at the bottom These menus are described in the following pages for reference prior to setup Switches keys and the joystick are...
Страница 9: ...SUSPEND CAMERA SETUP PATROL PAY PROGRAM PRESET CAMERA FUNCTION SERUP ESC HOME SET PRESET WIDE TELE NEAR AUX1 B W AUTO WIPER AUX2 DEF UP DOWN L FAR FOCUS IRIS CLOSS OPEN PROGRAM ALARM IRIS RESET AUTO F...
Страница 10: ...red in the files See page 21 for the setting Home Position HOME POSITION HOME POSITION is the camera s basic position It returns to this position automatically when a specific time has elapsed after a...
Страница 11: ...setting See page 25 for details 2 Proportional Pan Tilt Speed ON OFF PROPO P T If ON is selected the zoom ratio changes corresponding to pan tilt speed For example pan tilt speed slows down with zoom...
Страница 12: ...ID consists of up to 16 alphanumeric characters You can select whether to have the camera ID dis played on the monitor screen or not See page 35 for the setting 2 Light Control ALC MANUAL You can sele...
Страница 13: ...t SENS UP function varies the shutter speed to raise the sen sitivity in low light conditions when OFF is selected for ALC You can select the shutter speed for SENS UP from the preset values as follow...
Страница 14: ...cts the motion it supplies the alarm signal to the external equipment and stops at its position for the preset DWELL time See page 42 for the setting 9 Auto Focus AF MODE The camera adjusts the focus...
Страница 15: ...SELECTION switch to the NORMAL or ALARM OFF position 2 Press the PROG switch for 2 seconds or more to open the Program menu 3 Move the cursor to Camera Set Up then press the SET switch to open the SE...
Страница 16: ...ME POSITION SELF RETURN AUTO MODE AUTO PAN KEY DIGITAL FLIP LOCAL REMOTE SPECIAL1 CAMERA RS485 SET UP OFF OFF OFF AUTO PAN ON LOCAL PRESET NUMBER SET 2 6 10 14 18 22 26 30 1 5 9 13 17 21 25 29 ID DOOR...
Страница 17: ...4 To Set the Lens Zoom and Focus Positions 1 Move the cursor to PUSH SET next to ZOOM FOCUS and press the CAM SET key The ZOOM FOCUS setting menu appears 2 Select a zoom position by moving the zoom co...
Страница 18: ...ition 1 Move the cursor to COPY and press the CAM SET key The preset ID in the preceding position is immediately shown Each consecutive pressing of the CAM SET key displays the ID preceding the one cu...
Страница 19: ...e right or left 2 Enter copy change or delete the ID as described above To Return to the Preset Setting Menu Move the cursor to RET and press the CAM SET key Light Control Setting 1 Move the cursor to...
Страница 20: ...e File Setting 1 To set a scene file number Move the cursor to SCENE FILE and select a scene file number 1 to 10 or OFF by moving the joystick to the right or left No scene file is selected at OFF 2 T...
Страница 21: ...esired posi tion number by moving the joystick to the right or left 2 Select OFF if you are not using the home position function Note This setting functions only when AUTO MODE is set to OFF PRESET NU...
Страница 22: ...e joystick to the right or left to set a panning speed The panning speed increases when the joystick is moved to the right and decreases when it is moved to the left Caution If the panning range is ch...
Страница 23: ...canceled To activate Auto mode select the desired AUTO MODE again or set a time for SELF RETURN in the SET UP menu to resume the AUTO MODE after the time set When 0S is selected the camera stops witho...
Страница 24: ...camera will aim below 2 Move the joystick to the right or left and the camera will rotate 180 horizontally 3 Move the joystick upwards To set preset position directly from the WV CU360 controller it...
Страница 25: ...then press the CAM SET key 3 2 Move the joystick to adjust the pan and tilt position so that the desired position comes into the zone frame Note Zone setting is not available while the zone frame dis...
Страница 26: ...NESW An area title is displayed indicating the camera direction North N North East NE East E South East SE South S South West SW West W and North West NW ON USER A user customized area title is displa...
Страница 27: ...2 Adjust PAN TILT ZOOM FOCUS and display position in the as same way as AREA TITLE DIRECTION NESW See page 27 3 To add a user customized title move the cursor to the title of the desired number then p...
Страница 28: ...are stored when PATROL LEARN mode starts PAN TILT ZOOM FOCUS settings IRIS setting SHUTTER setting AGC setting SENS UP setting WHITE BALANCE setting IMAGE HOLD setting AREA TITLE setting DIGITAL FLIP...
Страница 29: ...key to stop playback or press any manual operation key e g PAN TILT ZOOM FOCUS except the iris keys PATROL PLAY with a Controller not Having PATROL Key 1 Close the SET UP or SPECIAL 1 menu The camera...
Страница 30: ...e output through the ALARM OUT connector 1 Move the cursor to CNT CLS 1 then select OFF ALARM or AUX 1 by moving the joystick to the right or left When ALARM is selected TIME OUT appears Select an app...
Страница 31: ...ered password is not displayed the up arrow moves one character to the right 3 2 Repeat the above step for the 2nd and 3rd digits Default 123 3 3 The cursor moves to OK after all the three digits have...
Страница 32: ...ty and motors operation 1 Move the cursor to CLEANING and select ON or OFF by moving the joystick to the right or left ON The contacts are cleaned as programmed for about 1 minute CLEANING disappears...
Страница 33: ...TROL PLAY OFF Alarm signals are not output Note Select OFF when the camera downloads or uploads the preset data Image Hold ON OFF IMAGE HOLD ON OFF The camera picture remains as a still image on the m...
Страница 34: ...the joystick and press the CAM SET key The selected character appears in the editing area 2 3 Repeat the steps above until all characters are edited 3 After editing the camera identification characte...
Страница 35: ...s menu is described separately and should be set up after installing the camera at the site and observing the actual site picture 3 When MANUAL is selected quit the setup menu by pressing MON ESC key...
Страница 36: ...mask the desired area 4 To cancel a masked area move the cursor to that area then press the CAM SET key To cancel all masking area press the F2 button of the WV CU550B For the WV RM70 press the right...
Страница 37: ...elects higher gain control OFF Fixed Level Disables the gain control function Notes Even if AGC is set to ON and if the noise reduction function is enabled afterimages may be produced by shooting a mo...
Страница 38: ...ternal INT by using the joystick The menu screen follows the example for WV CS854A Important Notices 1 The priority of SYNC modes is as follows 1 Multiplexed vertical drive VD2 highest priority 2 Line...
Страница 39: ...otes When the cursor reaches the end it jumps back to At the same time COARSE is incremented by one step to enable a continuous adjustment The reverse takes place when the cursor reaches the end When...
Страница 40: ...the white balance setup PUSH SW is highlighted to indicate that white balance is being set 4 PUSH SW returns to normal when balance setting is completed 5 For fine adjustment of the AWC move the curs...
Страница 41: ...arm signal is supplied while the DISPLAY MODE is activated OFF The alarm signal is not supplied while the DISPLAY MODE is activated 7 Move the cursor to DISPLAY MODE Press the CAM SET key to see the p...
Страница 42: ...g the joystick to the right or left S M and L stand for Small Middle and Large areas in the center of a scene that are used for sensing sharpness in auto focusing SET UP CAMERA ID ALC MANUAL SHUTTER A...
Страница 43: ...el Setting CHROMA GAIN 1 Move the cursor to CHROMA GAIN The I cursor is highlighted 2 While observing the vectorscope or color video monitor adjust the chroma level by using the joystick The I cursor...
Страница 44: ...ote It takes 1 minute to make the selected mode effective after stopping pan tilt zoom or focus ON Black and white mode is selected OFF Color mode is selected Note Mode selection is disabled if ALARM...
Страница 45: ...e right or left UNIT NUMBER Displays the unit number set by the DIP switch If the switch is set to 1 96 select a number by moving the joystick to the right or left In an RS485 chain each unit must hav...
Страница 46: ...mission 100 200 400 1 000 ms ALARM DATA Specifies alarm transmission mode depending on the protocol selected by the 8 bit DIP switch POLLING Transmits the alarm data in response to requests from the c...
Страница 47: ...ects termination ON OFF and half full duplex selection for RS485 communications Switch settings are read in to the camera when the power is turned on Make sure to turn it off then turn it back on afte...
Страница 48: ...3 4 ON 5 6 7 8 1 2 3 4 ON 5 6 7 8 1 2 3 4 ON 5 6 7 8 1 2 3 4 ON 5 6 7 8 Switch position Unit number Switch position Unit number 1 96 1 2 3 4 5 6 7 8 9 10 11 12 13 14 15 16 17 18 19 20 21 22 23 24 25 2...
Страница 49: ...1 2 3 4 ON 5 6 7 8 1 2 3 4 ON 5 6 7 8 1 2 3 4 ON 5 6 7 8 1 2 3 4 ON 5 6 7 8 1 2 3 4 ON 5 6 7 8 1 2 3 4 ON 5 6 7 8 1 2 3 4 ON 5 6 7 8 Switch position Unit number Switch position Unit number 69 70 71 72...
Страница 50: ...any cables OFF Termination ON Termination OFF b Top Cable Exit Prepare a hole in the ceiling board to run the cables 1 2 3 4 ON 4 bit DIP SW BP 3 BP 4 ON ON ON OFF OFF OFF Half duplex 2 line Full dupl...
Страница 51: ...he decoration cover against the cam era mounting base 15 Be sure to match the wire with the fall prevention wire fixing angle as shown below Fall prevention wire fixing angle Ring of the fall preventi...
Страница 52: ...for the 24 V AC Input Terminals Contact Insert Up A Approx 0 1 inch Insert the wire until A position and clamp the contacts Wire Up Wire Contact Up Contact Wire Approx 3 mm 0 1 inch Insert the wire un...
Страница 53: ...ations are low active non voltage contact ON when active or open collector Low when active The table below shows wire colors versus pin functions GND Brown Red Data transmission Data reception Orange...
Страница 54: ...K SEQ FORWARD SEQ ALT DEC 1CAM INC 1CAM STOP 1 2 AUX CLOSE OPEN IRIS PRESET FOCUS NEAR ZOOM TELE FAR WIDE System Controller WV CU 550 550B LEFT RIGHT UP DOWN ALARM BUSY F3 F4 F2 F1 AF 1 2 3 4 5 6 7 8...
Страница 55: ...s speed 22 times digital zoom x 10 3 79 mm 83 4 mm 1 1 6 WIDE 1 3 0 TELE F1 6 F22 close horizontal 2 6 51 7 vertical 2 0 39 9 approx 4 5 s TELE WIDE in manual mode approx 7 5 s 22 times digital zoom x...
Страница 56: ...1 s 120 s 8 steps 64 steps sequence mode maximum approx 300 s Functions WV CS854A WV CS554 Control interface Preset control Titles ID Auto focus Electronic shutter Electronic sensitivity up Super D2 B...
Страница 57: ...on cover 1 pc Alarm in cable 1 pc Alarm out cable 1 pc Connector for 24 V AC 1 pc Dome cover approx 60 transparency smoked type WV CS2S Dome cover approx 50 transparency smoked type WV CS2SH Dome cove...
Страница 58: ...NC Close 1 7 0 CAM FUNC EL SHUTTER On 1 7 1 CAM FUNC Off 1 7 2 CAM FUNC Speed Up 1 7 3 CAM FUNC Speed Down 1 7 4 CAM FUNC AGC On 1 7 5 CAM FUNC Off 1 7 6 CAM FUNC SENS UP On 1 7 7 CAM FUNC Off 1 7 8 C...
Страница 59: ...abriel Industrial Park Carolina Puerto Rico 00985 809 750 4300 Panasonic Security and Digital Imaging Company A Division of Matsushita Electric Corporation of America Executive Office One Panasonic Wa...