


40
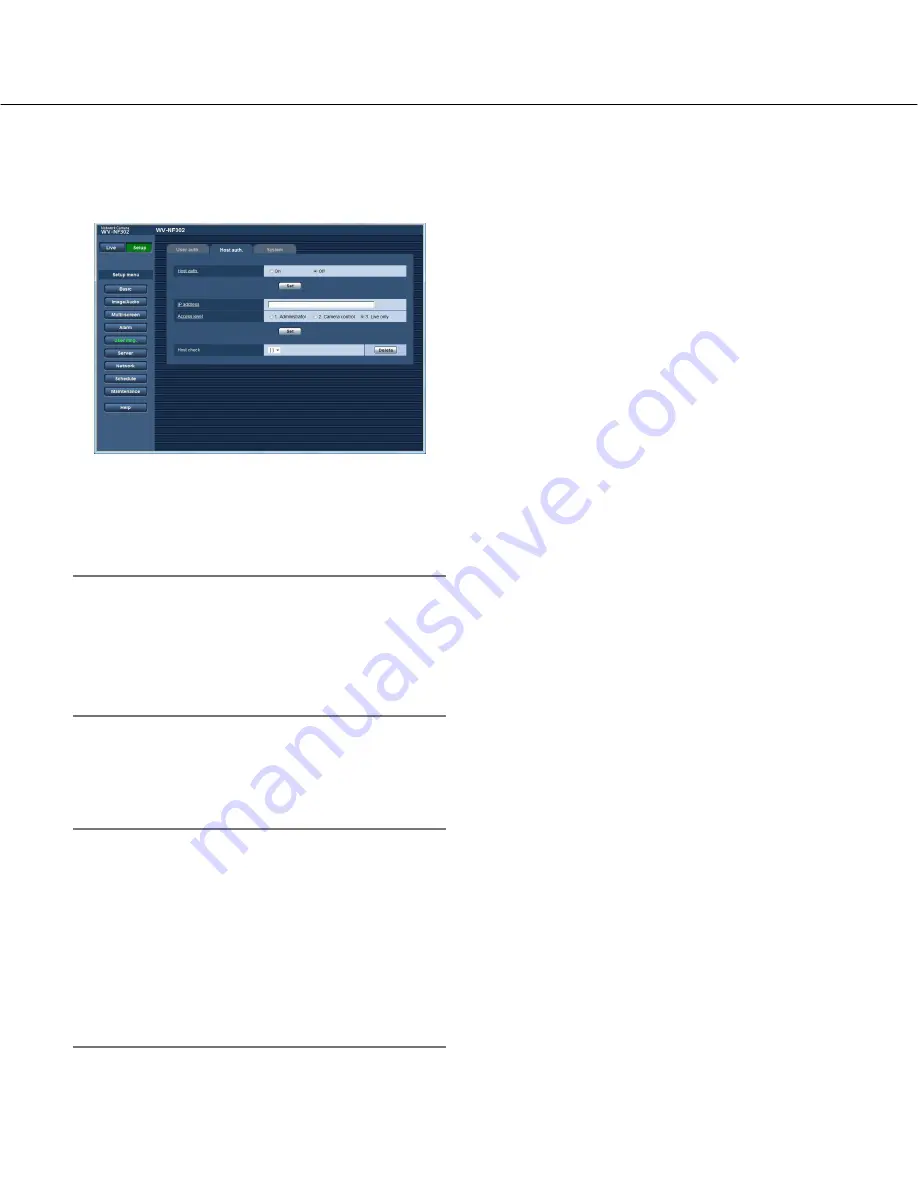
Configure the settings relating to the host authentication [Host auth.]
Click the [Host auth.] tab on the "User mng." page. (
☞
pages 4 and 5: How to display/operate the setup menu)
The settings to restrict PCs (IP address) from accessing the camera can be configured on this page.
[Host auth.]
Select "On" or "Off" to determine whether or not to
authenticate the host.
Default:
Off
Important:
Before configuring the host authentication, it is nec-
essary to register IP addresses of the PCs to be
allowed to access the camera and determine their
access levels. If "On" is selected for "Host authenti-
cation" before registering the hosts (IP addresses), it
will be impossible to access the camera.
[IP address]
Enter the IP address of the PC to be allowed to access
the camera.
Host name is unavailable for the IP address.
Notes:
• When "IP address/subnet mask" is entered, it is pos-
sible to restrict PCs in each subnet.
For example, when "192.168.0.1/24" is entered and
"2. Camera control" is selected for the access level,
the PCs whose IP address is between "192.168.0.0"
- "192.168.0.255" can access the camera with the
access level "2. Camera control".
• When the IP address already in use is entered and
the [Set] button is clicked, the respective host infor-
mation will be overwritten.
[Access level]
Select the access level of the host from the following.
1. Administrator/2. Camera control/3. Live only
Refer to page 39 for further information about the
access level.
Default:
3. Live only
[Host check]
By clicking [
C
] of "Host check", the registered host can
be selected and the selected host’s IP address can be
checked.
The registered IP address will be displayed with the
access level. (Example: 192.168.0.21 [1])
To delete the registered host, click the [Delete] button
after selecting the IP address to be deleted.


