


!1
!2
!3
!4
!5
!6!7
!8 !9
@0
■
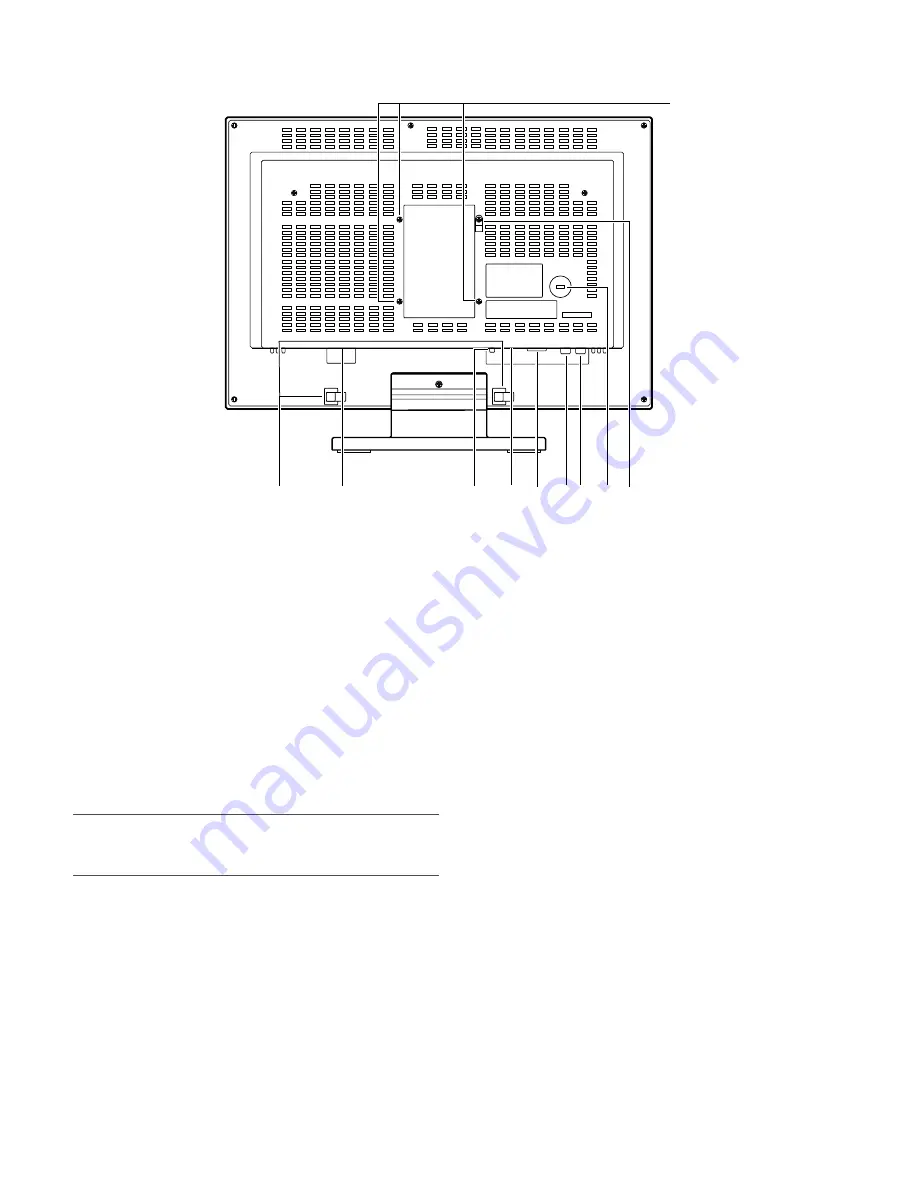
Rear View
!1
Clamp
After connection of the power cord and HDMI cable,
remove the screw that secures the cord clamp and fas-
ten the power cord and HDMI cable.
!2
Power input jack (AC IN)
Connect the power cord (accessory).
!3
Audio input connector (AUDIO IN)
With an audio cable connection, this connector accepts
an audio signal from an external device and supplies the
signal to the built-in speaker.
Note:
• When HDMI is selected for input, audio output is provid-
ed not from this terminal but from the HDMI connector.
!4
HDMI input connector (HDMI)
Accepts an HDMI signal (video/audio) from an external
device.
For timing data this connector supports, refer to page 11
"Timing data chart for HDMI input".
!5
PC input connector (PC IN)
Accepts an analog RGB signal from a PC.
For timing data this connector supports, refer to page 11
"Timing data chart for PC input".
!6
VIDEO input connector (VIDEO IN)
Accepts a composite video signal from an external
device.
!7
Video output connector (VIDEO OUT)
Supplies a composite video signal accepted by the
VIDEO IN connector to another external device.
!8
Security slot
You can attach a lock that meets the industry standard
specification (3 to 3.26 mm x 7 to 7.26 mm x 3.5 to
4 mm).
!9
Fall-prevention clamp
Use a strong cord or chain (locally procured) to secure
this monitor to a solid wall or column for fall prevention.
Remove the clamp when a mounting bracket for wall
installation is used.
@0
Screw holes for VESA mounting bracket
(
☞
page 20)
10
(This illustration represents WV-LW2200.)
Содержание WV-LW2200
Страница 27: ...27...


