background image

Before attempting to connect or operate this product,

please read these instructions carefully and save this manual for future use.

Network Disk Recorder

Setup Instructions 

Model No. 

WJ-ND200

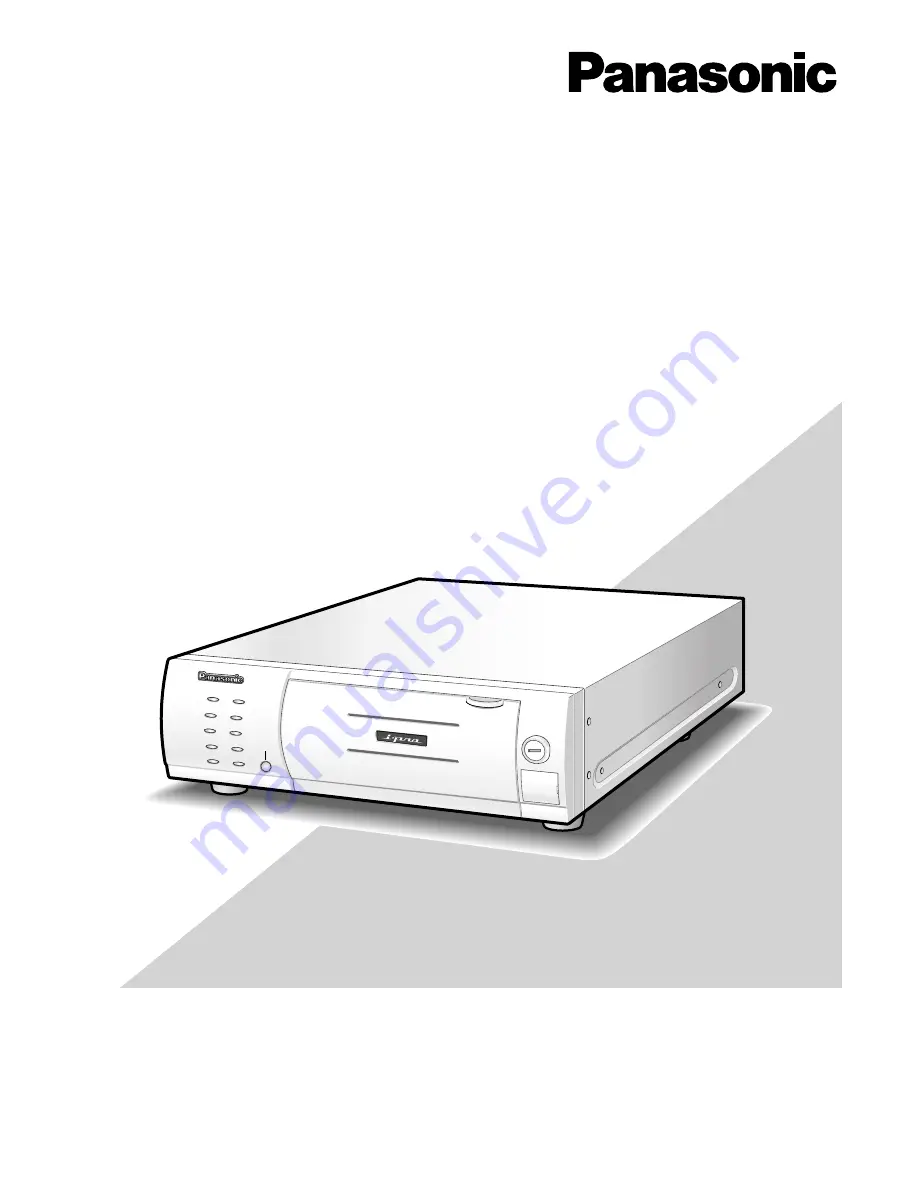
Network Disk Recorder WJ-ND200

ERROR

REC

OPERATE

TIMER

ALARM

ALARM

SUSPEND

BUZZER

STOP

LINK
/ACT

MIRROR

HDD1

HDD2

Содержание WJND200 - NETWORK DISK RECORDER

Страница 1: ...ct please read these instructions carefully and save this manual for future use Network Disk Recorder Setup Instructions Model No WJ ND200 Network Disk Recorder WJ ND200 ERROR REC OPERATE TIMER ALARM ALARM SUSPEND BUZZER STOP LINK ACT MIRROR HDD1 HDD2 ...

Страница 2: ...Select button 16 Setup button 17 Status display area 18 Playback point operation area 19 HDD tab 19 CAM Tab 21 Setup Menu 22 Setup menu chart 22 Basic operation with the setup menu 25 Perform the minimum required settings Quick 27 Perform the settings for the system System 30 Functions for the emergency recording Emergency REC 34 Functions for events Event 36 Settings for the recording event sched...

Страница 3: ...ek It is also possi ble to perform recording at a different recording rate according to time range Emergency recording In the case of an emergency emergency recordings will be given a higher priority than other recording modes by operating an external switch External timer recording It is possible to perform recording automatically using an external timer Event recording At an event occurrence suc...

Страница 4: ...t using the buttons on the front panel Refer to the Operating Instructions on the provided CD ROM for descriptions of how to operate this unit from a PC Adobe Reader is required to read these operating instructions PDF on the provided CD ROM When the Adobe Reader is not installed on the PC download the latest Adobe Reader from the Adobe web site and install it ND200 shown in the illustrations used...

Страница 5: ...efers to a hard disk drive mass storage medium The unit records camera pictures on a hard disk rather than on video tape Recording rate ips I Flame Refers to the unit that determines the smoothness with which the recorded images are played back ips is used to express the number of frames recorded per second The higher the number the smoother the movement but the available recording time becomes sh...

Страница 6: ...ions The recording time of SD memory data will be displayed based on the clock of the camera Event An event is a phenomenon which triggers a specific operation event operation in the unit Events are divided into terminal alarm command alarm and site alarm Sequence Sequence refers to automatically changing the displayed camera picture in a preset sequence Sequence display is possible while the unit...

Страница 7: ...nge the TCP IP setting of the PC to conform to the settings of this unit c Format initialize hard disk drives page 76 Display the disk configuration menu and format the hard disk drives v Display the camera setup menu and perform the network settings of cameras page 47 Display the camera setup menu and configure the net work settings of cameras b Setup pages 22 77 Perform the required settings on ...

Страница 8: ...0 254 Subnet mask 255 255 255 0 Gateway Address 192 168 0 1 When the network settings are different from the settings above perform the network settings of the PC The network settings of cameras can be configured on the NW Camera Setup page Camera NW Camera Setup In these operating instructions the settings are performed on Windows XP as examples Refer to the operating instructions of the respecti...

Страница 9: ...ndow will be displayed Step 3 Click Network Connections Screenshot 4 The Network Connections window will be displayed Step 4 Double click Local Area Connection Screenshot 5 The Local Area Connection Status window will be dis played Step 5 Click Properties ...

Страница 10: ...Internet Protocol TCP IP will be displayed Step 7 Click Use the following IP address and enter the IP address and the subnet mask as follows IP address 192 168 0 100 Subnet mask 255 255 255 0 Depending on the network configuration it may be nec essary to set the Default gateway Refer to a system administrator for further information Step 8 Click the OK button and close the window ...

Страница 11: ...e connected Refer to an administrator of each network for further information about the respective network Connection example Installing a firewall to use the packet filtering and the protocol filtering functions can better enhance the network security Connection example About the Network Security of This Unit WAN Router Router IP address 192 168 1 100 Subnet mask 255 255 255 0 Default gateway 192...

Страница 12: ...ntering IP address Example Correct 192 168 0 50 Wrong 192 168 0 050 If a message is displayed on the information bar see page 83 Screenshot 2 The user authentication window will be displayed This window will not be displayed when OFF is select ed for User Authentication on the Basic Setup of User Mng menu Step 2 Enter the user ID and password registered on this unit Important Refer to a system adm...

Страница 13: ...ll wizard of the ActiveX control required to dis play images from the camera will be displayed Follow the instructions of the wizard When the install wizard is displayed again even after completing the installation of the ActiveX restart the PC Important When the unit is being operated without changing the default administrator name and password the pop up window saying that it is recommended to c...

Страница 14: ...annels Setup button page 17 Clicking this button displays the Setup panel that is used for the setup operations Status display area page18 Current status such as playback status or recording sta tus will be displayed Current time display area Current time will be displayed Playback image display area Recorded images and live images will be displayed The setup menu will be displayed while setting u...

Страница 15: ... Search box The recording event search window will be displayed by clicking this button Use this button to search the record ed images Refer to the operating instructions PDF Search results will be displayed in list form in the log display area Refer to the operating instructions PDF Log box Error Log button The error logs of this unit will be displayed Logs will be displayed in list form in the l...

Страница 16: ... will be displayed sequentially according to the settings performed in advance The indicator on the button lights green during sequence operation EL Zoom box Camera images will be displayed in the proportion of the clicked zoom ratio button 1x 2x 4x Camera Select box When the WJ ND200 title is clicked the group title of the cameras will be displayed Refer to page 52 for the descriptions of how to ...

Страница 17: ...er to page 47 for further information Comm button The setup menu for network settings of the WJ ND200 will be displayed Refer to page 55 for further informa tion User Mng button The setup menu for user and host authentication will be displayed Refer to page 65 for further information Maintenance button The setup menu for the settings of the hard disk will be displayed Refer to page 72 for further ...

Страница 18: ...rently being mounted in the unit RECOVER Indicates that mirroring recovery is currently being performed FILTERING Indicates that the recording event list is filtered Refer to the operating instructions PDF for fur ther information about filtering of the recording event list w REC indicator The status of recording will be displayed When lit red Indicates that recording is being per formed When not ...

Страница 19: ...Playback speed for fast reverse playback will be changed in the following order each time this button is clicked Step2 Approx 4x Step3 Approx 8x Step4 Approx 16x Step5 Approx 32x Step6 Approx 48x Step7 Approx 96x PREV RECORD button Skips to the previous recorded image and plays it REV PLAY button Reverse playback of a recorded image will be per formed PLAY button Playback of a recorded image will ...

Страница 20: ...isplayed in red when there are recorded images on the SD memory card The letters SD on this button will be displayed in blue when there is no recorded image on the SD memory card When this button is clicked while the letters SD are displayed in blue the unit will check if there is any recorded image on the SD memory card or not When a recorded image is found the letters SD on the SD memory data ob...

Страница 21: ...t a camera in the clicked direction Clicking inside the control pad also can adjust the vertical hori zontal position pan tilt of the displayed image Panning tilting speed will be faster if a clicked point gets farther from the center point of the control pad Brightness box The brightness can be adjusted by clicking the button or the button It is possible to reset the set brightness by clicking th...

Страница 22: ...e basic settings for an event action Terminal Setup Set event actions to be performed at a terminal alarm occur rence Site Alarm Setup Set event actions to be performed at a site alarm occurrence Schedule Time Table Create timetables for each day of the week and assign a pro gram to each timetable Program Create recording programs on this menu Up to 4 programs can be created Perform the settings f...

Страница 23: ...amera connected to this unit to a designated FTP server periodically can be performed with the FTP Setup menu Mail Setup Perform the settings to send e mails to addresses registered in advance at an event or error occurrence Panasonic Alarm protocol It is possible to send a message to addresses registered in advance using Panasonic Alarm Protocol when an event or a problem occurs User Mng Basic Se...

Страница 24: ...on such as IP addresses of the connected cam eras and network line speed of the WJ ND200 will be displayed Disk Setup Perform the settings relating to the remaining disk size and the settings relating to image data Data recorded on the HDD can be deleted and actions to be taken when the remaining disk size runs out can be configured Save Load Contents of settings for this unit will be saved loaded...

Страница 25: ... the setup menu Screenshot 1 Start operation from the top page Step 1 Click the Setup button Screenshot 2 The Setup panel will be displayed Step 2 Click the desired button relating to the settings to be configured Setup panel ...

Страница 26: ... each item Click the SET button after completing the settings The settings will be applied When moving to other setup menu without clicking the SET button the edited settings will not be applied Important When the settings are applied all users except for the user who edited and applied the settings will be forcibly logged out When any setting of User Mng is changed all login users will be forcibl...

Страница 27: ... information about the settings for each item Step 2 Click the SET button after completing the settings Note When there are two or more SET buttons on the page click the respective button to the edited setting item Example When completing the setting items in field A click the SET button below field A A 1 The edited set ting items in field A will not be applied unless the SET button below field A ...

Страница 28: ... semi duplex 10 FULL 10 Mbps full duplex 100 HALF 100 Mbps semi duplex 100 FULL 100 Mbps full duplex Note When the setup menu is closed after changing the line speed the unit will automatically restart Camera Auto Registration The unit will search cameras and register the detected cameras automatically Determine how to register IP addresses of cameras Register the IP address automatically given by...

Страница 29: ...NF284 WJ NT304 WV NW484 When the IP address is registered to the camera the HTTP port of the camera will automatically set to 80 and the same subnet and the gateway of the unit will be set to the camera When the same IP address is used for the other camera the IP address and the MAC address will be displayed in red on the Camera Search Result win dow page 48 Make sure that the same IP address is u...

Страница 30: ...g will be performed ON Recording will be performed Default ON Language Select the display language for the web browser from the following JAPANESE ENGLISH Default ENGLISH Monitor Display It is possible to allocate camera channels to each sec tion of a 4 Screen when displaying images on a 4 Screen It is necessary to perform the settings of the camera group for the sequential display on a 4 Screen 4...

Страница 31: ... on sounding until the ERR button is clicked or the BUZZER STOP button on the front panel is pressed Perform the settings for the time and date Time Date Perform the settings for the time and date Screenshot 1 Click the System button on the Setup panel and then click the Time Date tab The Time Date page will be displayed Step 1 Perform the settings for each item Refer to the following for further ...

Страница 32: ...t and adjusts the clock MASTER Supplies a from the ALARM CONTROL con nector on the rear panel signal to the other connect ed devices and the other devices will adjust their clocks with reference to the clock of this unit Time When MASTER is selected for Auto Adjust Time set the clock for a signal to be supplied from the ALARM CONTROL connector time adjustment I O pin no 20 of the ALARM CONTROL con...

Страница 33: ... when the SETUP button is clicked Click the SET button after completing the settings and close the window by click ing the button at the top right of the window Enter the start time and date and the end time and date of summer time Enter the last 2 digits of the year Up to 10 times and dates for switching to summer time can be set ...

Страница 34: ... recording such as the recording duration or recording operations The following are available for the recording duration 2 s 5 s 10 s 20 s 30 s 1 min 3 min 5 min 10 min 30 min MANUAL Recording will continue during the emer gency recording input is being supplied CONTINUE Recording will not stop until the ALM but ton is clicked Note When MANUAL is selected recording will be per formed for at least ...

Страница 35: ...ng rate for SD MEMO RY REC When setting the recording rate for SD MEMORY REC make sure that Use is selected for the SD memory card setting of the camera When Use is not selected or when no SD memory card is mounted on the camera error messages may be displayed several times a day and recording may be interrupted for around 20 seconds each time the error message is displayed This may also occur whe...

Страница 36: ...the settings for each item Alarm Output Select the alarm output duration The following are available for alarm output duration OFF No alarm output is supplied 2 s 5 s 10 s 20 s 30 s 1 min EXT The alarm output will continue until the ALM but ton is clicked REC The alarm output will be supplied during the event recording is being performed Buzzer Select OFF EXT REC or a buzzer sounding dura tion at ...

Страница 37: ...gs for the following items for each ter minal alarm channel REC CAM Performs the settings for a camera channel used for recording PRESET Enter the preset position 1 256 to which the camera will move at a terminal alarm occurrence for each termi nal When no position is selected blank the camera does not move to any preset position Output Terminal Select the output terminal TRM1 TRM16 that out puts ...

Страница 38: ...the site alarm ON Validates the site alarm OFF Invalidates the site alarm Port Number from Camera Designate the port number to be used for receiving the site alarm Site Alarm Setup Perform the settings for the following items for each camera channel REC CAM Performs the settings for a camera channel used for recording PRESET Enter the preset position 1 256 to which the camera will move at a termin...

Страница 39: ... a program of another day of the week can be switched to a special day s program automatically Flowchart on how to create a schedule Follow the procedures below to create schedules Creating a program Program Up to 4 programs can be created by performing the settings for each camera such as resolution image quality bandwidth control etc Screenshot 1 Click the Schedule button in the Setup panel and ...

Страница 40: ...recording will not be performed SCHEDULE REC Select the recording rate for schedule recording from the following OFF 0 1 ips 0 2 ips 0 3 ips 0 5 ips 1 ips 2 ips 3 ips 5 ips 10 ips 15 ips ALL I Frame OFF Schedule recording will not be performed EVENT REC Performs the settings for the recording rate and record ing duration for pre event recording and post event recording The following are available ...

Страница 41: ...O When the camera in use is WJ NT304 recording will be performed at 0 2 ips even when 0 5 ips or 1 ips is selected for the recording rate for SD MEMO RY REC When setting the recording rate for SD MEMORY REC make sure that Use is selected for the SD memory card setting of the camera When Use is not selected or when no SD memory card is mounted on the camera error messages may be displayed several t...

Страница 42: ...than 30 min utes Refer to the operating instructions PDF for how to obtain images manually Important The emergency recording will be performed at the recording rate set for SD MEMORY REC on the Emergency REC page page 34 when commu nication with the camera failed during the emer gency recording The SD memory recording will not be performed if communication with the camera is not established even w...

Страница 43: ... is beyond the maximum network speed of the unit Example 30 Mbps 50 Mbps result value When the result value is beyond the maximum network speed of the unit 30 Mbps as indication refer each rate for LIVE VIDEO MANUAL REC SCHEDULE REC and EVENT REC Then lower the higher rate among them or lower image quality to diminish the net work traffic from the camera Click the Measurement button to check if th...

Страница 44: ...by clicking the program title displayed at the bottom of the table Screenshot 2 The timetable of the selected day of the week will be displayed Step 2 Perform the settings for each item Refer to the following for further information about the settings for each item Step 3 Click the SET button after completing the settings and close the window by clicking the button at the top right of the window S...

Страница 45: ...pop up window that notify of an alarm occur rence with a message when an alarm occurs Panasonic Alarm Protocol Select ON or OFF to determine whether or not to notify of an alarm occurrence to a PC according to the Panasonic Alarm protocol of the setup menu Comm Panasonic Alarm protocol page 64 To receive a notification and display the contents of the notification the optional software WV AS65 ver ...

Страница 46: ...cial Days page will be displayed Step 1 Click the i button and select date to be set as special day and the day of the week of the timetable to be assigned to the special day Step 2 Click the SET button after completing the settings Notes When two or more created timetable timetable for each day of the week daily and special day are set in the same time range the recording priority will be as foll...

Страница 47: ...ck the Camera button in the Setup panel and then click the NW Camera Setup tab The NW Camera Setup page will be displayed Step 1 Click the Search button of Camera Search to detect the cameras Notes When Camera Search is carried out the other login users will be forcibly logged out Recordings currently being carried out on this unit will stop in the process of Camera Search Camera Search is unavail...

Страница 48: ...ras whose checkbox is checked Notes Before giving IP addresses automatically set the subnet of the network port to 255 255 255 0 The image compression method of the registered camera will automatically be set to JPEG or M JPEG When the IP address is registered to the camera the HTTP port of the camera will automatically set to 80 and the same subnet and the gateway of the unit will be set to the c...

Страница 49: ...dress and set it to the detected camera However depending on the network environment the set IP address may be already used for the other network device such as when using the firewall function of Windows In this case check the IP address setting and regis ter the other IP address for the camera manually When a message saying there is no available IP address is displayed check and arrange the IP a...

Страница 50: ...mera A number from 1 65535 is available GROUP Select the group to which the camera is assigned G1 G4 CAM TITLE Set the camera title displayed on the Camera Select panel etc Enter up to 16 alphanumeric characters except the following _ USER ID Set the user ID for accessing the cameras and logging in Enter up to 32 alphanumeric characters PASSWORD Set the password for accessing the cameras and log g...

Страница 51: ... Thumbnail image from each camera will be displayed Note When failed to connect to the camera the reason why the connection failed will be displayed such as the following CONNECT ERROR Communication with the cam era cannot be established ATTEST ERROR User authentication of the cam era failed DNS ERROR DNS server cannot resolve the cam era address CAMERA ERROR Illegal response from the cam era PROX...

Страница 52: ...ters except the following _ Available characters are the same as for the camera title Step 2 Click the SET button after completing the settings 52 Screenshot 2 The Network Camera Registration window of the selected camera will be displayed Step 3 The same setup items displayed on the Network Camera Registration list window will be displayed Edit the settings for each item Refer to page 50 for fur ...

Страница 53: ...ence When the SETUP button for the selected method is clicked the following window will be displayed Perform the settings on this window Click the SET button after completing the settings and close the window by click ing the button at the top right of the window Note When the image compression method of the camera selected for a camera channel is MPEG 4 the respective sequence step will be skippe...

Страница 54: ... Enter the preset position to where the camera is to be moved at each step Only for SPOT Live Sequence Enter 1 256 for PRESET When no number is entered blank the camera will not move at the respective step DWELL Select a dwell time to go to the next sequential step from the following 2 s 3 s 5 s 10 s 20 s ...

Страница 55: ...k port occurs OFF Does not detect the network line disconnection NW Bandwidth Control Select a rate for transmission from the following Unlimited 32 kbps 64 kbps 128 kbps 256 kbps 512 kbps 1 024 kbps 2 Mbps 5 Mbps 10 Mbps Important The bandwidth will not be controlled when live images are transmitted in MPEG 4 format HTTP Port Number Specify the HTTP port number to be used to send images from the ...

Страница 56: ...the IP address of the gateway according to the network environment when OFF is selected for DHCP Line Speed The following are available for Line Speed AUTO Line speed will be applied automatically 10 HALF 10 Mbps semi duplex 10 FULL 10 Mbps full duplex 100 HALF 100 Mbps semi duplex 100 FULL 100 Mbps full duplex Note When the setup menu is closed after changing the line speed the unit will automati...

Страница 57: ...cters using alphanumeric charac ters and the following marks User Password Enter a password respective to the entered user name Enter up to 32 characters using alphanumeric charac ters and the following marks Note The following alphanumeric characters and marks can be entered A B C D E F G H I J K L M N O P Q R S T U V W X Y Z a b c d e f g h i j k l m n o p q r s t u v w x y z 0 1 2 3 4 5 6 7 8 9...

Страница 58: ...ON is selected perform the following settings Server Address Enter a proxy server address Enter up to 255 alphanu meric characters including hyphens and periods Port Number Enter a port number of a proxy server Exceptions Perform the settings for cameras who does not use the proxy server Enter the set address of the network camera Enter up to 128 alphanumeric characters including asterisks semicol...

Страница 59: ...tor of this unit Enter up to 255 characters using alphanumeric charac ters and the following marks SYSTEM NAME Enter a system name in alphanumeric characters to manage this unit by the SNMP system for example No1 Enter up to 255 characters using alphanumeric characters and the following marks LOCATION Enter a location name location where this unit is installed in alphanumeric characters for exampl...

Страница 60: ... interval of time inquiry to the NTP server from the following 1 h 2 h 6 h 12 h 24 h Default 1 h Step 2 Click the SET button after completing the settings Notes The clock will be adjusted using the NTP server when the clock of the unit becomes inaccurate beyond 5 seconds The clock will not be adjusted when event recording is being performed on any camera channel or when emergency recording is bein...

Страница 61: ...elow except and blank space User Password It is necessary to register a password when sending images to the FTP server Enter up to 32 alphanumeric characters listed on the next page An entered character for the password will be displayed as or Mode Select a mode for sending images to the FTP server Change to PASSIVE when sending images is difficult with ACTIVE Default ACTIVE FTP Send by Periodic T...

Страница 62: ...g will not be transmitted when pre event recording is not to be performed Perform pre event recording to transmit images recorded by pre event recording Refer to page 40 for further information about pre event recording settings Duration Post Select the duration of the images recorded by post event recording to be transmitted from the following OFF 1 s 10 s in 1 second interval Note It is possible...

Страница 63: ...cted for the recording rate of the event recording Mail Server Address Enter an IP address or a name of the SMTP server to send e mails to To enter an SMTP server name it is necessary to select MANUAL or AUTO for DNS Enter up to 255 alphanumeric characters including hyphens and periods POP before SMTP Select ON or OFF to determine whether to enable or disable the POP server authentication before s...

Страница 64: ... r s t u v w x y z 0 1 2 3 4 5 6 7 8 9 _ Settings relating to Panasonic Protocol Panasonic Alarm Protocol Perform the settings to notify a PC of event error occurrence Screenshot 1 Click the Comm button in the Setup panel and then click the Panasonic Alarm protocol tab to display the Panasonic Alarm protocol page Step 1 Perform the following setup items Port Number to PC Enter a port number to be ...

Страница 65: ...on host authentication Basic Setup Select ON or OFF to determine whether or not to authenticate the user host PCs Screenshot 1 Click the User Mng button in the Setup panel and then click the Basic Setup tab The Basic Setup page will be displayed Step 1 Perform the following setup items User Authentication Select ON or OFF to determine whether or not to authenticate the user Host Authentication Sel...

Страница 66: ...security change the password for an administrator periodically Level Displays the operational level of the user The user level of the administrators is LV1 and it is impossible to change it Priority Display the settings to assign priorities to operate this unit in case two or more users access this unit simulta neously The priority of the administrators is 0 and it is impossi ble to change it Defa...

Страница 67: ...ges of the camera group 4A 4D consist ed in advance from 4 camera channels will be dis played on a 4 Screen The settings for 4 Screen can be configured on the Monitor Display page System Basic Setup Monitor Display page 30 Registration of users who operates this unit and edit delete the registered user information User Setup Register user information such as a user name and password Screenshot 1 C...

Страница 68: ...er information To edit the selected user information Click the EDIT button to edit the selected user information The editing window will be displayed with information of the registered user Edit user information in the same way as the user registration page 67 To delete the selected user Click the DELETE button to delete the selected user Registration of a PC host accessible to this unit and edit ...

Страница 69: ...Setup Camera Partitioning Select a controllable range for each camera channel from the following View Operate Both displaying live recorded images and controlling cameras are possible View Displaying live recorded images is possible Controlling cameras is impossible Neither displaying live recorded images nor control ling cameras are possible Host Edit Delete Edit or delete registered host informa...

Страница 70: ... user from operating certain functions do not check the respective function Refer to page 71 for further information about each function Step 2 Click the SET button after completing the settings Note Each parameter of user level is as follows LV1 Possible to perform all the operations Administrators LV2 Possible to refer to the settings of the unit and the access log and to perform the alarm reset...

Страница 71: ... browse access logs Refer to the operating instruc tions PDF Event Log Status It is possible to browse event logs Refer to the operating instruc tions PDF Network Log Status It is possible to browse network logs Refer to the operating instruc tions PDF Alarm Reset An event action can be canceled Refer to the operating instruc tions PDF Error Reset An error action can be canceled Refer to the opera...

Страница 72: ...are the hardware this unit MAC address serial number internal temperature and number of times when the USE button on the front panel is pressed will be displayed Screenshot 1 Click the Maintenance button on the Setup panel and then click the Product Information tab The Product Information page will be displayed Step 1 Versions of the software the hardware this unit MAC address serial number intern...

Страница 73: ...he operating instructions PDF for further information about the built in hard disks of this unit Check the network status of the devices connecting to this unit Network Information It is possible to check the IP addresses of the cameras connecting to this unit line speed of this unit and users cur rently being logged in this unit Screenshot 1 Click the Maintenance button on the Setup panel and the...

Страница 74: ...isk space by clicking the i button to issue a warning when the available disk space of the built in hard disk reaches a specified level 1 to 10 can be set for this item in 1 intervals When OFF is selected the warning action will not be performed When CONTINUE is selected for Disk End Mode this setup item will be displayed in gray and become unavailable Default 10 HDD Exchange Warning Perform the s...

Страница 75: ... i button Screenshot 1 Click the Maintenance button on the Setup panel and then click the Save Load tab The Save Load page will be displayed Step 1 User Setup Save Click the SAVE button to save the settings of setup menu in this unit User Setup Load Click the LOAD button to load the saved settings to the unit Factory Default Click the EXECUTE button to reset the settings to the default settings Im...

Страница 76: ...y become unstable Determine whether to enable or disable the FORMAT button inside the front cover Screenshot 1 When the Config button is clicked the authentication window will be displayed Step 1 Enter the administrator name and the password and then click the OK button Screenshot 2 The Config page will be displayed Step 2 Select ON or OFF to determine whether to enable or disable the FORMAT butto...

Страница 77: ...mode of the unit Refer to the operating instructions PDF for further information about the operational mode of the unit All images recorded on the selected hard disk drive will be erased when formatted Screenshot 2 The confirmation window will be displayed Step 3 Click the OK button Screenshot 3 When completing the format the Format Result will be displayed Step 4 Click the OK button Step 5 Click ...

Страница 78: ...ion is nor mal If not check the settings of the IP address and the subnet mask Is the valid IP address set Refer to a system administrator for further informa tion Is the connection indicator of the 10BASE T 100BASE TX port lit When it is not lit connection to a LAN is not established or a network is not working correctly Confirm that the connection indicator of the 10BASE T 100BASE TX port is lit...

Страница 79: ...work port when the camera is active images may not be displayed recorded in a normal manner for around a minute at a maximum just after turning on the power of this unit or after connecting the LAN cable to the network port Reference pages Symptom The buttons on the browser are displayed out of align ment No SD memory data is dis played in the recording event list It is impossible to play SD memor...

Страница 80: ... for Windows XP 1 After closing all browser windows right click on the desktop and select Properties from the dis played pop up menu 2 Select Settings from Display Properties and then click the Advanced button 3 Click the Troubleshoot tab and disable the DirectDraw acceleration by adjusting the level of Hardware acceleration When displaying MPEG 4 images on a multi screen or when enlarging the dis...

Страница 81: ...dis played in the image display area and black screen will be displayed for a few minutes in the following cases When frequently checked if the appropriate values are set for the recording settings by clicking the Measurement button on the Program Setup page Schedule Program When the settings of the unit are saved repeatedly Wait around 10 minutes without any operations The unit will function norm...

Страница 82: ...line speed automatically depending on the network traffic and it may cause configuration errors Check the line speed settings of both the unit and the hub and configure the line speed settings of both to conform them Refresh of live images is unstable Browser disconnection sometimes occurs Network performance is poor Image file downloaded from the FTP server is faulty 43 Is ON selected for Enable ...

Страница 83: ...vice Pack2 SP2 is installed Follow the instructions below when the following occurred By performing the following solutions other applications and the security level may not be affected The Information Bar expressed in the following symptom and solutions will be displayed just below the address bar only when there is information to communicate The following message is displayed on the information ...

Страница 84: ...on to open the Security Setting window Under Miscellaneous select Enable for Allow script initiated windows without size or position constraints Click the OK button The Warning window will be displayed Click the Yes button Solutions An unnecessary status bar or scroll bar is displayed on the pop up window Reference pages Symptom ...

Страница 85: ...c equipment please contact your dealer or supplier for further information Information on Disposal in other Countries outside the European Union This symbol is only valid in the European Union If you wish to discard this product please contact your local authorities or dealer and ask for the correct method of disposal For U S Canadian and Puerto Rican fields Panasonic System Solutions Company Unit...

Отзывы: