manualshive.com logo in svg
background image

-5-

Jumper Connector

HDD #2 & #4 

(SLAVE)

Jumper Position

Jumper Position

HDD #1 & #3 

(MASTER)

6

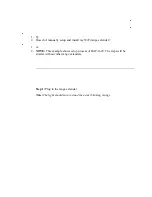
Set the unit address with jumper connector on the
HDD as shown.

Note:

For further details, refer to the instructions

included in the HDD unit.

7

Place the HDD into the appropriate opening, then fix it
with 2 screws.

8

Plug the 2 connector harness to the installed HDD as
shown.

9

Repeat above steps for HDD #2 through #4.

10 

Replace the front lid as before.

Содержание WJHD500 - DIGITAL DISC RECORDE

Страница 1: ...or the BSI mark G on the body of the fuse If the plug contains a removable fuse cover you must ensure that it is refitted when the fuse is replaced If you lose the fuse cover the plug must not be use...

Страница 2: ...aarop deze verklaring betrekking heeft voldoet aan de volgende normen of andere normatieve documenten overeenkomstig de bepalingen van Richtlijnen 73 23 EEC en 89 336 EEC Vi erkl rer os eneansvarlige...

Страница 3: ...GE TO ORANGE IF THE INSEDE TEMPERATURE EXCEEDS OR FALLS BELOW THE LIMIT Front View u Termination Switch TERMINATE ON OFF Set this switch to ON when the extension unit is located at the end of SCSI cha...

Страница 4: ...d to the right and remove it 2 Remove the HDD bracket 1 2 1 Loosen 2 screws as shown 2 2 Pull the bracket 1 out of the opening 3 Disassemble the bracket 1 Separate it into the fixing bracket and dummy...

Страница 5: ...connector on the HDD as shown Note For further details refer to the instructions included in the HDD unit 7 Place the HDD into the appropriate opening then fix it with 2 screws 8 Plug the 2 connector...

Страница 6: ...NC OFF OFF ON ON ON ON OFF OFF SIGNAL GND SIGNAL GND PO POWER WER AC IN C IN SCSI ID SCSI ID EXT OUT EXT OUT EXT IN EXT IN TERMINA TERMINATOR OR GND GND THERMAL ERR THERMAL ERROR OUT OR OUT NC NC OFF...

Страница 7: ...m overheating 1 SCSI ID TERMINATION ON OFF 1234 MODE ON Remove 4 screws M3X10 Supplied Rack Mounting Bracket Supplied M5X12 Not supplied Switch Settings 1 Set the MODE switch 2 on the rear of the WJ H...

Страница 8: ...Install HDD unit to the right position Ambient temperature is too low Use the unit within 5 C to 45 C Specifications Required Power 220 V 240 V 50 Hz Power Consumption 55 W inclusive of 4 HDD units i...

Отзывы: