Using Network Services (DLNA
/ VIERA
Connect)
75
Using DLNA
®
features
Ensure the preparation of the media server, network connections and network settings are completed.
(p. 69 - 74)
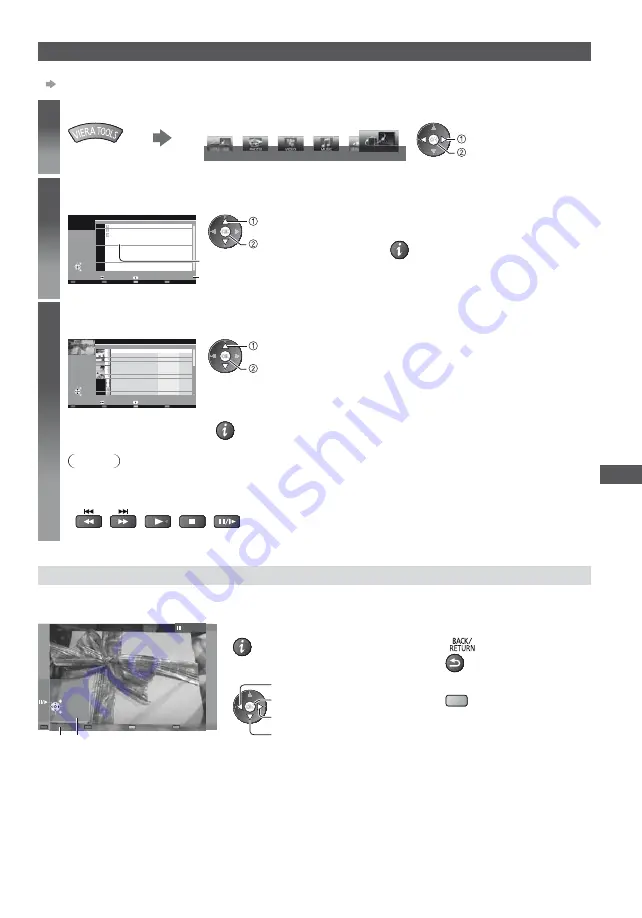
1
Display [VIERA TOOLS] and select [Media Server]
Media Server
select
access
2
Select one of the media servers to access
Example: Media server list
SERVER1
SERVER2
SERVER3
DIGA
4
Select
EXIT
RETURN
Access
Media Server
Info
Option Menu
Available media servers
Total listed number
select
access
To display the information of the
highlighted media server
3
Select the file
Example: File list
28
SERVER1
P000102
2011-10-05 09:54
2011-11-20 13:18
2011-12-07 11:31
2011-12-10 15:20
2011-12-19 12:39
2011-12-25 14:06
2012-01-06 13:52
2012-01-12 15:56
2012-01-20 10:08
2012-01-28 14:48
2012-02-09 19:58
P000135
P000180
P000214
P000251
P000276
P000293
V100025
V100042
M10054
M10078
3648x2736
JPEG
Info
Select
Pixel
Media Server
Format
EXIT
RETURN
View
Slideshow
Option Menu
select
access
Depending on the condition of media server, you may need to select the folder
before selecting the file.
To display the information of the highlighted file
Note
Non-playable files are also listed but cannot be selected.
Turn the TV off, and then on again when changing or reconnecting the network connection.
You can use the following buttons during playback. Set the code of the remote control to “73” (p. 29).
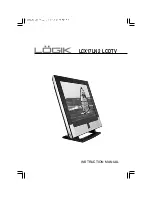
For photo file
[Single view]
- Photos are displayed one at a time.
Example:
Operation guide
Single view
EXIT
Select
RETURN
Single view
Stop
Rotate
To display / hide the operation guide
To operate Single view
To the previous photo
Slideshow
Stop
(return to list)
To the next photo
To return to list
To rotate 90°
(blue)


