Using Network Services (DLNA
/ VIERA
Connect)
81
Using DLNA
®
features
●
Ensure the preparation of the media server, network connections and network settings are completed.
(p. 74 - 80)
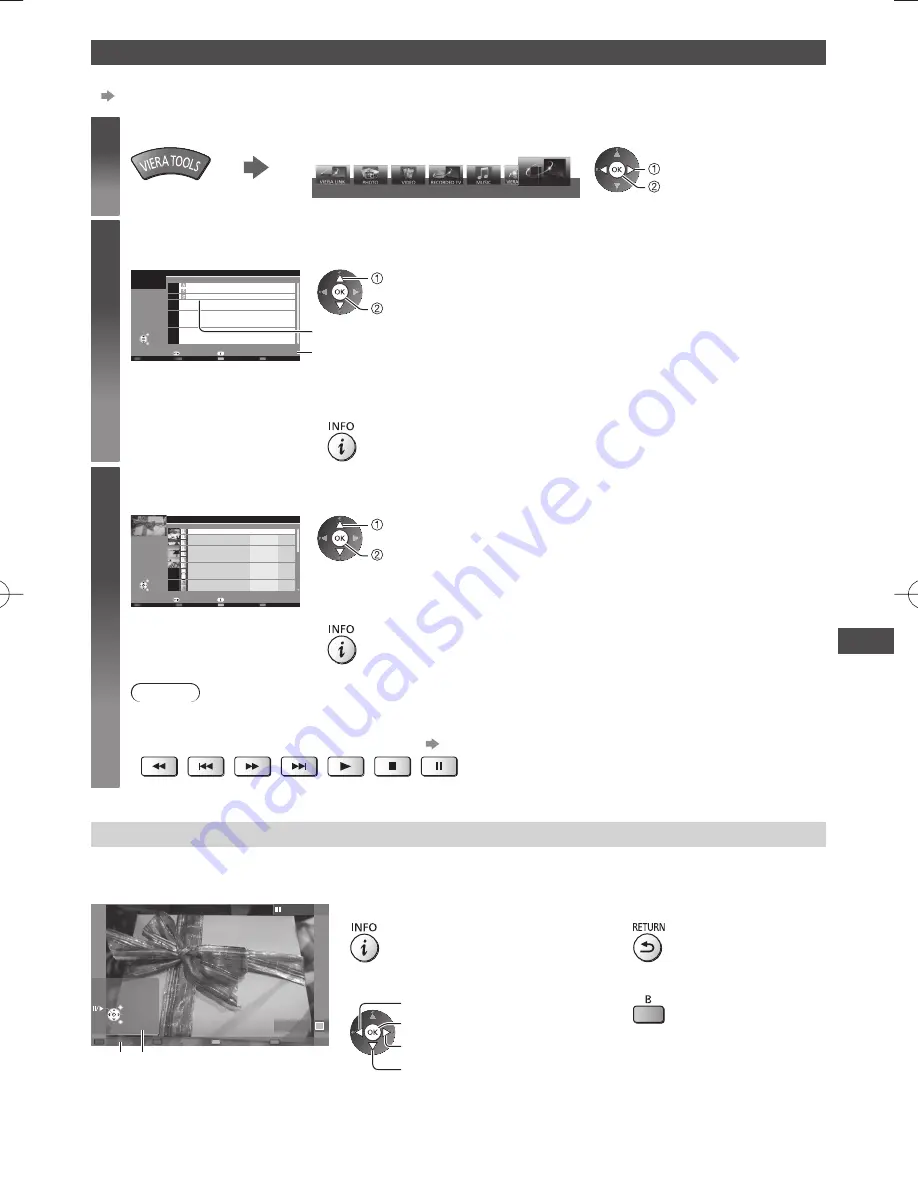
1
Display [VIERA TOOLS] and select [Media Server]
Media Server
select
access
2
Select one of the media servers to access
Example: Media server list
SERVER1
SERVER2
SERVER3
3
Select
EXIT
RETURN
Access
Media Server
Info
Option Menu
Available media servers
Total listed number
select
access
●
For the operations to access the other TV, select a name or MAC Address of the
other TV from this list.
●
To display the information of the highlighted media server
3
Select the file
Example: File list
28
SERVER1
P000102
10/05/11
09:54
11/20/11
13:18
12/07/11
11:31
12/10/11
15:20
12/19/11
12:39
12/25/11
14:06
01/06/12
13:52
01/12/12
15:56
01/20/12
10:08
01/28/12
14:48
02/09/12
19:58
P000135
P000180
P000214
P000251
P000276
P000293
V100025
V100042
M10054
M10078
3648x2736
JPEG
Info
Select
Pixel
Media Server
Format
EXIT
RETURN
View
Slideshow
Option Menu
select
access
●
Depending on the condition of media server, you may need to select the folder
before selecting the file.
●
To display the information of the highlighted file
Note
●
Non-playable files are also listed but cannot be selected.
●
You can use the following buttons during playback.
Confirm the code of the remote control is “73”
(p. 29)
For photo file
[Single view]
- Photos are displayed one at a time.
Example:
2D
Operation guide
Single view
EXIT
Select
RETURN
Single view
Stop
Rotate
●
To display / hide the operation guide
●
To return to list
●
To operate Single view
●
To rotate 90°
To the previous photo
Slideshow
Stop
(return to list)
To the next photo


